Seed Potatoes & Buckets

I called up one of our local farm stores today – Rural King – and inquired to see if they had their seed potatoes in yet.  Last week they didn't and couldn't tell me when they would be in.

They said they just got the potatoes in a few days ago – and had either the red variety or Kennebec – but didn't have any Yukon Gold.  Darn – I was hoping to plant some Yukon Gold potatoes this year – mix them up amongst the Kennebec.

The Kennebec potato is a standard white potato and is a mid-to-late variety potato.  Last year we got about 12 pounds of potatoes out of the garden from about ten plants.  They were very good – much better than the standard russet potatoes you can buy in the store for $3 for 10 pounds.  The Kennebec also tend to store longer than other varieties of potatoes – making it my preference.

But, the Yukon Gold potatoes are a yellow potato and are even better than Kennebec – but they don't last as long.  If you go to the store, usually Yukon Gold are twice the cost of russet potatoes – you get about five pounds for $3.

Kennebec Seed Potatoes

I hope I did the right thing, but I purchased 8.5 pounds of them.  Rural King sells them by the pound for 31 cents!  Amazingly cheap compared to what I bought last year.  Last year I bought a five-pound bag of Kennebec seed potatoes for $6 – more than $1 a pound!

I found out why though.  The seed potatoes in the bag were of better quality than these.  There were a lot of eyes on the potatoes in the bags (an eye is where a sprout will come from to make a new potato plant).  The potatoes purchased today had very few eyes on them and I spent about 20 minutes going through them to find decent ones.  They had some huge potatoes with only four or five eyes on them – and thoe potatoes alone weighed over a pound.  So, this is why I chose the smaller potatoes that had three to four eyes on them but were more spread out.  That way I can cut the small ones into thirds – thereby making three plants.  With 8.5 pounds, I probably have more than I need, but it is better to have enough.  And it was only $2.85 for 8.5 pounds!

Afterwards, we went to the dollar store nearby to just look around since we were on the other side of town.  In there, I found 20-quart wash buckets for $1 each.  I thought these would be great to plant potatoes in as well.  So, after getting home, I got out the drill and put about 10 holes in each of the buckets for drainage.  The buckets are about 10 inches high and 14 inches wide at the opening.  The plan is to put one potato plant an inch or so from the bottom of the buckets, fill the bucket half-way with dirt, and then wait until the plant grows out of the bucket.  Once it does, I will then fill the buckets up the rest of the way with soil – which is where the potatoes will then be formed.  Hopefully this will work – because from those ten plants, we should get about 10 – 15 pounds of potatoes.

Potato Buckets

We've been eating a lot of potatoes lately.  Ever since getting the mandolin slicer with an attachment that makes potatoes into french-fry cuts, we've been eating a lot of these with pepper, salt, and garlic salt on them with olive oil.  I bet if we grew 200 pounds of potatoes, we could easily eat that in a year.  However, I doubt we'll make that many potatoes – but my goal is to get around 100 pounds this year.

Growing Seeds Inside

Today and yesterday I began getting the fluorescent light setup going so I can start seeds inside.

The previous blog post was about starting the Copra Onions and I spoke a little bit about the fluorescent lights and the setup.

Below are some pictures of the setup I have.  The stand t hat holds the lights up is made of 1/2" PVC pipe.  There are four 90-degree elbows and two T connectors used.    The rack to hold the lights probably would cost a person less than $3 to make for the pipe and the couplers needed.

I have three four-foot fluorescent light fixtures in the box – with each bulb about 2.5 inches apart form one another.  I'm not sure yet whether this is overkill and I could get sufficient coverage with just four light bulbs instead of six (meaning only two fixtures are needed instead of three), but I want to ensure that these plants get a good head-start before putting them out.

The bulbs I am using are a combination of Cool White and Premium Cool White.  What is the difference?  Well, the Premium Cool White are about twice as expensive as the Cool White (which are standard utility bulb-grade).  However, the Premium Cool White have 3300 lumens and 20,000 CRI.  The standard Cool White bulbs have 3000 lumens and also a 20,000 CRI.  The thing that is important is the  lumens – which is the intensity of the light.  Of course, the color temperature is also important (basically the amount of light at each color in the spectrum), but the lumens will give your plants additional light.  So, the Premium Cool White bulbs will pack an additional 10% punch per bulb with the same amount of wattage used.

The Premium Cool White bulbs are used in the center fixture and then one bulb on each of the other two fixtures near the outside of the box.  The standard Cool White bulbs are on the outer two fixturs but closer to the middle fixture.  Why did I use two of the older kind?  Well, because I'm cheap – and I didn't want to buy more Premium Cool White bulbs.  Two of these bulbs are currently being used for the growing lettuce inside (which is going too slow to be worthwhile) – so I can just swap them into place when I'm done there.

The fixtures are hung from the PVC support system by using a small chain – which allows me to move the lights up or down as needed.  The lights should always be within 2 inches of the seedlings for the best results.

On the bottom is the box that I made using some old plywood and thin paneling.  I have a clear piece of plastic across the bottom and along the sides that will serve as a moisture barrier in case any water flows out of the seed containers (which it will easily by over-watering or spraying too much).  This will keep the box nice and dry and will keep water from spilling out into the table this all sits on (which is a pool table with plywood over the top).

I just placed the Copra Onion seed containers in the box – but none have sprouted yet.  So, I will not be turning these lights on until I see at least one sprout – no sense in wasting electric.

Fluorescent Lights for Starting Seeds


Fluorescent Lights for Starting Seeds

Starting Copra Onion Seeds

This evening I just seeded in the Copra Onion seeds.  I was pleasantly surprised at how many seeds are in a 1/16 ounce packet.  I must have at least another 200 seeds left after planting 144 total tonight.

The order of Copra Onion seeds came from FedCo seeds.  I got the idea of planting Copra Onion by the Gardenweb Veggie Garden forum where folks said this is one of the longest lasting onions available for the north (long-day variety)

Copra Onion Packet

Above is the packet the seeds came in.  It had some decent directions on them – along with a germination rate of 89%.  So the Copra Onions mature and are ready for harvest in 104 days.

As the packet says, you want to start these indoors to get a head-start on them.  I am planting them about 11 weeks before the last frost date.  Last year I figured the last frost date of May 5th.  I found an online site that says there is only a 10% chance of frost after May 11th in Central Illinois.  Last year the last frost date was at least a few weeks earlier than that.

While the packet says to plant them 1/2-inch deep, I sort of believe this is a little too deep.  I've read that 1/4-inch deep is enough for Copra Onions.

Alright, so getting started planting the seeds.

Planting Copra Onion Seed

These are the planters I used for the onion seed.  There are eight square containers in each of the trays – and each square container has nine separate seed locations.  I planted two trays – so 144 total.  I only need about 100 onions as this is all I have room for – but the others (if they grow) I can give away to my neighbor or others as well.  I wanted to plant enough to ensure I got good enough seed germination.

Previously when I've planted onions, I've had horrendous luck at getting them to sprout.  So, its time to try my luck again with planting from seed.  It is said that by planting onions from seed, you get much larger bulbs than if you use sets (which is what was used last year).

I put one seed in each of the seed locations and put them down between 1/4 and 1/2-inch deep.  I then used a very fine mister to make everything moist.  Throughout the winter, I've been collecting snow and some rain water to use for the seedlings.  Rain water is much better for plants than tap water – because it doesn't have all of the chemicals in it – and well, its just natural!

Rain Water Supply

I have quite the bounty of rain water – a large five-gallon water jug along with many one-gallon milk jugs.

After everything was misted down well, I then took more rain water and poured it into the tray that holds the seed containers.  This will allow the rain water to be absorbed from the bottom of the seed containers to help in moisture retention.

Then lastly, it was time to put the clear plastic covers over the top to further aid in moisture retention.

Copra Onion Planting

Right now I do not have any fluorescent lights over these.  When one onion sprouts up, I will take the clear lids off and put the seed containers under a fluorescent light.  it is important to ensure that the fluorescent lights are placed within two – four inches from the seedlings since this allows for better light absorbtion for the seedlings.

Well, that is all for now.  Next on the list will be planting the Ventura Celery!


February 20 Update

It has been nine days since planting the Copra Onions.  At first, I was getting worried that none of them were going to sprout!  The folks over at GardenWeb were showing that their Copra Onions were sprouting in about 4 – 6 days.  At the time I was reading that, it was already a week since I had planted mine!

Well alas, I finally have some sprouts.  The other day I moved all of the 9-packs with sprouts into one of the trays and took the clear cover off of that tray.  I kept the clear cover over the tray that didn't have any sprouts to maintain moisture.

Nine days later, I now have 39 total onions that have come up out of 144 planted (27% germination so far).  It would be 40, but there was a small white worm-looking thing sitting on the soil a few days ago and I didn't do anything with it.  Turns out, it was the very first onion that had sprouted as I took a look and found the seed at the end.  Oh well.

The planting area has a temperature that ranges from about 57.5 degrees at night to around 62 degrees during the day.   There also is rumors that onion seed needs light in order to germinate.  While I cannot say either way, it does seem that since I have turned the lights on, the germinations have been on an upswing!  But, it also has been nine days as well and it may just be time for them to start sprouting.

Copra Onion Sprouts


February 22

I don't have pictures right now for today, but I'm very impressed with the amount of germination over the weekend!  Just two days ago, I repoted there were only about 40 onions that came up.  Now, as of tonight, there are 108 that have sprouted out of 144.  That is exactly 75% germination.  Getting fairly close to the 89% rate the package said from it's August trial.  I don't suspect there will be many more that will germinate because there were only two that came up today.

The temperature underneath the fluorescent bulbs is quite higher than otherwise.  The temperature under the lights is about 69.2 degrees instead of around 62 degrees.  The night temperatures with the lights off gets down to about 57 degrees in the basement.

Lastly, believe it or not, the past post about seeing the very first seed germinate that looked like a worm has turned out to live!  I pushed the seed back down into the soil and left the white sprout sticking up – and today it is starting to turn green.


February 24

It now apperas the seeds are done germinating.  Out of 144, 110 seeds germinated.  I was looking for about 100 onions total and I got a few extras – so that works out well in case some don't make it over the next 10 weeks before they are planted outside.

In a matter of four to five days, they have grown fairly well.

I gave all of the contains another good misting of water this evening.

Copra Onions


March 4

The onions have really grown in a week's period of time.  Today I had to actually trim the Copra Onions to about 2.5 – 3 inches in length.  It is said that this is good to do for the onions so that it allows them to make good, strong roots and put up additional leaves instead of just one.  This is why you will see in the photo below a lot of greenery lying on the soil surface – because those were the clippings.

Unfortunately, I have lost about eight onions due to "damping off" diease.  This is a downfall of using soil from the garden for seed-starting, but it hasn't spread to neighboring squares.

Copra Onion Seedlings


How to Cut Rebar

So I was pretty embarassed when I went up to the local Menards today to pick up some rebar.  Last week I purchased the rest of the foundation blocks I needed for the foundation block retaining wall project behind the garage because they were on sale at 99 cents each instead of the usual price of $1.25 each.  During the process, I thought maybe the rebar would be on sale as well.  Nope, it wasn't – but I went ahead and got it all purchased.  I needed five additional pieces of rebar and a 20-foot section was $4.29.

With the five pieces, I will get seven pieces out of them – all approximately 34 inches in length.  The goal with these is to put one in each of the squares in the blocks to hold them in place.  I wanted to do this so I can use the squares in the blocks to plant one onion in them and so the wall can be taken down at a later date – if so desired.  If I used concrete to fill those squares, it would make it more permanent and I'd lose space to plant 40+ onions!

So I went up to the store to pick up the five pieces of rebar – with a hacksaw in hand.  I pulled all of the five pieces out and started to cut one about 8.5 feet long so they could fit in the car.  It took me at least 15 minutes to make this single cut with the hacksaw – and when i was done – the hacksaw blade was a complete goner!  So, word of advice – do not use a hacksaw blade to cut rebar because it just shreds the teeth to nothing.  It was literally smooth where the teeth used to be – with no sign of teeth even existing!

So I only could take home the rebar that I was able to cut – and had to put the four other pieces back to pick up at a later time.

I got home and decided to search on how to cut re-bar.  I came across a few sites and everyone had their different opinions (of course).  Some recommended to use a hacksaw or sawzall – but these two definitely will not work if you need to make more than one cut.  The blades will be worthless.  Others said you need to get a diamond blade to cut rebar.  Then others said to use bolt cutters (tried that last time I was at Menards and the guy couldn't get it to budge) or even an angle grinder (this is what the guy at Menards used after the bolt cutters didn't work).

Alas – I came across someone that says to use a skill saw with a masonry blade to cut rebar.  I remembered that I had previously purchased a masonry blade to cut some bricks I used to put down around the grape arbor in the front yard.

So, I got the skill saw out and put the masonry bit on.

Skill Saw Masonry Blade

Then I measured a piece to find where the length was that I needed.

Measuring Rebar

And then I started cutting!

Cutting Rebar

After a lot of sparks later and about 45 seconds, I stopped as I was a little more than 1/2 way through the rebar.

Cutting Rebar

Rebar is pretty brittle after it has been cut.  After this cut, I turned the rebar over, put a foot on one side, and pulled up on the other side and it snapped in two right at the cut.

After making the additional cuts on the one piece of rebar I was able to bring back home, I thought – "I found the solution!"  I went back up to Menards and picked up the other four pieces of 20-foot rebar – taking the skill saw and an extension cord with me to cut it on-site.  The 20-foot rebar – if left uncut – would have drug on the road all the way home – and that definitely wasn't acceptable.

I got back home and 20 cuts later, I now have 35 pieces of approximately 34" length rebar.

Finished Rebar

Garden Retaining Wall

Several months ago I began work on a retaining wall for the garden that is behind the garage.  There is a nasty slope back there that has caused me to slip several times while picking tomatoes and other veggies.  By putting in the retaining wall, I will then be able to fill in the area and make it level – and will have the added benefit of picking up an extra 2 x 27 foot gardening area for more produce!  I'll have to put a board down the middle of the garden so I'll have an area to walk on, however.

I looked at several options for making a retaining wall.  The first was looking at the typical retaining wall bricks.  But, those suckers are about $1 each and they are only about 4 inches tall by 6 to 8 inches long.  At that rate, it would have cost a small fortune to build the retaining wall – and I wasn't going to pay that!

The next option was making the wall out of the landscape timbers.  Those are also four inches tall and can be purchased at eight-foot long lengths for about $4.  I would have needed 16 of these – plus some rebar to put down the middle of them in order to hold them together.  This was more like it – and was going to cost right about $100 for all of the materials.

However, the landscape timbers left a bad taste in my mouth.  My dad used the same timbers for making a retaining wall around the walk-out basement at their house, and he just had to replace some this year due to – rot.  Granted, those timbers were probably 16 years old, but I would like to have something a bit more permanent.

Alas, I discovered the solution – typical foundation blocks for making a retaining wall!  The foundation blocks are 8 inches wide, 8 inches deep, and 16 inches long.  What I also like about the blocks is that they have two squares cut out in the middle.  I can use this space to plant one (maybe even two) onions in each of these!  The retaining wall blocks have been averaging between 99 cents each (they are on sale now and I've purchased about half of them from the sale) up to $1.25 each.  In addition, rebar is also needed as well.  I plan to use the rebar for two purposes – for ensuring the foundation blocks are secure and to use them as fence posts for the green plastic fencing I put around this garden.  This will then eliminate the need for using the 1×2 wooden strips I've been using as fence posts that rot out every year.

Below is a few pictures showing the progress so far.  Yesterday it was very nice outside and I put up about 2/3 of the below progress that day.

Foundation Block Retaining Wall

One thing I am going to change is to pull out the rebar I've put in (will put in six of them about 5.5 feet apart) is that I will put the rebar on the outside of the bricks.  I'm going to have to get a lot more rebar and cut it into 3-foot length sections.  Then I am going to have to put one piece of rebar in front of each little square (will be about 40 – 45 total) and drive them in the ground two feet.  This will keep the foundation block retaining wall in place.  I thought about adding concrete down every other square, but this would take away from the garden space – and it would make this a very permanent retaining wall.  I do want to have the possibility of other homeowners that may buy the house in the future to take this out if they wish.  So, by using rebar driven into the ground in front of each square, this will allow all the blocks to be removable.

Foundation Block Retaining Wall

Total cost of this project will even be just about the same cost as the landscape timbers – and may be a few dollars cheaper.

Received Seeds from FedCo Seeds

This year was the first time I've ever purchased seeds through an online company.  Well, I guess I did buy some Sugar Dots corn seed last year through a place – but this time I bought all the seeds I need for the garden except for potatoes.

Over at the GardenWeb Vegetable forum, folks were mentioning a place called FedCo Seeds.  I was quite surprised when I went to the FedCo seeds website to see their prices!  All other seed catalogs are very high on their prices – and shipping makes it not worth buying them at all.

Previously, I've always purchased my seeds from local garden/farm stores.  They already have their seeds out in the stores as well!  They carry the Burpee variety of seeds so while I was there a few days ago, I gave their displays a good looking over.  They typically sell their seeds 30% off of what Burpee's retail price is – so that is nice.  However, I feel very confident now on my decision to purchase from FedCo seeds.

As an example, the Silver Queen corn was available on the Burpee stand, but it was only 3/4 an ounce for $1.50 – even with the 30% off!  Through FedCo seeds, you got TWO ounces of seed (almost triple the amount at the store) for $2.00.  That is quite the difference – and with the two ounces of seed, I should have corn seed for three years now.

Overall, FedCo Seeds had a better selection than the displays at the stores.  While the stores had plenty of varieties of seed to choose from, there were several items that they didn't have.

Most of the order from FedCo Seeds came in – but the peas and bush beans (three packages total)  are on backorder and will be shipped later.

So, I got 13 packages of seeds for $22.90 including shipping from FedCo.  Here is what was ordered:

  • Greencrop Bush Green Bean (2 ounce pack for $1.30; ordered 2)
  • Kentucky Wonder Pole Bean (2 ounce pack for $1.40; ordered 2)
  • Sugar Snap Pea – Organic (2 ounce pack for $2.00)
  • Sugarsnax Carrot (1 gram pack for $1.30)
  • Copra Onion (1/16 ounce pack for $1.60)
  • Red Salad Bowl Lettuce (2 gram pack for $0.70)
  • Buttercrunch Lettuce (2 gram pack for $0.70)
  • Ventura Celery (0.1 gram pack for $2.20)
  • Caribe Cilantro – Organic (1 gram pack for $1.00)
  • Sweet Basil (4 gram pack for $1.00)
  • Silver Queen Corn (2 ounce pack for $2.00)

FedCo Seeds

So that is quite a bit of seed for the money.  While I would have liked to see them carry the Fortex Pole Bean, the Kentucky Wonder Pole Bean seems to be a relatively well-accepted one.  The Fortex Pole Beans can grow nine inches or longer – thereby increasing yields per square foot.

This year we are going to venture into trying celery and a few herbs.  One of my friends says his mom grows basil and they eat it fresh in salads and on several other dishes and it is great.  I have six long planters that are about 29 inches long, about six inches deep, and about five inches wide.  I figured we might as well use these for something and plant three with basil and three with cilantro and see how they turn out.

The celery is very hard to grow from what I understand.  I've read that you need to start celery indoors about 12 weeks before your last frost (just right there with the Copra onion).  This starts to get into the question – is it worth growing these items since that is three months of fluorescent lights  with an electric bill?  But, I'm all for experimenting to see what we can grow and testing my green thumb to see if its possible.

Cleaning Up Seed Starting Containers for 2010

Well, 2010 is now here and it is time to get things ready to go!  I'm going stir-crazy sitting in the house without much to do – except my two lettuce experiments.

So, over the weekend I built a seed-starting box.  It is 20 inches wide by four feet long and it is four inches deep.  It was made out of some old wood I had around the house.  The two short sides and the bottom were made from old 1/8" paneling and the longer sides made out of some old 1/2" plywood  that were once used as doors.

The idea with the box is to allow me to fit all of the little seed starting containers in here without any water leaking.  I've always had to use large rubbermaid lids to put under the little containers, but there was a lot of unusable space under the grow-lights – so this maximizes space.  Once the time grows nearer for starting the seeds, I'll put some plastic along the bottom and sides of the grow box so any excess water will accumulate and will not leach out onto a table.

So, here is the glory of all of the stuff.  All of the stuff is in the newly-created box in the first picture:

Seed Starting

I have quite the assortment of items over the years.  Most of them are the black plastic packs in various sizes.  Last year I bought the greenhouse kit and the brown-looking cups on the right-hand side that is like a self-watering system with the tray underneath.

Seed Starting Containers

Wow – quite a bit more stuff!  After I brought all of the containers in the house, I spent well over two hours with some hot soapy water and cleaned out every single container.  I know I have more than enough for all the seeds this year.

Seed Starting Containers

Above is about how the box will look.  I'll hang three two-tube fluorescent lights over the growing area and that should do it.

I thought I would now show the types of containers I have and used throughout the years.

Seed Starters

Just a standard square plastic pot.  I have nine of those.  A total of nine seedlings could start if one was planted individually in each.

Seed Starting

Above is a "four-pack" and it is 2 x 2 in dimension.  I have three of these.  A total of 12 individual plants could be started in these.

Seed Starting

Above is a 3 x 1 container.  I have 24 of these – so I can plant 72 total plants in these.

Seed Starting

Above is the typical six-packs where they are 3 x 2.  I have a lot of these – 33 total.  I can plant 198 plants in all of them!

Seed Starting

Above is a wider variety of the six-packs.  Also is 3 x 2 in size but these are wider.  I have six of these total – allows for 36 plants total.

Seed Starting

After seeing the photo of the 3 x 3 containers above, I didn't to a very good job of cleaning them!  These are the newest ones I have and came with the greenhouse kit and two other trays I bought last year.  I have 16 of these – so a total of 144 plants can be seeded in them.

Seed Cups

Just a standard 16-ounce cup.  I bought these last year and have lost one – so I have 35 of them.  These were used for the broccoli, cauliflower, and tomatoes last year.  They take up too much space so I'm hoping to put the tomatoes and peppers in other containers this year – and then maybe pot them up in these if necessary.

Seed Cup

The neighbor gave me some of these cups last year after he purchased some plants.  So I have seven of them.

Self-Watering Containers

And lastly, the 28 small cups in the self-watering tray.  The cups sit just a little higher than the bottom of the tray so you can pour water into the bottom and it will navigate through all of the holding areas and keep some water available to absorb into the containers.  These also take up a lot of space – but I started the tomatoes and peppers in these last year.


I couldn't believe how much stuff I have accumulated throughout the years!  Most of the stuff I've never bought and just re-used.  I got most of them from my mom for when she bought flowers in the black containers.


So out of all of the containers, I could start 541 seeds using all of them!  I don't have nearly that much space in the 49 x 20 inch box I made to put under the lights.  But I should be able to fit around  200+ in the box.

Hopefully there will be enough space for all of the seeds.  This year I'm going to try to plant Copra onion seeds instead of buying sets – as it is rumored that the bulbs can grow larger and Copra is one of the longest long-day storing onions available.   Unfortunately, the onions themselves will take up at least 100 of these spaces!

I've also been debating about starting all of the peas indoors before planting them out as well – just to ensure I use maximum space in the garden to prevent areas where a seed doesn't sprout (I had issues with this with the beans last  year).  If this is the case, there goes another 120+ containers!  Wow – how quickly everything gets filled up.  At this rate, I may have to make another box and buy more lights (I sure hope not).

So, it is now time to 'hurry up and wait' before planting can begin.  The first that will be started will be the onions – and those will be done around the beginning of February.  They have to get big enough to transplant out in the garden from the little tiny seeds.


On a last note, I placed an order for seeds over the weekend as well.  This is the first time I have purchased seeds online (except for the Sugar Dots corn last year) for most of my plants.  I did so through FedCo seeds because the price of the seeds were very low and shipping wasn't bad.  They had the Copra onion seeds so I purchased $15 worth of seeds for green beans, peas, cilantro (new for this year), celery (new for this year), onion, carrot, and two lettuce varieties.  So 11 packages of seeds were purhchased for $20 with shipping – that is very comparable (if not less expensive) than what they would have been purchasing them at the local store.


Full 2009 Garden Journal

Below is the full 2009 garden journal that I kept in a notebook.  I’m also placing it online in an electronic form for ease of access and to share with others.

 March 5 – 7 – Approximately 10 weeks before the 10% chance of frost date – May 11

  • Construction of 2 x 16 foot raised bed on driveway and 4 x 20 foot bed along the front driveway
  • Filled the front bed 2/5 full with a compost/manure mix from the local compost facility
  • Temperatures in the 60’s during the day
  • Planted three plantings of the following (to ensure they would grow in the mix from the compost facility)
    • Carrot (Burpee A#1 Hybrid)
    • Broccoli (Green Goliath)
    • Radish (Crimson Giant)
    • Lettuce (Simpson Elite)
    • Pepper (California Wonder)
    • Cauliflower (Snowball X)
    • Bush Bean (Tendergreen Improved)
  • Took a soil test of the manure mix
    • pH of around 7.7 – 7.9 (seems way too high)
    • Nitrogen – medium to high
    • Phosphorous – medium to high
    • Potassium – medium to low

March 9 (Exactly 9 weeks before 10% chance of last frost on May 11th)

  • Dug out strawberry beds and removed underlying Zoysia sod
  • Placed landscape fabric under the beds and black plastic around the sides of the bed
  • Put existing soil (regular topsoil that was purchased in bags last year) in the front driveway garden

March 10

  • 3 lettuce sprouted overnight (3 days – 100% germination)
  • 1 radish sprouted overnight (3 days – 33% germination so far) 
  • 2 radish srpouted during the day (3 days – 100% germination)
  • Fluorescent lights were turned on from 7 am to 7 pm daily
    • Consisted of two 4-foot standard shop lights
    • One GRO-LUX bulb was placed in each light (40 watts)
    • One Cool White Plus bulb was placed in each light (40 watts)

March 11

  • Removed all rock from the bed beside the house and moved it to the new rock bed right next to the garage to make an additional gardening space
  • Removed the clear plastic covers over the seedlings

March 12

  • 1 cauliflower sprouted overnight (5 days – 33% germination so far)
  • 2 broccoli sprouted during the day (5 days – 66% germination so far)

March 14

  • Planted 10 Green Goliath broccoli in 16 ounce cups
  • Planted 10 Snowball X cauliflower in 16 ounce cups 

March 15

  • Planted 10 California Wonder peppers in the self-watering tray
  • Planted 12  Simpson Elite lettuce in the deeper six-packs

March 16 (Exactly 8 weeks before 10% chance of last frost on May 11th)

  • 2 carrots sprouted overnight (9 days – 66% germination so far)
  • Planted the radishes in the front garden (experimental – frost/cold hardiness)
  • 1 cauliflower sprouted overnight (9 days – 66% germination so far)
  • Transplanted the two broccoli that were seeded on March 10th into 16 ounce cups
    • Soil fell apart around the roots causing them to be exposed.  This was because the manure/compost mix that was used to create the potting mix was finely filtered through patio screening mesh

March 17

  • 1 carrot sprouted overnight (10 days – 100% germination)

March 19

  • 2 Simpson Elite lettuce sprouted overnight (4 days – 16% germination so far)
  • Professional soil test results received from KSI Lab
    • pH – 7.2
    • Phosphorous – 310 lbs/acre (optimal is 50 lbs/acre)
    • Potassium – 800 lbs/acre (optimal is 300 lbs/acre)
  • Added 1/2 pound of sulfur to the front garden where the soil test was taken
    • Lab said to add 5 pounds per 1000 square foot (front garden is 80 square feet)
  • 2 Snowball X cauliflower sprouted during the day (5 days – 20% germination so far)
  • 3 Green Goliath broccoli sprouted during the day (5 days – 30% germination so far)

March 20

  • 1 Snowball X cauliflower sprouted during the day (6 days – 30% germination so far)

March 21

  • 1 Green Goliath broccoli sprouted overnight (7 days – 40% germination so far)
  • Purchased a heated growing container and placed California Wonder pepper seeds within it (none have sprouted yet)
  • 1 Green Goliath broccoli sprouted during the day (7 days – 50% germination so far)

March 22

  • 1 Snowball X cauliflower sprouted overnight (8 days – 40% germination so far)
  • 3 California Wonder peppers planted on March 10 sprouted in the day (15 days – 100% germination)
  • Planted five each in the self-watering trays
    • Best Boy Tomato
    • Roma Tomato (seed already a year old)
    • Red Cheerry Tomato (seed already a year old)
  • 1 Snowball X cauliflower sprouted during the day (8 days – 50% germination so far)

March 23 (Exactly 7 weeks before 10% chance of last frost on May 11th)

March 24

  • 1 Green Goliath broccoli sprouted during the day (10 days – 60% germination so far)
  • Replanted 10 Simpson Elite lettuce in place of the other 10 that did not sprout (only 16% germination rate on the previous batch)

March 26

  • Garden behind the garage was mixed in with manure/compost mix from the compost facility and was tilled up


March 27

  • 4 California Wonder peppers sprouted overnight (11 days – 40% germination so far; 6 days in heated container)
  • 3 Simpson Elite lettuce sprouted during the day (3 days – 30% germination so far)

March 28

  • 4 Simpson Elite lettuce sprouted overnight (4 days – 70% germination so far)
  • 3 California Wonder peppers sprouted overnight (12 days – 70% germination so far; 7 days in heated container)
  • 1 Best Boy tomato sprouted overnight (7 days – 20% germination so far)

March 29

  • 1 Simpson Elite lettuce sprouted overnight (5 days – 80% germination so far)
  • 2 Red Cherry tomatoes sprouted overnight (8 days – 40% germination so far)
  • 2 Best Boy tomatoes sprouted in the day (8 days – 60% germination so far)

March 30 (Exactly 6 weeks before 10% chance of last frost on May 11th)

  • 1 Best Boy tomato sprouted overnight (9 days – 80% germination so far)
  • 1 Best Boy tomato sprouted during the day (9 days – 100% germination)
  • 4-foot high green plastic fencing was placed around the back of the garage
  • 41 Dwarf Gray Sugar peas were planted five inches apart next to house
  • 65 Dwarf Gray Sugar peas were planted five inches apart behind garage

March 31

  • Re-planted 5 Roma tomato seeds; so far there has been 0% germination of them
  • Re-planted 4 Green Goliath broccoli
  • Re-planted 5 Snowball X cauliflower
  • Watered all seedlings very well
  • Three of the original Simpson Elite lettuce planted on March 10 are turning light green and shriveling up

April 1

  • Simpson Elite lettuce that was shriveling up recovered well after a healthy watering

April 4 – Date of a 90% chance of frost after this date

April 5

  • 2 Roma tomatoes sprouted overnight (5 days – 40% germination so far)
  • 1 California Wonder pepper sprouted overnight (20 days – 80% germination so far)

April 6 (Exactly 5 weeks before 10% chance of last frost on May 11th)

  • 2 Green Goliath broccoli sprouted overnight (6 days – 50% germination so far)
  • 1 Snowball X cauliflower sprouted overnight (6 days – 20% germination so far)
  • Received 1 inch of snow; overnight temps 28 – 30 degrees

April 7

  • 1 Green Goliath broccoli sprouted overnight (7 days – 75% germination so far)
  • Overnight freezing – 28 – 30 degrees

April 9

  • 1 Snowball X cauliflower sprouted overnight (9 days – 40% germination so far)
  • Continued cold freezing temperatures overnight
  • Approximately 4 Dwarf Gray Sugar peas have sprouted (10 days – 4% germination so far)
  • Planted 3 of each in the front driveway garden
    • Simpson Elite lettuce
    • Green Goliath broccoli
    • Snowball X cauliflower

April 10

  • 3 Snowball X cauliflower sprouted in the day (10 days – 100% germination)
  • Approximately 3 – 6 Dwarf Gray Sugar peas sprouted in the beds (11 days – 8% germination so far)

April 11

  • Put deer netting over the front garden
  • Planted about 30 – 40 yellow onion sets next to the house
  • Planted about 30 – 40 white onion sets next to the house

April 12/13 (Exactly 4 weeks before 10% chance of last frost on May 11th)

  • All but one Dwarf Gray Sugar peas in the bed next to the house has sprouted (total of 41 planted – 98% germination in 13-14 days)
  • Planted approximately 400 Burpee A#1 carrots in the 2 x 16 raised bed on the driveway

April 15

  • All Dwarf Gray Sugar peas in the bed next to the house has sprouted (total of 41 planted – 100% germination in 16 days)
  • No Dwarf Gray Sugar peas have sprouted behind the garage (total of 65 were planted – most likely due to the warmth of the house allowing for quicker germination for the bed next to the house)
  • 3 Green Goliath broccoli were planted in the front driveway garden (total of 6 now planted)
  • 3 Snowball X cauliflower were planted in the front driveway garden (total of 6 now planted)
  • 9 Simpson Elite lettuce were planted in the front driveway garden (total of 12 now planted)

April 17

  • Approximately 11 Dwarf Gray Sugar peas behind the garage have sprouted recently (out of 65 planted 18 days ago – 17% germination so far)
  • Temperature got to around 74 degrees with full sun today

April 18

  • Transplanted all California Wonder peppers and the three varieties of tomatoes to 16 ounce cups
  • Approximately 21 additional Dwarf Gray Sugar peas have sprouted behind the garage (19 days – 50% germination so far)
  • Temperature high was 70 degrees, fully cloudy and light sprinkles

April 19

  • Approximately 11 Dwarf Gray Sugar peas sprouted behind the garage (20 days – 66% germination so far)

April 20 (Exactly 3 weeks before 10% chance of last frost on May 11th)

  • Approximately 12 Dwarf Gray Sugar peas sprouted behind the garage (21 days – 85% germination so far)

April 22

  • 1 Dwarf Gray Sugar pea sprouted behind the garage (23 days – 86% germination so far)

April 23 (Average last frost date with a 50% chance of frost after this date)

  • 2 Dwarf Gray Sugar peas sprouted behind the garage (24 days – 89% germination so far)
  • 2 Green Goliath broccoli were planted in the front driveway garden (total of 8)
  • 2 Snowball X cauliflower were planted in the front driveway garden (total of 8)

April 24

  • 1 Dwarf Gray Sugar pea sprouted behind the garage (25 days – 91% germination so far)
  • Very warm day – about 82 – 84 degrees

April 25

  • A few Burpee A#1 carrots are sprouting (13 – 14 days)
  • 25 Crimson Giant radishes were planted between the onions and peas in the bed next to the house

April 27 (Exactly 2 weeks before 10% chance of last frost on May 11th)

  • Several (majority) of the Burpee A#1 carrots have sprouted (15 – 16 days)

April 29

  • Planted 252 Sugar Dots corn seed; mixture of seed of a year old and brand new seed
  • Approximately 313 Burpee A#1 carrots have sprouted (About 78% germination in 13 – 18 days)
  • 23 Crimson Giant radishes have sprouted in the bed next to the house (4 days – 92% germination)

May 2

  • Planted 8 California Wonder peppers in the front driveway garden
  • Seeded approximately 83 Bush Blue Lake 274 green beans in the front driveway garden – spaced 6 inches apart
  • Planted two each of the three types of tomatoes behind the garage at approximately two feet apart for the Roma and Best Boy and three feet apart for the Red Cherry tomatoes (Roma and Best Boy are determinate and will only grow so far – Red Cherry tomatoes are indeterminate and can continue to grow)

May 3

  • Planted 24 additional radishes between the onions and peas in the bed next to the house

May 4 (Exactly 1 week before 10% chance of last frost on May 11th)

May 6

  • Approximately 10 Sugar Dots corn have sprouted (8 days – 4% germination so far)

May 9 (First Harvest of lettuce and green onions)

  • Approximately 27 Sugar Dots corn have sprouted (11 days – 15% germination so far)
  • All 24 Crimson Giant radishes planted have sprouted (6 days – 100% germination)
  • Harvested one leaf of lettuce from each of 11 Simpson Elite lettuce plants (3 ounces)
  • Cut a few green onions that were bent over (1/4 ounce)

May 10

  • Approximately 5 Sugar Dots corn have sprouted; most that has sprouted is the new corn and not the seed that was a year old (12 days – 17% germination so far) 
  • Planted 3 Marketmore 76 and 3 Burpee Pickler cucumbers behind the garage
  • Planted 24 Crimson Giant radishes

May 11 (date of 10% chance of last frost)

  • Approximately 48 of 83 Bush Blue Lake 274 green beans have sprouted in the front driveway garden (9 days – 58% germination so far)
  • 1 Sugar Dots corn sprouted (13 days – 17% germination)

May 12

  • Approximately 3 Bush Blue Lake 274 green beans sprouted in the front driveway garden (10 days – 61% germination)
  • Harvested one leaf of lettuce from 11 Simpson Elite lettuce plants (3.75 ounces)

May 15

  • Most of the third set of Crimson Giant radishes have sprouted (5 days)
  • Planted the 42 Sugar Dots corn and seeded about 128 new Sugar Dots corn seed at the garden at the in-laws house 

May 16

  • Harvested 11 7/8 ounces of Simpson Elite lettuce

May 18

  • A healthy lettuce plant died – not sure of the cause as it was located in close proximity to all of the other lettuce.

May 21

  • Harvested 1 pound, 6 7/8 ounces of Simpson Elite lettuce

May 23

  • Planted 24 Crimson Giant radishes between the onions and peas in the bed next to the house

May 25

  • Most of the third set of Crimson Giant radishes have died (were planted on May 10th) – possibly due to sunlight problems or that they were planted too closely to the Dwarf Gray Sugar peas

May 26

  • Harvested 2 pounds, 6.75 ounces of Simpson Elite lettuce
  • Several Dwarf Gray Sugar peas have sprouted purple/white flowers
  • Harvested 7 Crimson Giant radishes from the first batch planted – 31 days
    • 9.75 ounces including foliage; 1 7/8 ounces without foliage (very poor)

May 29

  • One Tri-Star strawberry was picked

May 30

  • Harvested 1 pound, 8.25 ounces of Simpson Elite lettuce 

May 31

  • Harvested 6.75 ounces of Tri-Star strawberries 

June 5

  • Harvested a few Dwarf Gray Sugar peas (approximately 67 days from seeding)

June 7

  • Harvested 1 pound, 1 ounce of Tri-Star strawberries
  • Harvested 2 pounds, 2.5 ounces of Simpson Elite lettuce
  • Harvested 5.5 ounches (14) Crimson Giant radishes 
  • Three of the four potatoes in the potato bin have died
    • One that survived was growing faster than the other three
    • Most likely died because the potato plants were almost fully covered with soil
  • Only about 22 Sugar Dots corn (of the 128 seeded) have grown at the in-laws garden
  • Only about 11 Yukon Gold potatoes have grown at the in-laws garden

June 8

  • Harvested 5 1/8 ounces of Dwarf Gray Sugar Peas

June 9

  • Harvested 6.75 ounces of Tri-Star strawberries
  • Tied up the outer leaves of 1 Snowball X cauliflower plant as the curd is forming
  • A head on each of the 8 Green Goliath broccoli plants is forming
  • Tied up posts on each side of the Dwarf Gray Sugar peas and put string across
    • Peas are well over three feet tall (2-foot high chicken wire fencing was used to support the peas – and was placed about six inches from the ground)

June 10

  • Harvested 6 7/8 ounces of Dwarf Gray Sugar peas 

June 12

  • Harvested 5 1/4 ounces of Tri-Star strawberries

June 13

  • Created the PVC irrigation system and set for 30 minutes at 7 am every other day
    • While there are not further notes on this, 30 minutes was too long and was reduced to 15 minutes
    • Automatic timer was used on the bed beside the house and the bed behind the garage
    • A manual timer was used for the front driveway garden
  • Harvested 1 pound of Dwarf Gray Sugar peas

June 14

  • Harvested 2 pounds, 2 1/8 ounces of Simpson Elite lettuce
  • Harvested 2 pounds, 5 5/8 ounces (3) Green Goliath broccoli
    • 12 3/8 ounces
    • 13 5/8 ounces
    • 12 5/8 ounces

June 15

  • Harvested 1 pound (1) Snowball X cauliflower 

June 16

  •  Harvested 1 pound, 7 3/4 ounces (2) Green Goliath broccoli
    • 12 7/8 ounces
    • 10 7/8 ounces
  • Harvested 1 pound, 12 1/2 ounces of Dwarf Gray Sugar Peas

June 18

  • Harvested 2 pounds, 8 3/8 ounces of Dwarf Gray Sugar peas

June 19

  • Harvested 14 ounces of Dwarf Gray Sugar peas 
  • Harvested 3 1/2 ounces of Tri-Star strawberries

June 21

  • Harvested 1 pound, 5 7/8 ounces (2) Green Goliath broccoli
    • 11 1/8 ounces
    • 10 7/8 ounces
  • Harvested 1 pound, 9 5/8 ounces of Dwarf Gray Sugar peas

June 22

  • Harvested 4 7/8 ounces of Tri-Star straberres 

June 23

  • Harvested 7 1/2 ounces (1) Green Goliath broccoli (finished all broccoli)
  • Harvested 1 pound, 4 3/4 ounces of Snowball X cauliflower finished all cauliflower – only one good curd)
    • 1 ounce
    • 2 3/4 ounce
    • 3 3/8 ounce
    • 6 3/8 ounce
    • 7 3/8 ounce
  • Harvested 1 pound, 12 1/4 ounces of Dwarf Gray Sugar peas
  • All Snowball X cauliflower was pulled up and put on the compost pile
  • All Simpson Elite lettuce was pulled up and put on the compost pile (lettuce was very bitter)
  • The last week has been extremely hot – 90+ degrees\

June 26

  • Harvested 4 ounces of Tri-Star strawberries
  • Harvested 14 3/8 ounces of Bush Blue Lake 274 green beans (first harvest since planting 55 days ago)
  • Harvested 12 7/8 ounces of Dwarf Gray Sugar peas

June 27

  • Planted about 70 green beans in the front driveway garden where the broccoli/cauliflower/lettuce was (not sure if it was Bush Blue Lake 274 or Bush Blue Lake 74)

June 28

  • Harvested 15 7/8 ounces of Bush Blue Lake 274 green beans
  • Harvested 5 3/4 ounces of Tri-Star strawberries
  • Planted 96 Sugar Dots Corn in plastic six-pack containers (all new seed this year) 

June 29

  • Harvested 1 7/8 ounces of Dwarf Gray Sugar peas
  • Weather has cooled back down into the lower 80’s for the past few days and will for the rest of the week.  Was in the 90’s with heat indexes over 105 degrees for a week

June 30

  • Harvested 6 ounces of Tri-Star strawberries

July 1

  • Harvested 2 pounds, 1/8 ounce of Bush Blue Lake 274 green beans
  • Approximately 5 -7 green beans have sprouted (4 days – 9% germination so far)

July 2

  • Approximately 30 Sugar Dots Corn have sprouted (4 days – 31% germination so far) 
  • Approximately 30 green beans have sprouted so far (5 days – 43% germination so far)
  • Harvested 7 ounces of Tri-Star strawberries

July 3

  • Approximately 54 Sugar Dots Corn have sprouted (5 days – 88% germination so far) 
  • Planted 65 Peaches and Cream Corn in plastic six-pack containers
  • Planted approximatley 29 green beans where the others have not sprouted in the front driveway bed (not sure if it was Bush Blue Lake 274 or Bush Blue Lake 74)

July 4

  • Approximately 5 Sugar Dots Corn have sprouted (6 days – 93% germination so far)

July 5

  • Harvested 1 pound, 1 3/8 ounces of Tri-Star strawberries
  • Harvested 2 pounds, 2 3/8 ounces of Bush Blue Lake 274 green beans
  • Approximately 4 green beans have sprouted (8 days – 49% germination so far)

July 7

  • Harvested 14 1/8 ounces of Tri-Star strawberries
  • 28 Peaches and Cream Corn have sprouted (4 days – 43% germination so far)
  • Harvested 6 3/4 ounces of Dwarf Gray Sugar peas from behind the garage
    • Pea production has mostly stopped and therefore the Dwarf Gray Sugar peas behind the garage were tore down (also getting in the way of the growing tomato and plants)

July 8

  • 25 Peaches and Cream Corn have sprouted (5 days – 82% germination so far)

July 9

  • Harvested 11 5/8 ounces of Tri-Star strawberries
  • Harvested 1 pound, 10 ounces of Bush Blue Lake 274 green beans
  • Picked 10 3/8 ounces of Dwarf Gray Sugar peas beside the house (last harvest of peas for the year)
    • Pulled all of the Dwarf Gray Sugar peas out
  • 10 Peaches and Cream Corn have sprouted (6 days – 97% germination so far)

July 10

  • Planted approximately 37 green beans in the bed beside the house
    • 20 Bush Blue Lake 47
    • 17 Bush Blue Lake 274

July 13

  • Harvested 1 pound, 5 3/4 ounces of Tri-Star strawberries
  • Harvested 2 California Wonder peppers (first harvest of peppers this season)
    • 6 5/8 ounces
    • 2 ounces
  • Harvested 9 3/8 ounces of Bush Blue Lake 274 green beans
  • Harvested 1 7/8 ounces of Red Cherry tomatoes (7 total – first tomato to ripen)
  • Harvested approximately 18 pounds of the Burpee A#1 carrots (100% harvested – took about 106 days from seedling emergence to harvest)
  • Planted approximately 70 Bush Blue Lake 274 green beans in the 2 x 16 raised bed on the driveway (where the carrots were)

July 15

  •  Approximately 10 green beans sprouted in the garden next to the house – mostly all Bush Blue Lake 274 but no other data (5 days – 27% germination so far)

July 17

  • Harvested 11 7/8 ounces Bush Blue Lake 274 green beans
  •  Harvested 14 3/4 ounces of Tri-Star strawberries
  • Approximately 16 green beans have sprouted in the garden next to the house – mostly all Bush Blue Lake 274 but no other data (6 days – 43% germination so far)
  • Plans to plant the Sugar Dots and Peaches and Cream Corn fell through at the in-laws house after it was found to be a total loss.  The corn was root-bound in the six-packs and needed to be planted, so room was made
    • About 39 Sugar Dots corn was planted in the 2 x 16 raised bed on the driveway
    • About 24 Sugar Dots corn was planted in the front driveway garden
    • About 48 Peaces and Cream corn was planted in the garden next to the house
  • All yellow and white onions were harvested
    • 36 white onions – 5 pounds, 12 3/8 ounces
    • 28 yellow onions – 5 pounds, 11 1/4 ounces

July 19

  • Built a new 8 x 4 raised bed on the driveway next to the patio.  This will be used to transplant all of the green beans that were planted in the side garden and the 2 x 16 raised bed on the driveway where the corn had to be located
  • Approximately 25 Bush Blue Lake 274 beans sprouted in the 2 x 16 raised bed (6 days – 36% germination so far)

July 20

  • Harvested 1 pound, 1 7/8 ounces of Tri-Star strawberries
  • Harvested 4 5/8 ounces of Bush Blue Lake 274 green beans
  • Harvested 10 3/8 ounces (1) Best Boy Tomato (first harvest of Best Boy and seems to have ripened quicker than Roma)
  • Harvested 6 5/8 ounces of Red Cherry tomatoes

July 22

  • Harvested 13 1/2 ounces of Tri-Star strawberries

July 23

  • Harvested 3 pounds, 3 7/8 ounces (6) Best Boy tomatoes
  • Harvested 10 3/8 ounces of Red Cherry tomatoes
  • Harvested 10 1/2 ounces of Bush Blue Lake 274 green beans
  • Harvested 8 1/2 ounces of Tri-Star strawberries

July 24

  • Harvested 7 1/2 ounces of Tri-Star strawberries

July 26

  • Harvested 7 ounces (3) Roma tomatoes (first harvest of Roma – but last to ripen of the varieties of tomatoes) 
  • Harvested 7 3/8 ounces of Red Cherry tomatoes
  • Harvested 1 pound, 3 ounces of Tri-Star strawberries

July 28

  • Harvested 2 pounds, 12 1/4 ounces of Bush Blue Lake 274 green beans
  • Harvested 9 1/2 ounces of Tri-Star strawberries

July 29

  • Harvested 4 3/4 ounces (2) Roma tomatoes
  • Harvested 3 3/4 ounces of Red Cherry tomatoes
  • Harvested 5 3/4 ounces (1) Best Boy tomato

July 30

  • Harvested 1 pound, 7 1/8 ounces (2) of cucumbers (first cucumber harvest of the year – not sure but most likely was Marketmore 76 cucumbers)
  • Harvested 1 pound, 1/8 ounces (3) Best Boy tomatoes
  • Harvested 3 1/4 ounces (2) Roma tomatoes
  • Harvested 4 pounds, 11 1/4 ounces (15) California Wonder peppers

July 31

  • Harvested 1 pound, 1 ounce of Tri-Star strawberries
  • Harvested 1 pound, 1 1/4 ounces of Bush Blue Lake 274 green beans

August 2

  • Harvested 2 pounds, 3/4 ounce (3) Best Boy tomatoes
  • Harvested 7 ounces (3) Roma tomatoes
  • Harvested 1 5/8 ounces of Red Cherry tomatoes
  • Harvested 6 7/8 ounces of Tri-Star strawberries
  • Made 7 quarts of salsa
    • 12 pounds tomatoes
    • couple of shakes of oregano
    • 7 or 8 green peppers
    • food processor full of onions
    • 2 tablespoonds of salt
    • 1 tablespoon and 3 teaspoons of minced garlic
    • 3 tablespoons of chili powder
    • 2 teaspoons of pepper
    • 2 cups lemon juice
    • 4 – 6 ounce cans of tomato paste
  • Planted 21 Simpson Elite lettuce in the self-watering tray

August 3

  • Harvested 14 1/4 ounces of Bush Blue Lake 274 green beans

August 4

  • Harvested 11 7/8 ounces of Tri-Star strawberries
  • Harvested 2 pounds, 1 5/8 ounces (5) Best Boy tomatoes
  • Harvested 1 pound, 9 1/8 ounces (11) Roma tomatoes
  • Harvested 4 ounces of Red Cherry tomatoes

August 5

  • Harvested 3 pounds, 3/8 ounces of Bush Blue Lake 274 green beans
  • 13 Simpson Elite lettuce has sprouted (3 days – 62% germination so far)

August 6

  • Harvested 14 ounces of Tri-Star strawberries
  • Harvested 1 pound, 6 1/8 ounces (3) cucumbers 
  • Harvested 3 pounds, 8 ounces (6) Best Boy tomatoes
  • Harvested 1 pound, 13 1/2 ounces (13) Roma tomatoes
  • Harvested 3 7/8 ounces of Red Cherry tomatoes
  • 6 Simpson Elite leettuce has sprouted (4 days – 90% germination so far)

August 7

  • Harvested 1 pound, 7 7/8 ounces of Bush Blue Lake 274 green beans

August 8

  • Harvested 9 7/8 ounces of Tri-Star strawberries
  • Harvested 2 pounds, 3 5/8 ounces (4) Best Boy tomatoes
  • Harvested 1 pound, 2 3/8 ounces (10) Roma tomatoes
  • Harvested 3 ounces of Red Cherry tomatoes

August 10

  • Harvested 4 7/8 ounces of Tri-Star strawberries
  • Harvested 5 pounds, 7 7/8 ounces of Bush Blue Lake 274 green beans
  • Harvested 1 pound, 1 3/8 ounces (3) California Wonder peppers

August 11

  • Harvested 2 pounds, 8 3/4 ounces (4) cucumbers
  • Harvested 2 pounds, 11 5/8 ounces (21) Roma tomatoes
  • Harvested 5 1/8 ounces of Red Cherry tomatoes

August 12

  • Harvested 4 1/8 ounces of Tri-Star strawberries
  • Harvested 2 pounds, 11 1/2 ounces of Bush Blue Lake 274 green beans

August 13

  • Harvested 2 pounds, 15 3/8 ounces (10) California Wonder peppers 
  • Harvested 1 pound, 1 1/4 ounces (2) Best Boy tomatoes
  • Harvested 1 pound, 7 5/8 ounces (12) Roma tomatoes
  • Harvested 3 ounces of Red Cherry tomatoes

August 14

  • Harvested 2 pounds, 3 5/8 ounces of Bush Blue Lake 274 green beans

August 15

  • Harvested 1 pound, 6 1/4 ounces (3) Burpee Pickler cucumbers
  • Harvested 1 pound, 14 3/8 ounces (5) Best Boy tomatoes
  • Harvested 1 pound, 12 7/8 ounces (16) Roma tomatoes
  • Harvested 2 1/2 ounces of Red Cherry tomatoes

August 17

  • Harvested 5 pounds, 9 1/8 ounces of Bush Blue Lake 274 green beans (At this point, it has been about 50 days since the sowing of the second batch of green beans in the front garden and the second batch of green beans should start to produce)
  • Harvested 7 3/8 ounces (1) Burpee Pickler cucumber
  • Harvested 6 1/4 ounces (2) Best Boy tomatoes
  • Harvested 1 pound, 14 3/4 ounces (17) Roma tomatoes
  • Harvested 1 7/8 ounces of Red Cherry tomatoes


August 19

  • Harvested 1 pound, 1 3/8 ounces (3) Best Boy tomatoes
  • Harvested 1 pound, 10 7/8 ounces (14) Roma tomatoes

August 20

  • Harvested 7 7/8 ounces of Tri-Star strawberries
  • Harvested 3 pounds, 15 1/8 ounces of Bush Blue Lake 274 green beans

August 21

  • Harvested 1 pound, 2 3/4 ounces (2) Burpee Pickler cucumbers
  • Harvested 7 3/8 ounces (2) Marketmore 76 cucumbers
  • Harvested 1 pound, 1 ounce (9) Roma tomatoes
  • Harvested 9 3/8 ounces (2) Best Boy tomatoes
  • Canned 3 quarts of pickles using the Ball pickle mix
  • Canned 6 quarts of tomatoes

August 22

  • Harvested 11 3/8 ounces (3) California Wonder peppers (green/red picked; all peppers before this date were all picked as green peppers)
  • Harvested 2 7/8 ounces of Bush Blue Lake 274 green beans
  • Pulled up some of the original Bush Blue Lake 274 green beans at the northwest side of the front driveway garden and planted 12 Simpson Elite lettuce
  • Approximately 8 Sugar Dots Corn have begun pollination
    • Tassels were cut off for pollen to collect in a bucket
  • Pollinated 4 Sugar Dots Corn

August 23

  • Pollinated 2 Sugar Dots Corn
  • Harvested 14 ounces (4) Marketmore 76 cucumbers
  • Harvested 6 3/4 ounces (2) Best Boy tomatoes
  • Harvested 1 pound, 15 1/4 ounces (23) Roma tomatoes
  • Harvested 7/8 ounce of Red Cherry tomatoes
    • The second and last Red Cherry tomato plant was pulled up (not sure of the date of when the first was pulled)
  • Harvested 1 pound, 12 3/8 ounces of Bush Blue Lake 274 green beans

August 24

  • Pollinated 13 Sugar Dots Corn

August 25

  • Pollinated 17 Sugar Dots Corn

August 26

  • Harvested 4 1/2 ounces (1) California Wonder pepper
  • Harvested 1 pound, 7 7/8 ounces of Bush Blue Lake 274 green beans
  • Harvested 5 1/4 ounces of Tri-Star strawberries
  • Pollinated 8 Sugar Dots Corn
  • Harvested 1 pound, 11 7/8 ounces (20) Roma tomatoes
  • Harvested 4 7/8 ounces (2) Best Boy tomatoes

August 28

  • Pollinated 3 Sugar Dots Corn
  • Pollinated 4 Peaches and Cream Corn

August 29

  • Pollinated 6 Peaches and Cream Corn
  • Harvested 5 3/8 ounces (1) California Wonder pepper
  • Harvested 1 pound, 9 3/4 ounces Bush Blue Lake 274 green beans
  • Harvested 9 7/8 ounces (2) Burpee Pickler cucumbers
  • Harvested 1 pound, 1 3/4 ounces (12) Roma tomatoes
  • Pollinated a second ear on a Sugar Dots corn
  • Peaches and Cream corn is over 7 feet tall in the garden next to the house
    • Most of all the pollen has been released by the tassels and very few ears have put on silk to catch the pollen
  • Harvested 4 1/4 ounces (1) California Wonder pepper

August 30

  • Harvested 3 ounces (1) California Wonder pepper
  • Re-pollinated 12 Peaches and Cream Corn
  • Pollinated 2 Peaches and Cream Corn

August 31

  • Pollinated 1 Peachss and Cream Corn

September 2

  • Harvested 15 3/4 ounces of Bush Blue Lake 274 green beans
  • Pollinated 7 Peaches and Cream Corn
  • Harvested 5 3/8 ounces (2) Burpee Pickler cucumbers
  • Harvested 1 pound, 8 ounces (22) Roma tomatoes

September 3

  • Harvested 4 3/8 ounces (1) California Wonder pepper
  • Pollinated 2 Sugar Dots Corn
  • Pollinated 6 Peaches and Cream Corn

September 6

  • Rained yesterday and wet today – no corn pollination but about 15 need pollinated
  • Harvested 3 pounds, 8 ounces of green beans that were mostly in the new bed (combination of Bush Blue Lake 274 and Bush Blue Lake 74)
  • Harvested 11 /8 ounces (9) Roma tomatoes
  • Harvested 3 5/8 ounces (1) Burpee Pickler cucumber
  • Pollinated 10 Sugar Dots Corn

September 7

  • Marked 7 Peaches and Cream corn with the date – no pollen was available for pollination

September 8

  • Harvested 8 7/8 ounces (2) California Wonder peppers
  • Marked 3 Peaches and Cream corn with the date – no pollen was available for pollination

September 9

  • Harvested 2 pounds, 10 ounces of green beans
  • Harvested 3 7/8 ounces (1) California Wonder pepper
  • Harvested 4 3/4 ounces (1) Best Boy tomato
  • Harvested 15 ounces (14) Roma tomatoes
  • Harvested 1 ounce (1) Burpee Pickler cucumber

September 10

  • Harvested 4 3/8 ounces (1) California Wonder pepper

September 12

  • Harvested 8 7/8 ounces (2) California Wonder peppers
  • Harvested 2 pounds, 3/4 ounces of green beans

September 14

  • Harvested 1 pound, 1 3/4 ounces (4) California Wonder peppers
  • Picked Sugar Dots Corn
    • 4 that were pollinated on August 22
    • 2 that were pollinated on August 23
    • 13 that were pollinated on August 24
    • 1 that was pollinated on August 29 (Not good)
  • Overall, 3 pounds, 10 ounces (18) Sugar Dots corn were kept (out of 20)
    • Very bad, small ears
    • Corn was planted approximately 12 inches apart in rows and between rows
  • Tore down all Sugar Dots Corn stalks that did not produce a single ear
  • Picked 1 Peaches and Cream Corn that was pollinated on September 6 (Deer ate it)
  • Pulled down the two cucumber plants
  • Pulled down the Roma tomato plants
  • Pulled up one Kennebec potato plant that was planted right next to a Roma tomato plant
    • Yielded 2 pounds, 13 3/8 ounces of potatoes

September 15

  • Harvested 3 pounds, 1 1/4 ounces of green beans

September 16

  • Harvested 1 pound, 4 5/8 ounces (6) California Wonder peppers

September 17

  • Harvested 1 pound, 5 7/8 (4) California Wonder peppers
  • Picked Sugar Dots Corn
    • 17 that were pollinated on August 25
    • 7 that were pollinated on August 26
    • 1 that was pollinated on August 28
  • Only 13 out of 25 picked were productive and had kernels; 2 pounds, 4 7/8 ounces

September 19

  • Harvested 3 pounds of green beans

September 20

  • Picked Peaches & Cream Corn – 2 pounds, 4 3/8 ounces – total of 9 out of 12 picked were productive
    • 1 that was pollinated on August 26
    • 5 that were pollinated on August 28
    • 6 that were pollinated on August 29


September 21

  •  Harvested 1 pound, 11 7/8 ounces (6) California Wonder peppers

September 22

  • Harvested 1 pound, 14 1/2 ounces of Peaches and Cream Corn – all 9 were productive
    • 1 that was pollinated on August 28
    • 2 that were pollinated on August 30
    • 1 that was pollinated on August 31
    • 5 that were pollinated on September 1

September 23

  • Harvested 1 pound, 15 5/8 ounces of green beans

September 24

  • Harvested 1 pound, 15 ounces (8) California Wonder peppers

September 26

  • Harvested 2 pounds, 8 3/8 ounces of Peaches and Cream Corn – all 13 were productive
    • 7 that were pollinated on September 2
    • 6 that were pollinated on September 3
  • Harvested 11 5/8 ounces (3) California Wonder peppers
  • Harvested 2 pounds, 8 3/8 ounces of green beans
  • Pulled out all of the Bush Blue Lake 274 green beans from the front driveway garden 

September 28

  • Harvested all remaining corn – 1 pound, 8 7/8 ounces – total of 12 “good” ears
    • 8 that were pollinated on September 6
    • 7 that were pollinated on September 7
    • 2 that were polinated on September 8

September 30

  • Harvested 3 1/8 ounces of green beans
  • Harvested 10 3/8 ounces (4) California Wonder peppers

October 5

  • Harvested 11 1/8 ounces (2) Best Boy tomatoes

October 7

  • Harvested 1 pound, 8 3/4 ounces (7) California Wonder peppers
  • Harvested 4 3/4 ounces of Simpson Elite lettuce (first batch of lettuce for the fall crop – very bad production and the lettuce plants did not grow as vigorous as they did in the spring)

October 11

  • Harvested California Wonder peppers (no note on the weight)
  • Night temperatures are very close to freezing over the past few nights

October 12

  • Harvested 11 pounds, 10 ounces of Kennbec potatoes in the potato bed next to the house 
  • Harvested 2 pounds, 2 3/8 ounces of potatoes from the potato bin (only one plant survived and all of the potatoes produced were in the very top portion of the bin.  Bin was about 2.5 feet tall and the potato stemp was fully rotted about a foot down)

October 20

  • Harvested 9 pounds, 3/4 ounce (42) California Wonder peppers (last harvest of the year)

October 25

  • Harvested 4 7/8 ounces of Simpson Elite lettuce 

November 8

  • Found one Kennebec potato in the potato bed beside the house – 15 3/8 ounces
  • Harvested 3 1/2 ounces of Simpson Elite lettuce

November 26

  • Harvested 4 3/8 ounces of Simpson Elite lettuce
    • The lettuce has sustained several nights below freezing and hard frosts 

2009 Journal Notes

  • Last frost date was earlier than typical; about a 75% chance of frost after the April 7th week
  • Extremely hot temperatures early June.  August and September were cooler than typical
  • Began storing seed in the refrigerator this year; seed that was a year old was not stored in these conditions and therefore was hampered
  • Putting out seeds extra early (such as the peas) did not gain any additional benefit because the soil needed to warm up before germination occurred
  • Using the heat mat to start some seedlings (was used for only peppers this year) is beneficial and helps germination by around 4 days.  House temperature ranged from 60 to 64 degrees typically
  • The radishes do not grow well at all unless they have direct sunlight. They were in the garden next to the house where they didn’t get very much sunlight and there was an extremely poor harvest from them
  • The garden at the in-laws house was abandoned.  Germination rates and growth quality suffered severely
    • Most likely because the soil is very hard and full of clay – was very hard to even till a small area to plant potatoes
  • Even though you can buy “dwarf” varieties of peas, don’t plan on them staying small.  Dwarf Gray Sugar peas grew to at least four feet tall – and even taller if there was additional support.
  • Blanching (boiling) of vegetables before placing in freezer storage was a complete waste.
    • The peas became very hard and frozen together, were flimsy, and lost their color and flavor.  Peas that were not blanched were crisp, had better flavor, and were not frozen together
    • Broccoli and cauliflower that were not blanched before freezing was fine.  However, the broccoli and cauliflower needed to be immediately cooked and used – if it was put in the refrigerator to thaw, they had a very foul smell and tasted bad
  • While not noted in the above log, only one each of the Marketmore 76 and Burpee Pickler cucumbers germinated out of the three each that were planted 12 inches apart from each other.
  • Germination for Bush Blue Lake 274 was superior to the more expensive Bush Blue Lake 74 seed that was purchased.  The Bush Blue Lake 74 seed was more expensive because it was noted as a “customer favorite” from Burpee.
  • Although there were 6 more white onions over yellow onions harvested, the weight was within 2 ounces and therefore it seems that the yellow onions produced better.
  • The Red Cherry tomatoes succumed to a disease (most likely fusarium wilt) very early in the season and produced horrendously.  One of the two plants was pulled up mid-way through the season because it was almost fully dead – and the other plant was pulled up a few weeks after.
  • The Best Boy and Roma tomatoes also suffered from wilt.  It did not affect the fruit, but the leaves from the bottom-up were turning yellow and then brown.  The Roma plants held up better than the Best Boy plants, however.

220 Gallon Rain Catchment System – Done!

This week I am using some vacation time away from work.  I have a lot of time that needs to be used so I figured around Christmas week, this was the time to do it!

Therefore, I used the time today to go pickup two more rain barrels to fully complete the 220 gallon rain catchment system.

Here are some pictures of the system.  Below shows the full system – the four barrels at the top will hold approximately 220 gallons of rain water.  The barrel below is one of the composters (still need one more barrel to complete that).

220 Gallon Rain Catchment System

The below photo shows the side view of the system – with the gutters, the overflow, and the 1/2" PVC pipe that comes off from under the barrel.  So far I have attached two ball knobs down that 1/2" PVC pipe – the first one by the 4×4 post will allow me to turn the water on to fill a bucket or attach a hose (I attached a 1/2" to 3/4" male adapter to the end to allow a hose connection).  The next ball knob at the bottom of the picture and close to the ground will connect to the irrigation system that will be on that side of the garage.  Later on, I will add another ball knob where I have a "T" connector by the corner of the garage – this line will go to the garden beside the house and the one in the front yard.  By using individual ball knobs, I can open/close the water flow to each garden around the house.

220 Gallon Rain Catchment System

In the next photo – this is underneath the barrels where you can see the 2" PVC pipe connecting all of the barrels together.  All of the fittings have been glued together using PVC cement.  Between each barrel, there is a 2" PVC Union coupler that allows me to unscrew the piping.  This was done so that I can take down the barrels for maintenance or cleaning in the future.  Without these, I would have to cut the main PVC pipe between each barrel to free them – and then couple them back up.  Eventually this would use all of the PVC pipe and I wouldn't have any more space to make couples!

220 Gallon Rain Catchment System

And lastly, this is the top of one of the barrels.  There was a 3/4" hole that was cut out and some screening put over the hole.  Then I used some caulk to adhere the screening to the barrel.  This is to release the air pressure in each barrel when the water fills them up.  The screening keeps any bugs out so they cannot get into the barrels.

Rain Catchment System

Here is the Part 2 of the water cachment system video:

Experiment 2 – Growing Lettuce Under Lights

So it has been a week since I planted the original lettuce in the rubbermaid container (previous blog post).  Not one of them has sprouted.

I am thinking that it is because I planted them too deep.  Lettuce should only be planted about 1/4 inch deep because of the very tiny seeds and they need to get to the surface quickly.  When planting them in the rubbermaid box, they probably were planted at least 1/2 inch to 3/4 inches deep by the time I put peat moss over the top of them.  I have been religiously spraying the container twice daily to keep it moist – but nothing has happened.

Therefore, it is time for experiment number 2 – growing lettuce under lights.  I had been looking over the GardenWeb “Growing Under Lights” forum and was asking questions about what fluorescent bulbs would be best to grow lettuce.  One individual told me that warm white was best – but others had their own opinions as well.  Previously I used the standard Gro-Lux bulbs coiupled with a Cool White Plus bulb by Sylvania.  The Cool White Plus bulbs are 40 watts each with about 2950 lumens.  I can’t recall the rest of the information on that bulb right now.  I used one Gro-Lux bulb and a Cool White Plus bulb in each of the two fixtures I used for the seedlings earlier this year.

But, I purchased some organic soil mix today along with four Cool White Premium bulbs.  I was primarily looking at higher lumens – which typically means brighter light output.  The Cool White Premium bulbs are 3300 lumens, 40 watt, 80 CRI, and 4100K.

I then made a box out of some old paneling and some of the treated wood that was used around the potato bin.  The pieces from the potato bin were six inches high by 2 feet long – so I had to put two of the boards together to make them four feet long total.  I just didn’t have any perfect planting box that would make use of all of the fluorescent lights to maximize space – so building a box was best.

So the box was 4 foot long by 6 inches tall.  I then used the paneling on the bottom and on the sides – the box was about 14 inches wide (well, about 12 inches after the sides were attached).  I then just used a staple gun to staple all of the pieces together.  As you can see in the pictures below, I then used plastic to surround the box – the bottom and the sides – so that water will not leak out anywhere.

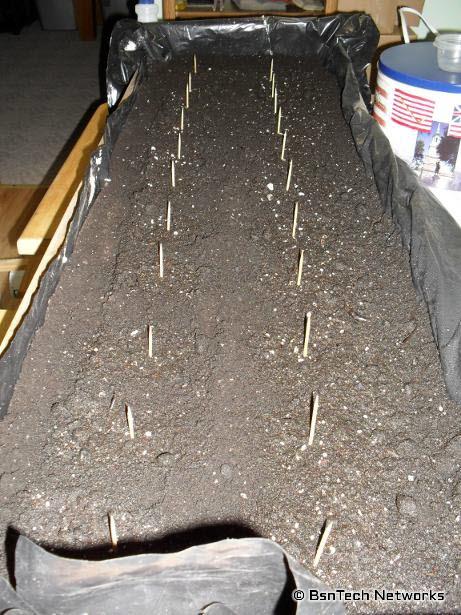
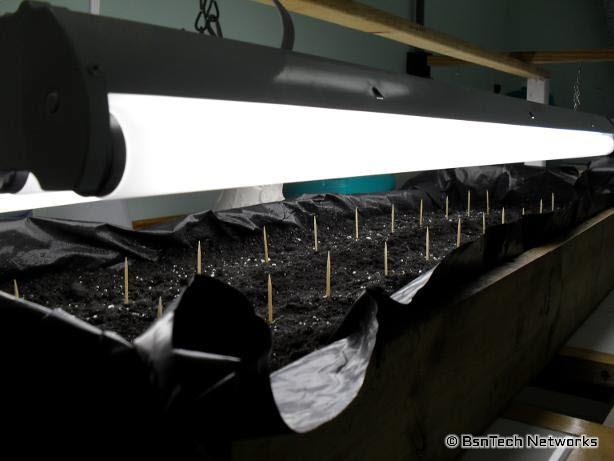
I then planted Simpson Elite lettuce every four inches in hopes that at least half of them will sprout.  I put all of my seeds in a butter container and put them in the refrigerator – hoping to increase the life of them.  Therefore, I’m hoping with the first indoor container that I just planted them too deep – but this time we will see how viable the seeds are.  They were all planted at 1/4 inch with light soil placed over the top and then sprayed down well.
Growing Lettuce Under Lights

Growing Lettuce Under Lights

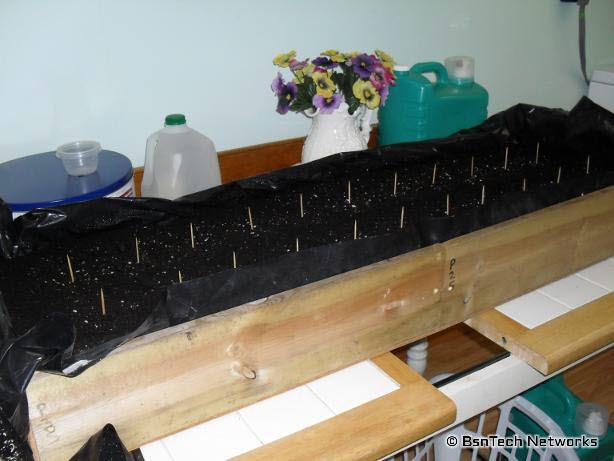
The toothpicks above show approximately where the seeds were sowed – so I have an idea if there was any weed seed in the organic soil mix that was purchased.

And here is the full ensemble with the two light fixtures over the top.  I turned the fixtures on just for the photo – but they will not be turned on until the first seedling emerges.  The lights on plugged into a surge protector power strip – and then plugged into a timer that will turn the lights on daily at 7 am and off at 7 pm.
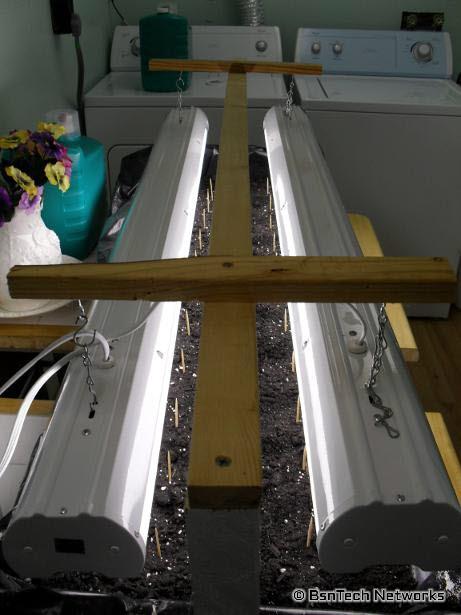
Growing Lettuce Under Lights

Growing Lettuce Under Lights


December 25

The Growing Lettuce Under Lights experiment is working very well – unlike the Shady Lettuce Experiment which is pretty much a bust.

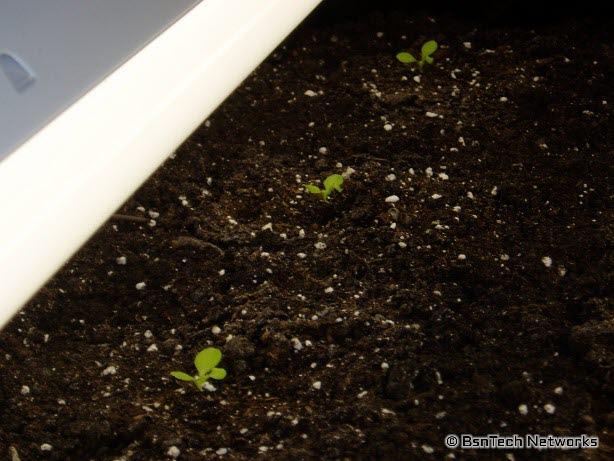
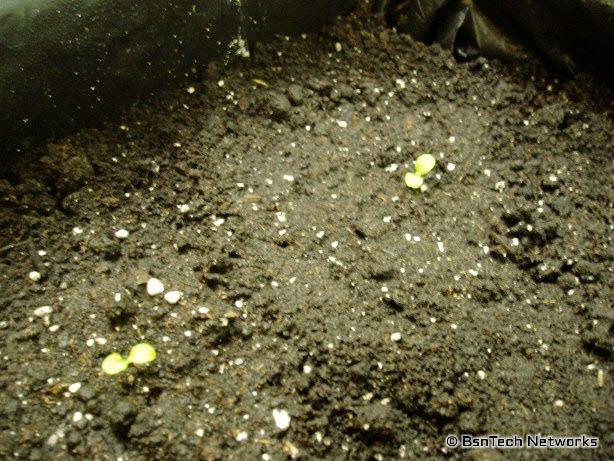
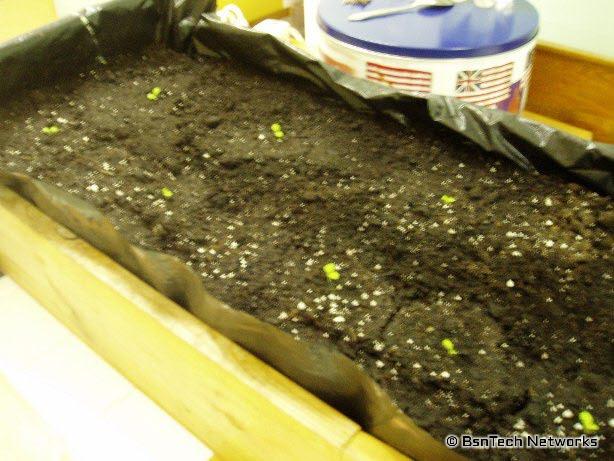
I placed toothpicks next to each of the seeds sowed – and there are already 50% of them that have sprouted – in just five days!  I didn’t have the lights on for the first three days because there weren’t any sprouts.  The first sprouts occurred yesterday – and there were about three or four of them.  Today, there are now eleven of them.  I have removed the toothpicks from the spots where the spouts have occurred.
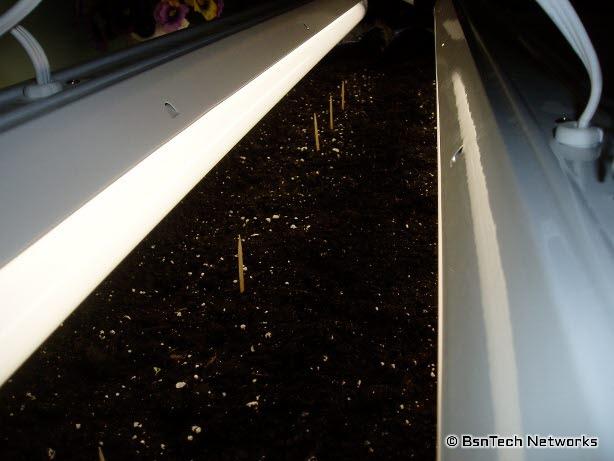
Growing Lettuce Under Lights

You can just barely see on small sprout in the picture above – underneath the bottom-most toothpick by about two inches.

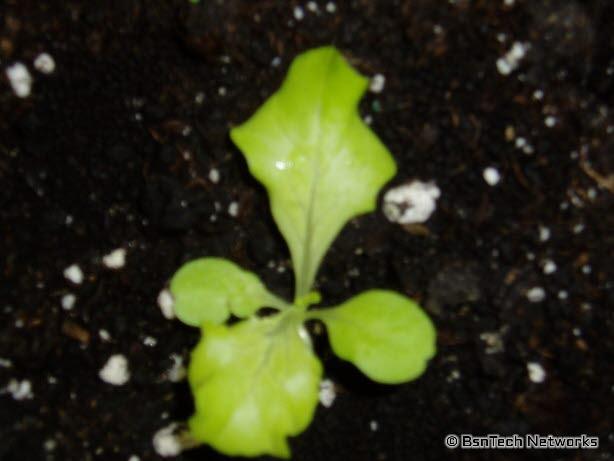
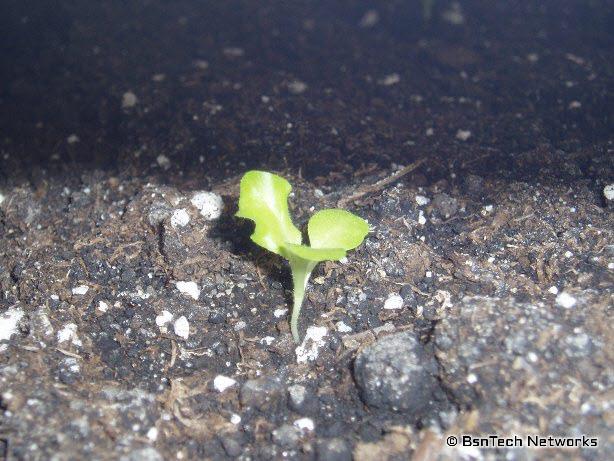
Here is a closer look at one of the sprouts.  The leaves have already unfolded to receive the light from the fluorescent bulbs.
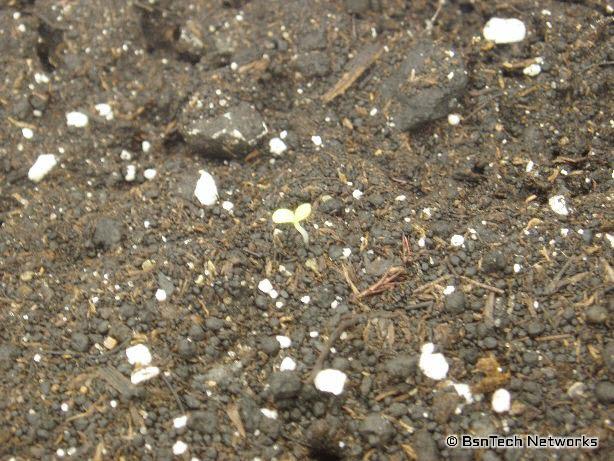
Growing Lettuce Under Lights


December 31

Out of 22 Simpson Elite lettuce that were planted,  13 seedlings have emerged and are doing quite well.  The seeds were purchased back in March/April of this year and have been kept in the fridge.  Lettuce seeds are known to only last maybe two seasons – and this shows it by only having a 59% germination rate.  At any rate, the little seedlings are doing very well.  I moved the seeds so they are all eight inches apart now and four inches between the rows.  I have one extra plant that I am keeping just in case something happens to one of the other ones.
Growing Lettuce Under Lights

Growing Lettuce Under Lights


January 7

At this point, I’ve pretty much thrown in the towel on the shady lettuce experiment.  This week though, two more lettuce seedlings sprouted in that container.  The lettuce is just too stalky and when I water them, they just fall over.  But, I’m still keeping it going although I don’t expect anything.

However, the growing lettuce under the fluorescent lights experiment is still going very well.  All of the plants now have three or more leaves.
Lettuce Under Lights

Lettuce Under Lights


January 14

The lettuce plants have doubled in size in the past seven days (one week)  The Simpson Elite lettuce is now 21 days old.  The package says that they will be mature and ready for harvest in about 60 days.  Somehow I don’t beleive this will be the case with growing them under lights.  Here pretty soon I’m going to be required to make a decision on how to start the seeds for the real garden.  The Copra Onion seeds will be started around the beginning of February.  This means I’ll have to buckle and probably purchase more fluorescent fixtures for them – which isn’t what I would like to do.

In addition, I have removed two of the four fluorescent bulbs from the lettuce growing experiment.  The two rows of lettuce is directly underneath one of the bulbs on each fixture.  So, this will reduce power usage down to 80 watts from 160 watts.
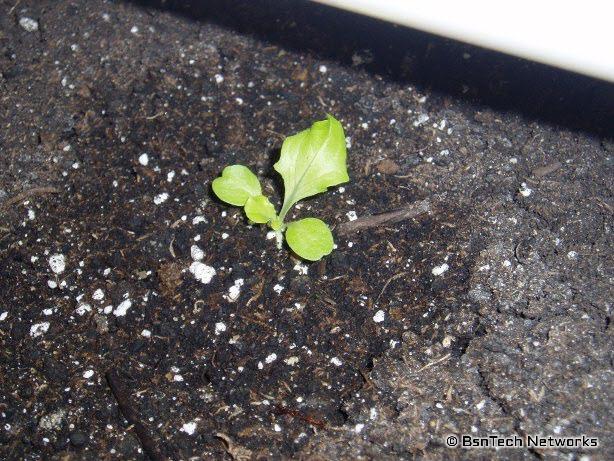
Lettuce Under Lights


January 31

The lettuce has really grown yet again!  One of the lettuce plants really needs to be “thinned” because there are three of them that are four inches apart from one another – and all the others are eight inches apart.  I just cannot get myself to do it because it is one of the better-looking plants!

Something I did a couple of weeks ago was to remove a fluorescent bulb from each of the two fixtures – as noted in the last post.  So far this doesn’t appear to have made any kind of difference in the growing of the lettuce.
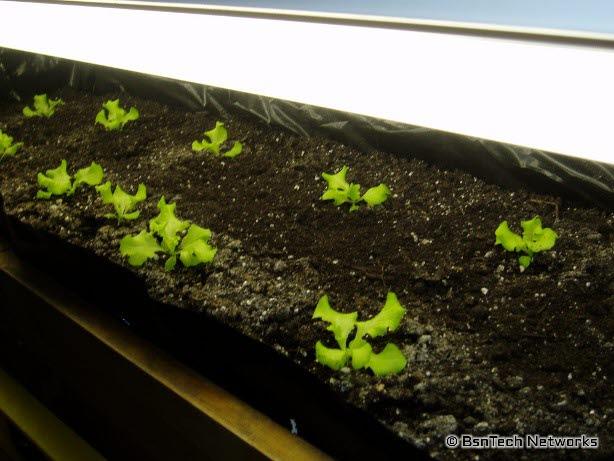
Growing Letetuce Under Lights


February 20

Curtis – who commented below – motivated me to make an update to this experiment.

It has been a good 20 days since my last update on this.  Sine then, the lettuce has doubled or tripled in size again.  However, the lettuce is now about 60 days old, and according to the package, I should be able to start harvesting the lettuce by now.

Nope!  The lettuce just is not big enough yet.  I still am running only one 4-foot Premium Cool White fluorescent bulb (3300 Lumens, standard Cool White bulbs have 3000 lumens) in each of the two fixtures.

At this point, I am about ready to scrap the project.  The amount of electric required to grow the lettuce almost is not worth the effort.  The lights are on for 12 hours a day and consume 80 watts of power between the two bulbs.

One thing I have noticed is a direct relationship between the distance of the fluorescent bulbs and the size of the plants.  In the picture below, you can see how the left row of lettuce is larger than the right row of lettuce.  Well, this is because the light over the left row was about an inch closer to the lettuce than the light on the right side.

Today I moved the fluorescent lights down to be just about one inch from the top of the lettuce.  I’m not sure how much longer I will keep this experiment going since it doesn’t have great results.  On top of that, I may need the box that the lettuce is growing in to start more seeds for the main garden outside before long!
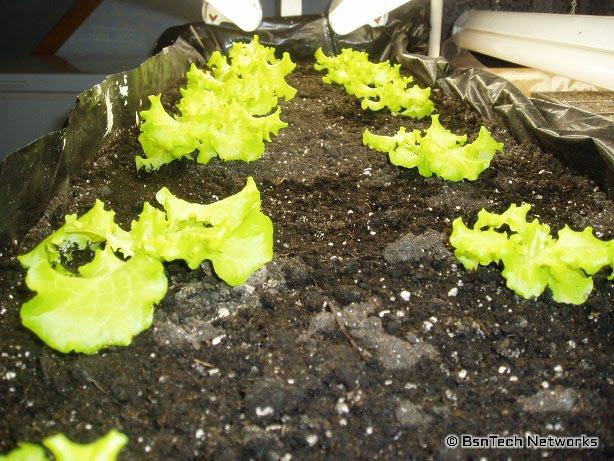
Growing Lettuce Under Lights


March 11

Today the lettuce was all harvested and the lights taken down.  At this point, it is safe to say that growing lettuce indoors does not do as well as growing outside.  This may be due to several factors – availability of real sunlight, availability of carbon dioxide, and possibly fertilization.  I did not fertilize the lettuce at all because I purchased brand new soil mix that already had fertilizer added.

The lettuce was always watered with rain water that I had in gallon jugs.

Overall, we got two nice salads out of it last night plus there is still enough left for maybe two more salds tonight.  But, considering that 80 watts of power is used for 12 hours a day, there was a lot of electric usage for this.  The lights were on 12 hours daily from December 20th until today – so quite a long time.  The lettuce started off with four fluorescent bulbs and then I removed two bulbs on January 14th (which meant from December 20th to January 14th, there was 160 watts of power used daily for 12 hours) .

The lettuce was quite good and was not bitter.  It was interesting to see that the lettuce had a very small root system – nothing like what it is if planted out in the garden.  Then again, each lettuce plant in the garden yielded about a pound of lettuce – whereas these plants in this experiment yielded less than a pound for all 13 plants.
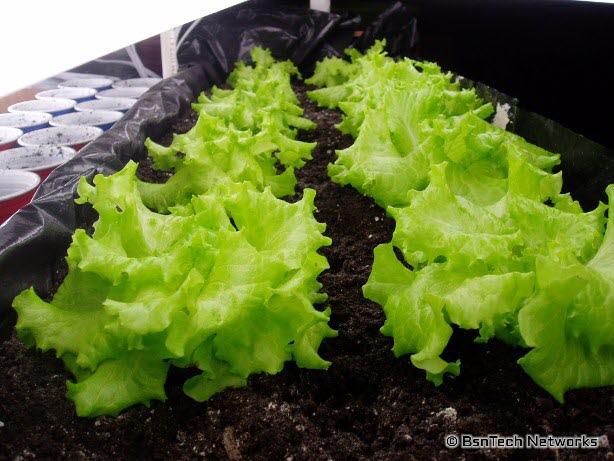
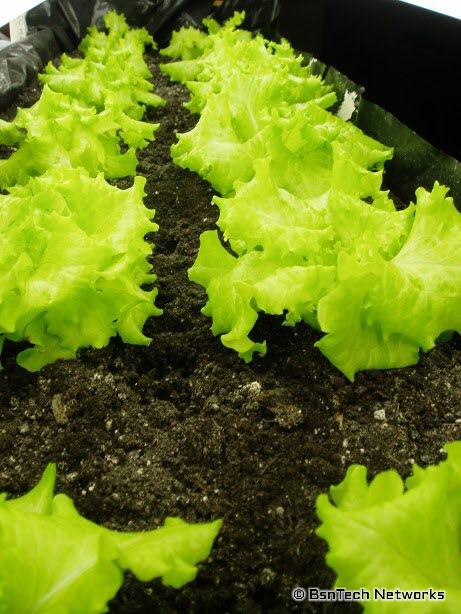
Lettuce Under Lights

Lettuce Under Lights

As you can see, the lettuce really did grow well in the past 30 days, but the amount of electric and effort to grow lettuce indoors is not worthwhile from what I have found out.