Carrots/Peppers/Peas

Let’s start with the bathroom update.

We called it a day already today.  There wasn’t terribly much to do this week.  Just a few things here and there.  Since the first coat of drywall compound was put on last weekend, it was just some sanding and filling in the screw holes with compound throughout the week.  In addition, I also cut the last few pieces of concrete backer board around the tub (done today) so the area around the tub is fully ready for tile.

Speaking of tile – we got the first row of tile in around the tub!  The tile was much easier to cut than was originally suspected.  Two pieces needed to be cut and then we used the hole saw to cut the holes for the faucet and valve for the tub.  One tile was broken in the process, but the second try was successful.

Below shows the full walls around the tub completed with the backer board and the first row of tile.

Bathroom Project

And a better view of the first row of tile.

Bathroom Project

About six more rows of tile to do before it is done!  Hopefully we can get one more row of tile in today – and then if we put in one row a day, it will be done Friday evening.  That is in a perfect world though.  It seemed to take about two hours to put one row of tile in – but that also included doing the cutting for the facuet/valve as well.


What is going on in the garden?  A lot of dead stuff.  I pulled all of the celery this week and pulled the broccoli.  I was hoping to get some seed off of the broccoli plant but it just didn’t seem like it was possible.  The celery just didn’t do well at all because the incredibly hot temperatures.

In better news, at least we got some peppers.  However, it was less than four pounds.  Last year we picked about 50 pounds of peppers from eight plants – and this year we may have picked about 10% of that from eight plants.  We do have enough to make salsa though – so that is the important part!

California Wonder Peppers

I also pulled all of the pea vines behind the garage.  I was saving those so I could capture some seed from them – and here are the seed pods that were collected:

Pea Seeds

It seemed that out of around 50 or so pods, we got around 125 seeds.  This is just about what I need for next year for planting.  I just hope that they are viable and that they will grow.

Pea Seeds

I also pulled down the last three ears of corn.  One was not pollinated at all and was discarded – but the other two were full.  I cooked them right up and had them for supper on Friday night.  Just decided it wasn’t worth chilling them and freezing them when they could be eaten fresh that night!  The kernels were very meaty and chewy and it was fantastic.  Usually after I freeze the corn and then cook again, the kernels fall apart much easier and are not as meaty.

Silver Queen Corn

And in the last bit of gardening news – the carrots were all picked… finally!  I’ve been a bit lazy lately and didn’t want to pick all of them.  Well, I got all of them harvested on Saturday in the early morning before it turned off hot.

Carrots

There were two varieties planted this year in equal amounts – Sugarsnax and Burpee A#1.  The Burpee seed was a year old and the Sugarsnax carrots were purchased at the beginning of this year.  Overall, the Burpee carrots seemed to succumb to damping off disease pretty bad and I thought the Sugarsnax tolerated it better.  But in the end, there were about 65 Sugarsnax carrots to 61 Burpee A#1 carrots.

Sugarsnax:

Sugarsnax Carrots

Sugarsnax Carrots

Burpee A#1 carrots:

Burpee A#1 Carrots

Now the carrot/potato bin raised bed is all alone and empty now.

Carrot Raised Bed

Overall, the Sugarsnax carrots weighed in around five pounds, 14 ounces.  The Burpee A#1 carrots also weighed in at…. five pounds, 14 ounces.  Per carrot, there was slightly a bit more weight per carrot for the Burpee A#1 – but not by much.

Taste?  Well, both of them tasted exactly the same and had a little bit of sugar content to them.  So in the end, it doesn’t matter which variety is planted in the way of taste, but the Burpee A#1 carrot was just a bit better on the yield.

It is a bit sad though – because combined, the carrots were just under 12 pounds.  Last year we had almost 18 pounds of carrots.  So that is six pounds difference.  If it wasn’t for damping off disease hitting, I think that they could have surpassed that 18 pounds this year!

That is all going on here!  We did make another seven jars of salsa last night along with four more jars of pickle spears.  The tomatoes have a lot of bruises/bad spots in them and they are going bad in a matter of days.  So we’ve been putting them to use in the salsa.

Potatoes/Salsa/Pickles

Before starting on the gardening updates, here is what is going on with the bathroom project.

This week there were some boards put between the studs in the wall so that towel racks and other items have something to grab onto once they are installed.

After that, black plastic was then put around the entire room as a moisture resistant layer.  After the black plastic was up, the concrete backer board was applied around the tub – which the tiles will be adhered to.

Black Pastic/Concrete Backer Board

You can see in the picture above that the black plastic is wrapped around the walls.  I used a staple gun to hold the plastic in.  Then the backer board was put behind the tub.  Two more pieces were also put up after this photo was taken; one on the front and one on the back of the tub.  We had to pick up another piece of concrete backer board because I’ve decided to run tile all the way to the ceiling.  Originally I was only going to go up five feet, but decided to do the entire thing.

I also worked on putting the last coats of varnish on the cabinet and vanity.  After that was done and I let it sit a few days, I brought the vanity inside and put the vanity top and faucet on.  Looking pretty good!

Vanity and Top

My dad stopped by again on Sunday and we had quite a bit of work to do.  He started off by getting all of the plumbing done for the toilet and hot/cold water lines for the sink.  Originally there was galvanized pipe and it was needing to be replaced.

After that, we began putting drywall up on the ceiling.  Well, I had forgot that because we were putting drywall over the existing drywall, this was a one-inch thick piece to screw into.  The screws we were using were 1 1/4 inches and they were not long enough to really hold in.  Not to mention that the ceiling joists were not playing nice and we had trouble locating them.

So we had to run back to Menards to get a few PVC items, the next piece of concrete backer board, and a few other odds n ends.

Got back and put up the rest of the ceiling.  The walls were then all put up and my dad started doing all of the drywall compound work.  This is something I’m not too good at; I know how to make a mess with it and apply it to the drywall, but when it comes to making a nice smooth finish, I haven’t been too successful doing that.

Drywall

Drywall

Still a bit left to do.  I still need to get more screws in the ceiling to hold that better, cut and install the last bit of the concrete backer board, and fill the screw holes with drywall compound.  Probably another week or two weeks and the walls and ceiling will be ready for painting!


Moving on to the garden.  I’ve slacked off again this week and didn’t do very good with watering the garden.  I got up earlier this morning to go out and water the gardening areas.

However, I did manage to pick some things from the garden.  So far we’ve collected a little over 20 pounds of tomatoes and I dug up about 10 pounds of potatoes off of ten plants.  The potatoes in the potato bin were very nice – and were the best producers.  With the bin, it was originally built to be one foot deep.  Then as the potatoes grew, I just added a six inch layer of mulched leaves.  Out of the six potato plants in this bin, I would say that it was about eight pounds.  I then dug up about four potato plants behind the garage and they were not as good.  However, I may not have dug far enough either – so there still may be more potatoes in there!

Kennebec Potatoes

What to do with all of the tomatoes – welp, we made some salsa again!

Salsa Making

We filled up 12 quart jars of salsa from 20 pounds of tomatoes.  We mixed in 24 ounces of tomato paste, about six cups of onions, 3.5 cups of lemon juice, the cilantro from the garden, some basil from the garden, oregano, and about three pounds of peppers from the garden.

Salsa Jars

Looks good!  However, it was a bit more soupy than last year and you can see in the jars above, there is a lot of water on the bottom.

Speaking of onions – last year when we made salsa, we had to cut the onions up by hand and used a food processor to really make them small.  This year I wanted to have a bit more chunky salsa – and we got this onion chopper.

Onion Chopper

This thing works wonders!  I cut the onions in half and then placed the flat side on the cross-hatched blade area.  Gave the white lid a good push down and it chopped the onions into perfect-size little squares.  It does take quite a bit of power to get the onions to fully chop – so much that you feel you are going to break the chopper!  I’m sure it will eventually break from all of the pressure, but it works very well!

While the water bath canning pot was still out and rolling to a boil, we also cut up the cucumbers from our garden to make spear pickles.  Last year we made slice pickles for use on hamburgers and such, but we really haven’t used many of them and have cans left.  So this time we made some spear pickles.

Pickles

Some other gardeners mentioned to me about adding epsom salt to your peppers and tomatoes.  Well, I opted to try it.  The peppers are growing, but they are just not producing like they did last year.

California Wonder Peppers

So I took about one tablespoon of epsom salt and sprinkled around the trunk of each pepper plant.  While I was at it, I also put some around the tomatoes as well.

Epsom Salt

We’ll see if this does any good.  Epsom salt – as in the photo above – has a lot of magnesium in it that peppers and tomatoes need to produce good-sized fruits.  So this is basically a fertilizer.

Well, what else is going on around the garden.

This is the carrot bed that has had all of the potatoes pulled.  The potato bin was right in the front and the carrots behind.  The carrots really need picked – but just have to find the time to do it!  It takes a lot of time to pull all of the carrots, cut off the tops, and wash them good.

Carrots

The back garden is slowly beginning to die off.  That is because the potatoes are needing to all be picked.  That is going to be a big task.  Planting potatoes is no big deal – but having to dig all of them up is going to take a substantial amount of time.  The cucumbers weight is pulling the fencing down too – so hopefully it will last to the end of the year.

Back Garden

Speaking of cucumbers – these things must grow fast!  I was just out picking things a few days ago and somehow another yellow cucumber is huge and growing!  Another one I need to pick today!

Yellow Cucumber

Moving to the patio garden with the basil and green beans.  The green beans in this bed are growing very large and bushy.  Just hopefully we’ll get some green beans from them.  Hasn’t been a good year for green beans around the garden for some reason.

Patio Garden

And the front garden.  All but just a few stalks of corn are left.  The corn needs to be taken down because I don’t expect there to be any usable ears.  Green beans have been planted in this entire area – but again, they just don’t seem to be growing well – or are not germinating at all.  I gave them a good compost tea feeding on Friday so maybe this will help a bit.

Front Garden

And lastly – I thought I’d take a photo of the radish seed pods.  Some of them are finally beginning to turn brown.  Hopefully the seed in here will be good so I can use it next year.

Radish Seed Pods

That is all for this week!

Harvesting Week

The work on the bathroom is progressing well.  This week had a few more updates.  The floor has been fully put in place, insulation was replaced/added, some plumbing was finished – and lastly – the new tub was installed!

Part one of the reconstruction is under way with the tub being mostly done and in place.  There is still a little bit of work around the tub that needs completed – in addition to starting to put up the concrete backer board on the wall.

Bathroom

Eljer Madison Whirlpool Tub

Installing a tub takes longer than one might expect.  The bathroom is exactly five feet wide – as is the tub.  It took some maneuvering to get it into place.  The drain and overflow pipes all had to be cut to perfect size and the trap and drain all needed to be installed.  The tub then needed to have a support wall (in the bottom of the picture above) added to the one side – and a 2×4 had to be put on the opposite wall to give the tub some support.  Lastly, we had to put down some plastic and sandwich some mortar mix between the two pieces of plastic under the tub to provide support at the bottom.

The cabinet and vanity has been getting finished as well.  I prefer the natural oak color – so I don’t use any stain on the wood – and just purely varnish the cabinets.

Cabinets

And now for the cabinet being finished.

Cabinets


Moving on to gardening things, the corn has mostly been picked.  As I pick the corn, I’ve been taking down the stalks.  All of the corn should be done and harvested within the next week – so I planted another 50 Greencrop green bean seeds in the area where the Silver Queen corn is at.

Silver Queen Corn

A little time after picking the corn, there was a visitor in the garden.

Deer

Deer

Darn deer is feasting on the corn leaves that I put in the garden!  I went out there afterwards and saw many of the leaves from the green bean plants stripped off.  I didn’t have any kind of problem with deer when the onions were still in the ground – but now that they have been pulled, they aren’t staying away!  That means I’ll unfortunately need to get the netting out soon and put around the area to keep them out.

Speaking of onions, all of the Copra onions were pulled this past week.  There was a total of just about 20 pounds of onions from about 70 total onions.  Just over 100 onions were planted outside so 70% of them made it to harvest; others rotted or never grew after they were transplanted out.

Copra Onions

We chopped the tops off and the wife filled a gallon ice cream bucket with chopped-up green onions – that were then put in a bag and went into the freezer.

A few more green beans were picked.  This year the bean production is down substantially.  Last year we had about ten 1-gallon freezer bags full of green beans.  We haven’t filled up one yet!

Greencrop Green Beans

The back garden is still it’s usual self; very overgrown.  The potatoes seem to be dying back now so it is getting easier to walk back there.  But now the weight of the cucumber plant is pulling the fencing down.

Back Garden

I’m not impressed with the Straight Eight cucumber plants.  They are very small and while they do have some blooms on them, very few – if any – cucumbers.  Below is a photo of one of the Burpee Pickler cucumber plants.  All three of this variety are huge and growing well.

Burpee Pickler Cucumber

There is even a cucumber started here.

Small Cucumber

Unfortunately with as busy as I’ve been, I haven’t been keeping up with things as well.  When I was taking the pictures, I saw two large cucumbers that were already turning yellow.  Maybe we can still use them for something.

Yellow Cucumbers

The patio garden has also been growing very well.  The greencrop green beans in this bed are by far the largest of the plants so far.  I’ve also pulled all of the cilantro out from the patio bed – and the basil is still growing very well.  The parsley – which is at the bottom of the photo – are doing well too.  I’m just not sure when to harvest the parsley – or what we’re going to use it for!

Patio Garden

One of the potatoes beside the patio garden was harvested.

Potato Bin

Above is one of the buckets that was pulled out.  It yielded just a bit more than a half a pound of potatoes.  They were all quite small and all were less than two ounces each.  They will be good for mashed potatoes but otherwise not much else can be done with them.  They look big in the below photo, but they are not at all.

Kennebec Potatoes

The side garden with all of the tomatoes is still producing well.  We’ve picked over five pounds of tomatoes this week.  We still have a lot more that we need to make some salsa.

Side Garden

And the tomato harvest of Best Boy tomatoes, Roma tomatoes, and Red Cherry tomatoes.

Tomatoes

And lastly – going to the front garden.

Front Garden

As you can see, almost all of the corn has been taken out in one part of the garden.  This was the Sugar Dots corn that did not yield very well.  The Silver Queen corn is still there and has yielded quite well – but I’ve found a few ears that have been ripped off by the deer as well.

The celery is doing very poorly – but I just cannot get myself to rip it out of the ground quite yet.

The peppers have made a bit of a comeback and do have some peppers coming along, but we are not getting nearly as many as we did last year.

California Wonder Peppers

It is quite sad; I increased the garden square feet by almost double this year and the output may be less than what we had last year.  The question is still out on the amount of potatoes we get.  Last year there was about 250 pounds of produce from the garden.  This year I bet we are at 50 pounds or less so far.  But, on the other hand, there is still a lot that needs to come out.  The carrots need to be picked still (estimating about 10 pounds of carrots) and I’m hoping we’ll have 80 to 100 pounds of potatoes.  A lot of tomatoes are still on the vines and I’m betting at least another 50 pounds of tomatoes.

The thing that caused the issue this year is the heat.  The heat basically put a stop to the cool weather crops.  The lettuce had a very poor showing and only yielded about 1/6 what we got last year.  Same with the peas; we had maybe two pounds of peas and last year we had over 12 pounds.  Then the heat is causing havoc on all of the plants.

The other issue this year is that I used basically a full 20 x 4 box for corn – and the corn is doing alright, but not nearly as well as expected.

But on the positive side of things, we are getting produce and filling the freezer.

Finally Have Some Rain!

We finally got some rain!

We had a big storm front finally make it through our county yesterday and dumped about two inches of rain on us.  The first wave came through around 1:45 PM and lasted about 45 minutes to an hour.  I checked the rain barrels after this and they were completely full!  I don’t know how much rain we got in that storm, but it was enough to fill nine 55 gallon drums full of water.

Unfortunately, the one barrel that I just added last week still has a leak in it!  I had to use some silicon caulk sealant around the hole where the PVC T-adapter connects the barrel to the main line underneath – and then it cured for about five days before the storm yesterday.  Still, somehow the water made it through and there is about a one drop per second leak coming out of it.  That means something else to fix down the road.

Then the next storm came through right around 10 pm and lasted another hour or so.  That one also dumped quite a bit of rain on us.

They are predicting rain everyday this week through Saturday – and we are getting some rain today (Tuesday) as well.


I failed to write my blog entry over the weekend – because it was a busy weekend!  More work on the bathroom is progressing.

The first picture shows the tile we will be using on the floor and around the tub.  The tile near the bottom of the picture is the tile that will be on the floor; the tile near the top of the picture will be put around the tub.  Also notice the old flooring that is a bit rotted out (which we replaced this weekend).

Bathroom Remodel

My dad came up to help on Sunday and we got the old cast iron tub out.  I was doing a lot of reading online on how to remove a cast iron tub.  Well, everyone had the same idea – take a large sledge hammer and just it up!  We put a blanket over the top in order to keep the porcelain from flying everywhere – because it is extremely sharp and would have went flying everywhere!  My dad basically began in the back of the tub near the middle and in essence – cut the tub in half right down the middle so we could take it out in two pieces.

Cast Iron Tub Removal

It took less than an hour to fully get the tub out.  Cast iron is actually quite brittle – even though it seemed the tub was about 1/4 inch thick.

After that was done, it was time to remove the old 1/2-inch flooring.  Before doing so, I had to run a couple of additional supports between the joists because one of the walls was not sitting directly on top of a joist.  Luckily this wasn’t a load-bearing wall, but not very good to have zero support under the wall.

Now the floor is removed and you can see right through to the basement and the A/C unit right under the bathroom.

Bathroom Floor Removal

And lastly, we got the new OSB 3/4-inch flooring laid down.  It has tongue and groove in it so the pieces interlock and help to strengthen it even more.  Amazingly enough, this took a good four hours to put in with all of the cut outs and snugly getting the pieces in place.

OSB Board Installed

Last night I then removed the rest of the drywall that was around the but.  In the picture above, you can see at the very back wall at the bottom of the wall there is the studs and black insulation showing – then above that is the drywall.  That was all taken out so the demo is almost fully done!  Today I plan to put the new insulation in and maybe work on making some additional supports between the joists.


Let’s get back to gardening!

I believe in the last post I mentioned how two of the tomato plants fell flat on the ground.  Well, all of the plants kept leaning more and more and I was afraid they would fall over.  I made some posts out of 1/2-inch PVC pipe and filled it with concrete and put these in each tomato cage, but they simply cannot support anything and it was a waste.  So I had to cut two 10-foot pieces of rebar I had into 5-foot pieces and drove them in the ground – and then tied all of the tomato cages to them.  This should be quite enough support to keep them going for now.

Tomato Rebar Support

In addition, we had our first Best Boy tomato that was picked last week as well!

Best Boy Tomato

Then we had a couple of little cherry tomatoes that joined the party.

Red Cherry Tomatoes

I also picked one of the Ventura Celery plants last week as well.  Well, it wasn’t anything like I expected.  There just wasn’t much of anything on the stalks and it only weighed in at about 2.5 ounces of usable celery.  The celery was a bit fibrous, but I sort of like it that way – makes it more crunchy.  But, it had this very sweet, sugary-like syrup flavor to it.  I don’t know if the weather this year caused the issues with the celery (since it turned very hot incredibly quick).  But I will try celery again next year and see what happens.

Ventura Celery

The four new trays for our dehydrator showed up two weeks ago.  I immediately put them to use and filled all eight trays with basil that was drying on the table for a few days.  It took about 3 – 4 days to fully dry all eight trays and there was quite a bit of basil that we got out of it!

Dried Basil

On Saturday, I picked our first few ears of corn.  These are Sugar Dots corn and it is a bi-color variety with both yellow and white kernels.  One of the ears was very good size but the other two left more to be desired.  The Sugar Dots corn was quite stunted and didn’t seem to grow well.  In addition, only about half of the corn managed to have some silks – but that doesn’t mean we’ll get much of an ear from them.

Sugar Dots Corn

After picking the corn, I removed all of the Sugar Dots corn stalks that were in the garden bed that didn’t have any silk on them.  No reason to continue feeding them and taking good nutrients out of the soil without any results.  I then back-planted about 50 Greencrop green beans in this area; they were spaced six inches apart with about 18 inches between the rows.  Our bean harvest this year isn’t very good thus far.  We had over 50 pounds of green beans from the Bush Blue Lake variety last year – but this year we might have two or three pounds from about 40 Greencrop plants.  However, the playing field isn’t “level” because these beans are being shaded by the potatoes in the back garden all day long.  We’ll see how these new green beans with full sun produce.

And for the last couple of pictures – onions!

I noticed that several Copra onions had the “leaves” that were bent over near the top of the onion bulb.  I asked on GardenWeb if this meant they were ready – because the leaves were still green.  I was told to pull them!

I pulled them – and although there were maybe a dozen that were rotten already (roots were completely off and the bottom was rotted out – because they continued to get water when they were done), there was over 20 pounds of onions so far!  I still have yet to pick the onions in the back garden that are in the foundation blocks – but I will do that in the next couple of days.

Copra Onions

Some of the onions have pretty large bulbs – like the size you buy at the grocery store.  Others didn’t produce quite as well – but they are by far much bigger than the onion sets that I planted last year.

Copra Onions

Well, that is all for this update.  I would have liked to take all of the general pictures of the garden beds but just haven’t been able to do that lately with the work in the bathroom.

The Well Has Run Dry (Well, Rain Barrels Anyways)

Yep – so we haven’t had any good amount of rainfall for probably 2.5 weeks now.  We did have a quick downpour last weekend that gave me about 100 gallons.

But, today I used all of the water up.  No more in supply.  So I took the opportunity to get on the ladder and use the “As Seen On TV” pressure sprayer that the wife got me from Walgreens.  It has a tip on the end that is very small so the pressure pushing the water through there is fairly good.  It worked well for getting the algae off the side of the white barrel – which I couldn’t see through at all.

After doing that, I put up the barrel that had a couple of holes in the bottom and tied it in.  In the picture below, you can see how on the white barrel there is still some area of darkness at the very top.  I couldn’t get this area of the barrel during cleaning – but you can see the difference.

Nine 55 Gallon Drums for Rain Water Collection

The sixth barrel in the sequence from the left side is the one I put in.  I then backfilled some water into the rain water collection system.

Welp, it didn’t take long for me to see a leak from where the PVC T connector connected that barrel to the main PVC pipe underneath.  So I had to disassemble everything and use some more silicon sealant caulk around that T connector.  That means I won’t be able to remove the PVC connector from that barrel now.  Oh well – I just don’t want any leaks because water is sparse and I can’t afford even a slow drip at this point!

Alright – moving on to the next stuff.

We’ve been getting quite a few Red Cherry Tomatoes recently.  Not too terribly much, but we’ve maybe had about a pound so far for the year.  That is already more than we had last month!  Unfortunately, I woke up this morning to go mow the lawn.  Walked out the back door and saw the huge cherry tomato plant and the adjacent Roma tomato plant flat on the ground.  I didn’t take a picture of it, but I was a little devastated.

I had a small 3-foot piece of rebar in the garage so I drove it in the ground behind and in the middle between both of the plants.  I then had to take some more twine and attach both plants to it to pull them back up.

Red Cherry Tomato Plant

As seen above, it is still leaning a bit, but it is better than being on the ground.  All of the other tomato plants are also reaching forward as well – I suspect to try and get more sunlight.  It doesn’t help that the tomato plants are all fully loaded with tomatoes – so the weight is substantial.

Tomatoes Leaning

There is one Best Boy tomato that is ripening!  Won’t be too much longer before this is done.

Best Boy Tomato Ripening

A few days ago I picked another handful of Greencrop green beans from the back garden – where it is well overgrown and the potatoes are in charge:

Back Garden

I put the beans up to a small tape measure so you can see how large they are.  I think that the Greencrop bean is my favorite bean thus far – over the Bush Blue Lake 74 and 274 that I planted last year.

Greencrop Green Beans

Speaking of the green beans, these things are doing well in shaded conditions between the corn.

Greencrop Green Beans

And they are doing well in the patio garden by the herbs.

Patio Garden

In addition to getting a few beans and cherry tomatoes, I have had a load of basil!  I actually ordered four additional trays for the Nesco / American Harvest FD-80 dehydrator from Amazon on Thursday.  They were basically $14 for a set of two – and so I got two sets of two and it qualified for free shipping!  Basically it was like getting the second set for free because shipping was the same cost as one of the sets.  This will make the dehydrator have eight total trays – which is the maximum it can have.  They will amazingly be delivered tomorrow – but it looks like they were sent out of Indianapolis which is just a couple of hours away from us.  Anyways, all of this Basil is drying on its own right now – waiting for the new trays to arrive.

Basil Drying

That should be good for about one herb/spice bottle.  There is about five ounces of leaves there.

Why so much basil?  Well, it started putting on it’s flower stalks and when it does that, production stops.  So I cut off all of the flower tops.  When doing so, this makes basil become more bushy and put on new stems of growth.  With the great taste of this basil, I don’t want it to stop now!

Basil with Flowers Cut Off

Alright – let’s look at the flowers up front.  The marigolds have filled in very well and there are hundreds of flowers in the patch!  I should sell some marigold seeds next year because I’ll have thousands of them!  Last time I mentioned that we were going to put in tulips and daffodils in this area – but I’ve decided against it.  The bulbs would have cost over $200 for all of them that we needed.  The marigolds are just fine up in this area and they fill in well.  We may add in some additional annual flowers into the mix for next year, but I think it looks fine already.

Marigolds in Flowerbed

The Rose of Sharon “tree” in the front landscaping also has several flowers on them as well.

Rose of Sharon Tree

So what’s left?  Oh – the front garden!  Before there, here is a small cucumber that is growing on one of the Burpee Pickler Cucumber plants.  I walked through the area where the six cucumber plants are – and so far I’m not fully impressed.  The leaves and vines are huge already – but there simply is not a lot of cucumbers on the plants – probably because the back garden is completely overgrown with potatoes!

Burpee Pickler Cucumber

How’s the onions doing?  The Copra onions are doing well!  I’d say about half of them are pretty large – larger than any of the onions that we planted from sets last year.

Copra Onion

The Ventura celery – well, I just don’t know about it.  I was hoping to see one or two of them put up some kind of seed stalk to see how it multiplies.  No such luck.  It is well into the growing period and they were started back in March.  That is about 170 days that they’ve been alive now – and they still just are not very big.

Ventura Celery

The Silver Queen corn has made a comeback!  This week and last week there have been dozens of ears that finally shot out some silk.  Many of them have two ears of corn on one stalk.  A few of them were planted a little later and don’t have ears started yet, so I just hope they stick around long enough to get some pollen.

Silver Queen Corn

Silver Queen Corn

How about those clothespins by the ears?  Yep, I put a clothespin near the ear with the date on it that the silk came out – or maybe the day after the silk came out.  After 20 days from this date, I will then pull the corn.

Down to two more pictures – first off, the California Wonder peppers.  This little pepper plant looks like it is just trying to mature – but the peppers aren’t nearly as big as what they were last year.  Last year the peppers were the typical bell shape and were as big as those in the supermarket!  It has just been a bit of an odd year for the peppers and even folks on the GardenWeb forums around my area are complaining about them as well.

California Wonder Pepper

And lastly – the strawberry patch.  I have neglected this patch for two weeks now.  A few nights ago the wife and I went out to pick some strawberries after it cooled down.  We found half of the patch laying over like it was dead.  Woops!  I haven’t given them any water for quite some time and we’ve been in drought-like conditions for 2.5 weeks!  All of the strawberries looked like dehydrated strawberries since the plants were stealing the water from them.  So needless to say, I messed up with the strawberries and probably caused pounds of strawberries to be unusable.

Same thing yesterday; I was watering yesterday and they looked pretty bad again.  I watered them and overnight they spruced up a bit, but they still look like they need some attention.

Strawberry Pyramid

Well, that is all for this week.  We are supposed to get some rain tonight, but we’ll see.  Last week they said rain two or three days with 50 and 60% chances – and we only got a small sprinkle.  All of the rain seems to be going north or south of us.

Happy July 4th Garden Update!

Well good Fourth of July to everyone!

I missed getting the pictures taken yesterday.  The past week I have been dismantling the upstairs bathroom because we are going to fully re-do the whole thing with new drywall, flooring, tub, mirror, and all (except the toilet which was purchased a few years ago).  Yesterday I spent most of the day putting the old vanity and sink in the downstairs bathroom to replace the bad one that didn’t work well down there.  In order to do so, I wanted to do it right and put up a wall around it.  The vanity/sink would have been sitting against a foundation brick wall – but the water lines and drain line prevented it from sitting flush with the wall.  So I built up the wall behind the vanity/sink, made a wall to the left, and then hung up a new mirror.  Several years ago we purchased some paneling that looked like tile specifically for this reason – to make it look nicer.  I got enough of a wall up to put the vanity/sink in permanently so it doesn’t need taken out again – but the room isn’t done.

Below shows an older picture of the bathroom with the old toilet in (also replaced this when we moved in a few years ago to match the one upstairs).  The old paneling on the left side of the picture has all been redone since.  But, this was the only older picture I had of the bathroom.

Before Bathroom Renovation

Now, here is what it looks like after the renovation thus far.

Bathroom After Remodel

Eventually I will have a wall around that vertical sewer pipe so it is completely hidden and then another wall behind the toilet.  That will full enclose the bathroom.

Alright, let’s get back on topic for what this blog category is really about – gardening!

It has been over a week now without any rain.  We have a 30% chance of rain today and a 20% chance for the next couple of days – but we really need it!  The beginning of the week was great – around 80 degrees and humidity of 40 – 50%.  Big change from the 90+ degree weather with 80% humidity.  Well, the hot weather and humidity returned yesterday.

After a week of no rain, I’m almost out of water in my 500 gallon rain barrel system.  Cannot believe how fast it went!

Today I harvested a couple of cherry tomatoes, a few peas, and then almost a half pound of Greencrop green beans.

July 4th Harvest

All last week the basil has been drying in the dehydrator.  I tried to leave the leaves out on a plate for them to dry out, but it simply didn’t work.  It did seem that they dried out a little bit and therefore made for less time in the dehydrator.  From all the basil that was picked, the herb container is now about 3/4 full.

Crushed Basil

I have been using a little bit of the basil on things- like a potato yesterday.  I have to say – it is amazing at the difference between store-bought basil and basil out of your own garden!  Although after I crushed the basil, the chunks are much larger than what the store has, but the flavor is at least twice as good as what the store-bought provides.

The cilantro still seems to be slowly drying out in the kitchen.  I tried to crunch some of it a few days ago but didn’t get anything; so I’m leaving it alone for a bit.  A few people have commented that it smells like urine!  Hmm.. I sure hope it doesn’t taste like that!

Dried Cilantro

Next year I don’t know if I am going to plant cilantro or not.  Just didn’t seem like we got a whole lot before it bolted and is going to seed.  I definitely know we’ll be planting basil next year – and hopefully I can get some oregano to grow better than it did this year.

While speaking of herbs, here is the herb garden.  First up is parsley.  It isn’t doing too much.  When we had the cooler weather the beginning of the week, it seemed like the plants were trying to put on new stems and new leaves.  Now that it has warmed up again, they have stopped.  I am not sure if we’ll plant parsley next year; we haven’t even clipped anything off of it yet!

Parsley

Here is the oregano that has managed to grow.  I did a lot of reading this morning on oregano and it is said that it can grow 30 inches tall.  Well, mine just seems to be spreading out like a ground cover or a weed!  With as small as these leaves are, I can’t imagine trying to pull each leaf off and put in the dehydrator.  I’ll probably just leave it on the stem (when the time comes) and dry the whole thing.  Basil and oregano are by far my two favorite herbs and I use them quite often.  I don’t really use anything else except garlic salt.

Oregano Plant

Here is the cilantro in bloom with its white flowers.

Cilantro in Bloom

And the basil continues to grow.  It is now also beginning to flower.  I plan to allow one of them to flower so I can gather the seed, but I’ll clip off the others so we get a lot of basil.

Basil

Also planted in the herb garden was some Greencrop green beans.  16 were planted and only eight came up.  I had to re-plant eight a week ago and none of them have sprouted yet!  Just seems that no matter what kind of green bean that is planted – only about half of it germinates.

Greencrop Green Beans

Kennebec potatoes are doing well – still.  Nothing much going on with them – but this patch is heavily flowering now.

Flowering Kennebec Potatoes

Figured I’d take a quick picture of the Granny Smith apple tree.  It only has one apple on it now since all of the others were removed; the branches just cannot support them.  But, most of the leaves have been completely eaten by the Japanese beetles.

Granny Smith Apple Tree

The back garden is still just how it was – can just barely walk through it.

Back Garden

This is one of the Burpee Pickler cucumbers.  While you can’t really see it in the picture, there is a small cucumber starting on it.  Lots of flowers on the plant.

Burpee Pickler Cucumber

And one of the Sugar Snap peas.  I am leaving the rest of the peas on the vines so I can save the seed for next year.  Hopefully it turns out to be a success.

Sugar Snap Pea

The side garden with the tomatoes still looks the same – overgrown and out of control!

Side Garden

The Red Cherry tomato plant still keeps on climbing and won’t stop!Red Cherry Tomato

The Roma tomato plant has dozens of small tomatoes starting.

Roma Tomatoes

And the Best Boy tomatoes also have large fruit on them as well!  Going to be a good year for tomatoes I’d say!

Best Boy Tomatoes

Going to the front yard – let’s look at the marigolds.  These things just keep growing and putting on more flowers!  Looks very well and has filled in the area beside the road very well.

Marigold Flowers

A total view of the front garden:

Front Garden

And one of the best-looking California Wonder pepper plant:

California Wonder Pepper Plant

Here is the one large radish plant that I’ve let go.  I’m waiting for the seed pods to ripen so I can save this seed as well.  You’ll notice green little pods; these hold a few radish seeds in each of them.  They’ll turn brown just like green beans of peas when they are ready.

Radish Seed Pods

I’m going to see if I can get anything out of the Green Goliath broccoli as well.  This plant was left in place and it has a large shoot on it now.

Broccoli Shoots

What about the Copra onions?  Well, the onions have really taken off and they are bulbing well now.  Here is a photo of one from the front garden:

Copra Onion Bulbing

And one from the back garden where it sits in a foundation block:

Copra Onion Bulbing

Now, moving on to the next part – the corn.  I posted on GardenWeb about being upset that the Silver Queen corn was losing much of its pollen before any silk even emerged on the plants.  Well, FINALLY yesterday a few Silver Queen corn had silk on them!  Today there were another six that put on silk as well.  I have been babying these things lately and have been giving them all a good amount of compost tea for the past three days.  Hopefully all of this extra ‘fertilizer’ is what is causing them to spurt up and add the silks.  It was going to be really bad if – just like last year – all of the pollen was gone and we didn’t get much of any corn.  Now, we still may not get very much – since only eight of 36 Silver Queen plants have silks on them.  Most of the plants also have two – or even three – areas where ears of corn are developing.  Would be nice if we get an average of two ears per stalk for a total of 72 ears.

Silver Queen Corn

Something i am going to pay attention to as well is these suckers at the bottom of the plants.  This one alone has three suckers coming from the bottom!  If there are not any ears that grow on these suckers, I’ll know for next year to cut these off so it doesn’t steal nutrients from the main plant.

Silver Queen Corn Suckers

Now – the Sugar Dots corn.  A guy on GardenWeb mentioned that they are stunted because of nitrogen deficiency.  I already figured this was the problem – but what is interesting is the area the Sugar Dots was grown in is NEW soil that was just all added this year.  However, it was tilled in with the underlying clay soil which may be causing part of the problem.  The Silver Queen corn is HUGE and doing very well (minus the silking problem) – and that soil was all put in last year.  Below is one of the ears from Sugar Dots.

Sugar Dots Corn Ear

That is all for this week.  Now I need to go get started taking out the cabinet from the upstairs bathroom and some of the sofet that was built (like a box of drywall up near the ceiling).


A post of Garden Pictures

A post of pictures – yes, a lot of pictures.

This morning I started making my rounds around the garden before it got too hot.  It is over 92 degrees outside now!

We haven’t had any rain in a few days (going to possibly get more tomorrow) so I turned the irrigation system on to the front garden and the garden beside the house.  The garden behind the garage was still soaked with water since it doesn’t appear to drain as well.

After doing that, I had to manually water the potatoes in the buckets next to the house since they don’t get any rain under the house overhang.  Same with the onions in the front yard and some flowers in containers.

I looked at the apple tree and I made the decision to remove most of the apples.  The apples were getting larger and it was pulling the branches down.  I didn’t want any more permanent damage done to the tree if it doesn’t need it.

Premature Granny Smith Apples

Kind of a shame – but they went into the trash.  Especially being Granny Smith apples, they are already sour – but since they were picked very early, they would be extremely sour.

After this, I picked a few peas; just four ounces worth.  The peas have just a few flowers left on them but most of them are just the vines without any peas.  This year it just turned too hot very quickly so the cool-weather crops suffered – like the peas and lettuce.

Peas

Next – time to pick the cilantro!  The cilantro has already began to bolt!  What does bolting mean?  Well, it means that the center stalk of the plant begins to grow exceptionally high compared to the rest of the plant and this is where the the flowers and seeds are formed.  Here is the cilantro plants bolting.

Bolting Cilantro

There are three in the above picture to the right and one small cilantro plant to the left.  You can see the difference in height versus the plants.

There isn’t much below the cilantro plants because they were harvested today – got about 10 ounces of leaves/stems from them.  Cilantro has a very soapy smell – and it tastes like soap too.  Not sure why it is so popular, but it is added to salsa.  This is what the goal was for this year – but the cilantro has pretty much finished up before the tomatoes have even ripened.  Below shows all of the harvested cilantro.

Harvested Cilantro

As I read other places, cilantro does have a large tap root.  This is why it does not transplant well.  It almost looks like a carrot.  The tap root looks to be just as long as the bed on the driveway was deep.

Cilantro Taproot

I didn’t want to put the cilantro in the dehydrator because of how long it took the basil last time.  So I took the stems and put them in bundles and tied them with a rubber band.

Bundled Cilantro

I had three of these bundles.  So I tied each of the bundles together and then hung them upside down from a small hook we have between the kitchen and the hallway.  This will allow them to dry.  Once they get closer to getting dried, I’ll take them down and might put them in the dehydrator for a bit.

Tied Cilantro

Alright.  All done with the cilantro-talk now.

I did use the dehydrator one other time this week – and that was to try dehydrating strawberries.  I wasn’t sure what they would be used for, but it was a bit of an experiment and to just use some of the strawberries we’ve been picking lately.  We picked four pounds at the beginning of this week.

Dehydrated Strawberries

The dehydrated strawberries filled half a herb container.  This came from just one tray of strawberries (out of the four total).  So two trays of strawberries would have filled this up!  But, the dehydrated strawberries are a bit crunchy and hydrate when you chew on them.  But if the strawberries aren’t very sweet, they will be just as sour after dehydrating them.

Speaking of strawberries – another three pounds was picked today!  That is seven pounds of strawberries in a week!

Tri-Star Strawberries

Moving on to the next produce for the day – more basil leaves.  First, here are the basil plants before the leaves were picked.

Basil Plants

Here is all of the leaves that were picked – amounted to around four ounces worth.  It took a good 20 minutes to go through the 15 basil plants and pick out the largest leaves again.  By choosing the largest leaves, you get ‘more bang for your buck’ when you pick them.  It also helps to open the ‘canopy’ and allow the sunlight to get to the other leaves that still need to grow a bit more.

Basil Leaves

This time I plan to leave the basil leaves out for a bit and then I might put them on the dehydrator – if they can be done in a day.  Last time it was way too much to let the dehydrator run for two days.

Now with all of the produce out of the way that was picked today, lets go on the garden tour again.

The usual side garden pictures.  Potatoes are in the bottom of the picture and all of the tomatoes are behind the TV antenna tower.

Side Garden

This sole plant is the Red Cherry tomato plant.  There are a few small cherry tomatoes that are yellow and just starting to ripen up.  This plant is now at the top of the THIRD tomato cage that I stacked.  Therefore, this plant is now well over my head – about seven to eight feet tall.

Red Cherry Tomato Plant

And the other tomato plants – one is a Roma tomato and the other five are Best Boy tomatoes.  Can’t really tell how many are planted here because they have all grown together.

Tomatoes Growing Together

Moving on to the back garden.  It doesn’t seem like too much is happening back here.  But this is where I am getting most of the peas – from the Sugar Snap pea plants.  The cucumbers were also planted back here as well and they are taking off.  Most all you see below is Kennebec potatoes covering everything.  There are some Greencrop green bean plants that are hidden under all of those potatoes unfortunately.

Back Garden

Here are the two largest cucumber plants.  This one has a nice bloom on it already and it is the Burpee Pickler cucumber plant.  I planted three of these.

Burpee Pickler Cucumber

Next is the cucumber plant that has grown to the top of the four-foot fence already.  This is the Straight Eight cucumber.  Also planted three of these.

Straight Eight Cucumber

Next is to the potato “bin” and the carrots.  Not really a potato bin since I am not filling it up like I did last year.  At least this year all six potato plants have survived and doing very well.

Kennebec Potatoes

And the carrots.  These seem to be filling in fairly well now and getting tall.  This are a mixture of Burpee A#1 and Sugarsnax carrots.  The Sugarsnax carrots seemed to sprout before the Burpee A#1 carrots and grew a bit faster.  Whatever got in and killed a lot of the carrots seemed to dramatically affect the Burpee A#1 carrots – and took out probably 50% of them.  It was less disastrous with the Sugarsnax and maybe 60 – 65% remained alive.

Sugarsnax Carrots

Let’s take a break from greenery and see some nice flowers.  The marigolds along the road in front of our house are very bushy and the flowers are coming along well this week.

Marigold Curb Appeal Project

While hard to see in the above photo, most of those are pretty large flower heads.

Flowers

And lastly – here is the Rose of Sharon “tree” in our landscaping between the driveway and sidewalk.  The white flowers with a hint of red in the middle is nice – but I would have liked them to be all colorful.  Oh well – we got the “tree” for free from the in-laws so we can’t complain about free.

Rose of Sharon Bloom

OK – so the last area of the tour – the front garden.

Front Garden

Most of the broccoli has been pulled out – except for two.  I’m hoping to maybe get some seed from them.  I’ve had another Ventura celery plant die this week; it seemed to have some kind of white-ish fluid down by the ground level and the stalks were split open.  With this hot weather we’ve had, I just don’t know whether I should be pulling all of the celery up.  Some also have some yellowing leaves as well.  We’ve had a substantial amount of rain to keep them hydrated lately – about everyday this week we had at least a half inch or more of rain.

Notice the difference with the corn?  Well, the Sugar Dots corn is on the left and it is a yellowish-green color.  The Silver Queen on the right is a full dark green.  The Sugar Dots have begun to put the tassels on and drop pollen.  There are around five or six plants dropping pollen – but only two of them have silks on them.  So I did my usual manual corn pollination by cutting all of the silks to an even length and shaking the tassels to get pollen into a bucket – then using a paint brush to paint the pollen onto the silks.  I then place a clothes pin up by the tassels with the date so I know to come back 20 days from that date and harvest it.

Closer view of the Sugar Dots corn.

Sugar Dots Corn

Closer look of the Silver Queen Corn.

Silver Queen Corn

It looks like we are going to have a decent harvest from the Silver Queen Corn – as long as the tassels don’t begin shedding pollen until the silks emerge (had that problem last year with the Peaches & Cream corn).  Most of the stalks all have two areas where you can tell an ear is going to emerge.  Yay!  Glad that the Silver Queen is going to put on two ears of corn so we’ll have ample this year (and will probably make up for what we don’t get from the Sugar Dots corn).

And the last photo is from a California Wonder pepper plant.  I would really think the peppers would be loving this hot weather.  But, it just doesn’t seem like the pepper plants are doing nearly as well this year as what they did last year.  But, this one pepper plant is doing the best out of all eight and it does have a few peppers on it.

California Wonder Peppers

Welp, after a post of lots of pictures, that is all for the garden tour.  I’m debating about making a YouTube video and just going around the garden and narrate a bite.  Some folks like to see videos with narration rather than reading and viewing pictures.

Garden Update / Drying Herbs (Basil)

Been a week since I’ve last posted a garden update.

Here is a lot of photos from the garden – then followed up by my first time drying herbs (basil) with the Nesco FD-80 dehydrator.

Starting off with the herb/lettuce garden.  I’m not too happy with Mother Nature this year.  It has turned off incredibly warm and therefore the cool-weather crops have suffered dramatically.  We’ve had less than two pounds of lettuce this year and less than a pound of peas.  Last year we had 12 pounds of each.  The hot weather has stayed in the upper 80s to lower 90s this week.  Summer this year is exceptionally hot!

The basil is doing well along with the cilantro.  I’m surprised the cilantro hasn’t bolted yet.  However, none of the oregano came up and the parsley is still very leggy and not doing well.  I even seeded at least five to eight seeds of oregano in each area – times 16 areas!  That is a lot of seed.  Oregano seed was so tiny; I’m amazed that something could even grow from that small of seed!

The potatoes in buckets are to the left in the picture below – and they aren’t looking nearly as good as those planted in the ground.  But, this is an experiment to see how well they do.

The basil is in the very back of the photo, cilantro in front of the basil, lettuce in front of the cilantro, and then the parsley at the very bottom of the photo.
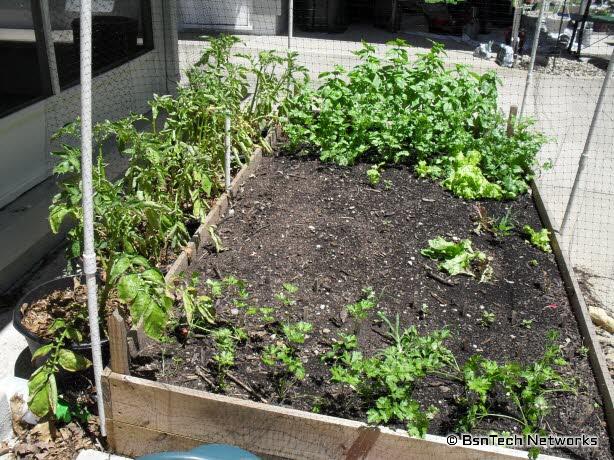
Patio Herb & Lettuce Garden

Here is a closer look of the cilantro and basil.  I just plucked a good helping of basil from each of the 15 plants that came up and put the dehydrator to use today!
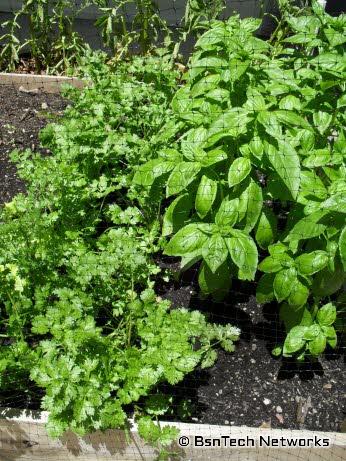
Cilantro and Basil Plants

Here is the old potato bin.  Now it just has potatoes in it and I didn’t build the bin up like I did last year.  What a difference.  All six potatoes are thriving and doing well.  I did build up the “bin” by an extra six inches and then filled it in with leaves – so this is like hilling up the potatoes.  The potatoes grow above the seed potato that you plant – so it is important to hill up or provide enough growing room for all of the potatoes.  If the potatoes get sunlight, they turn green and are poisonous at those spots.
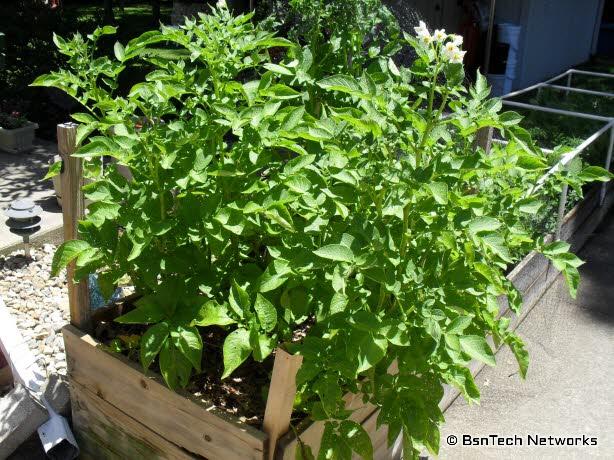
Kennebec Potatoes

Behind the potatoes are the carrots.  The carrots didn’t recover as well as I hoped they would.  Last year we had almost 17 pounds of carrots and I think we’ll be lucky to get 10 pounds this year.  I re-seeded all of the areas where the carrots died due to a disease (probably damping off disease).  Dozens of them came up – but the original carrots that survived damping off have easily fought the newer carrots for sunlight and most new carrot seedlings have been killed off from this.

Last year this entire 2 x 13 area was completely filled with greenery with zero dead spots.
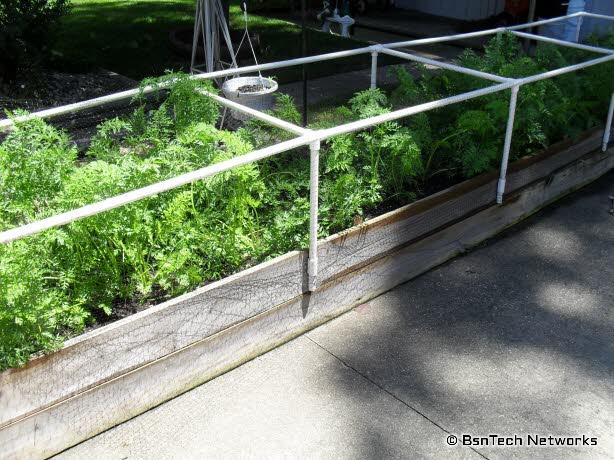
Carrots

Going to the side garden.  There has got to be something in the soil over here!  These are the largest tomato plants that I’ve ever had!  The tomatoes were planted two feet apart from each other with a potato planted between each tomato plant (trying to use all the area possible).  The tomatoes have all completely grown together and the potatoes are vying for sunlight!
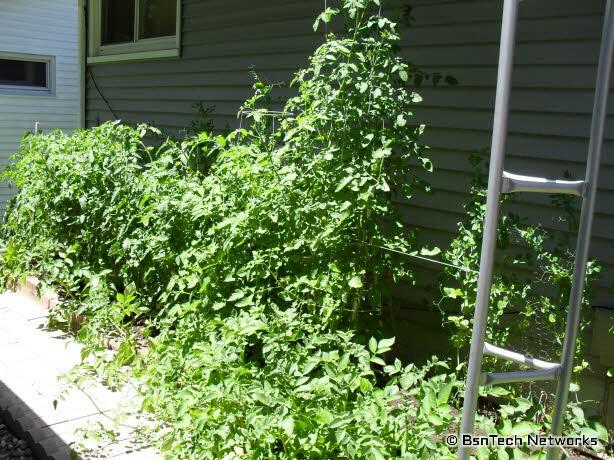
Side Garden

Look at that huge tomato plant in the above picture!  It is over six feet tall now!  That is the red cherry tomato plant.  Here is a closer look.
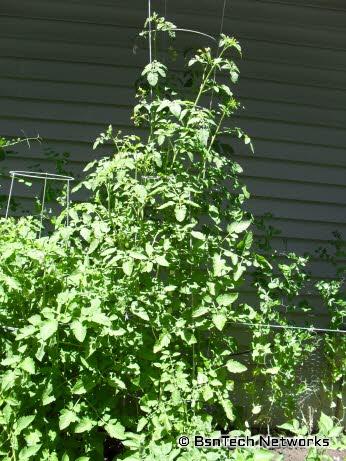
Cherry Tomato Plant

Here are some of the red cherry tomatoes on the vine:
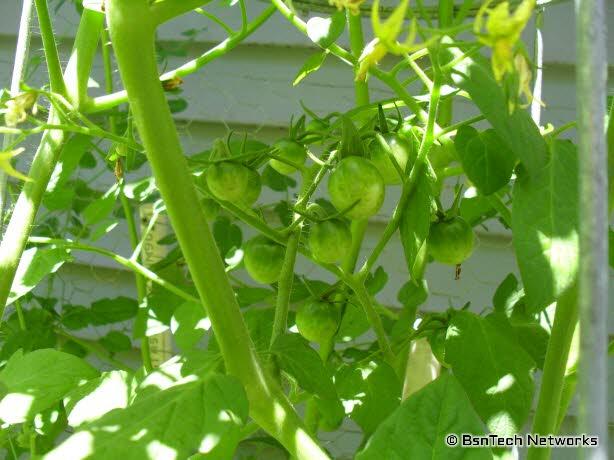
Red Cherry Tomatoes

And some Best Boy tomatoes on the vine:
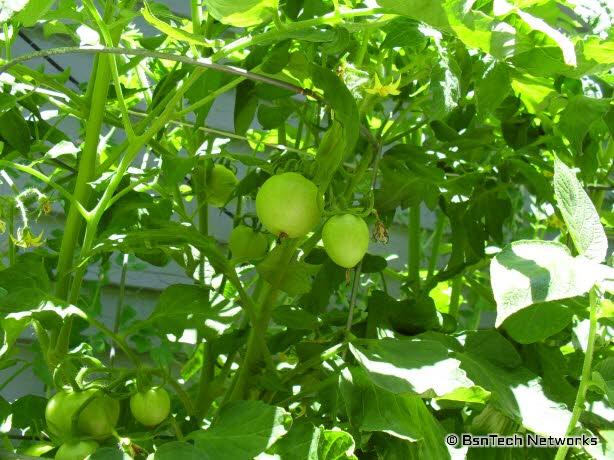
Best Boy Tomatoes

Now to the back garden.

The potatoes have the reign back here.  The potatoes were planted a foot apart down the right side of the walkway (which you can’t hardly see now).  27 total on that side.  They were then also planted on the left side – but only about 14 on this side to leave room for lettuce in the back.  There are green beans under the potatoes on the right sides of the board – but you simply cannot see them because of the potatoes covering everything up.
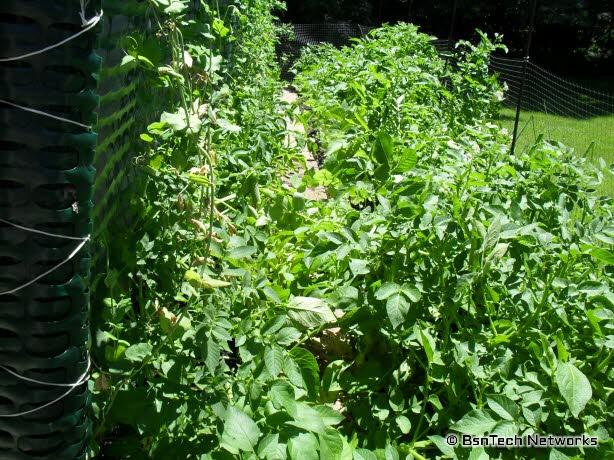
Back Garden

A view from the other side so you can see some of the lettuce (on the left) and some green beans (on the right).
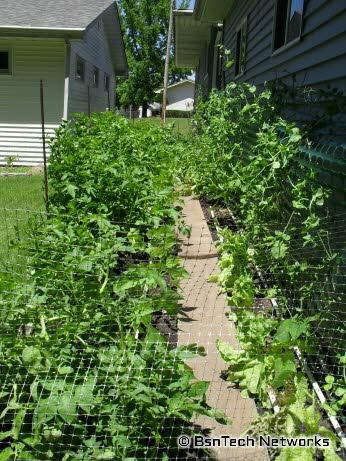
Back Garden

And a side picture of the garden – where you can see the onions that were planted in the foundation blocks trying to fight for some sunlight against the potatoes!
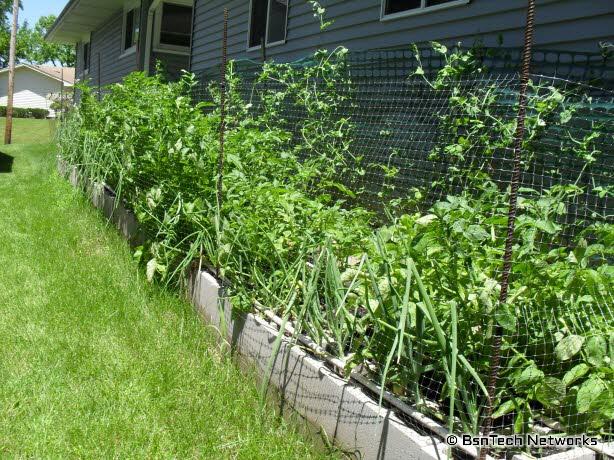
Back Garden

Going to the fruit area now – here is the Flame Bunch grapevine.  This sucker is huge and has made it all the way to the end of the trellis (where the concord grape vine is – but isn’t doing nearly as well).
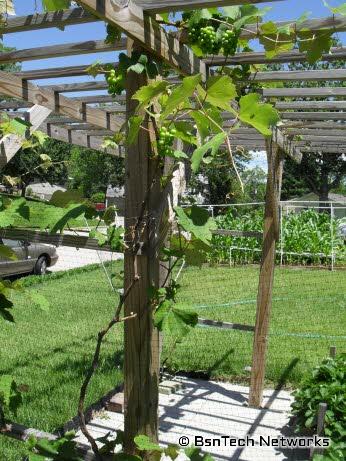
Grape Arbor

Did you catch the top of the photo?  There are quite a lot of bunches of grapes that are coming along well.  Here is a closer view.
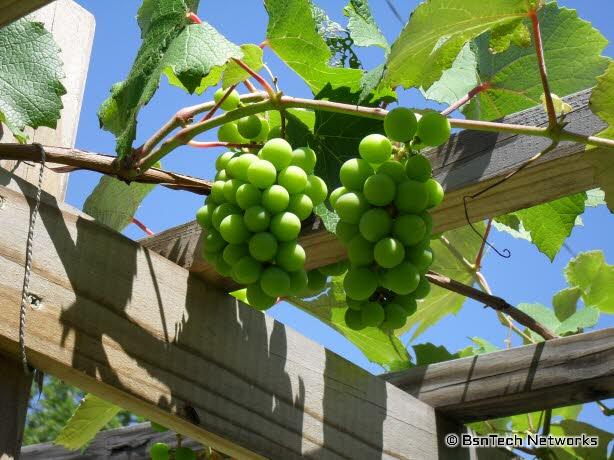
Flame Bunch Grapes

The strawberry pyramids by the grape arbor are still full of greenery.  I cut off well over 50 runners from the two strawberry pyramids and took them to my parents house.  So they have quite a bit of strawberries planted in their garden now.  While you can’t see them in the picture, these Tri-Star strawberries are STILL producing!  We will have another picking of strawberries in a couple of days.  While the Tri-Star strawberries aren’t nearly as large as those huge berries you buy at the store, this variety does continue to produce fairly evenly throughout the year.  The large strawberries at the stores typically produce once in the year and that is all.
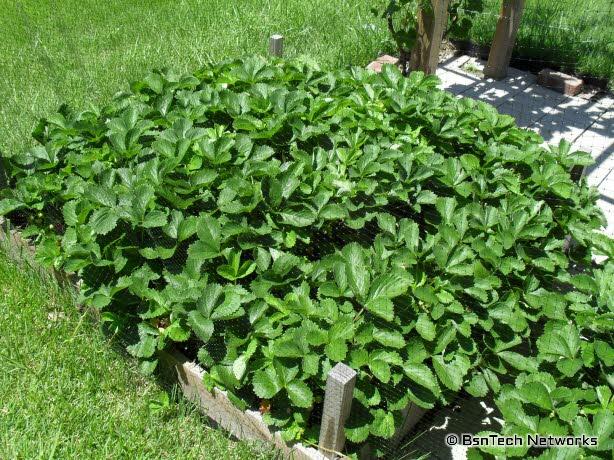
Strawberry Pyramid

Lastly for the fruit – the Granny Smith apple tree.  I’m going to have to provide some support for the limbs with apples on them.  This one is drooping quite a bit because the weight of the apples.  I’ve contemplated cutting the apples off (maybe seven on the tree in total), but may just get some support to tie the limbs together so we can have some apples.  The Japanese beetles are out already and one of them is on a leaf of the apple tree below.
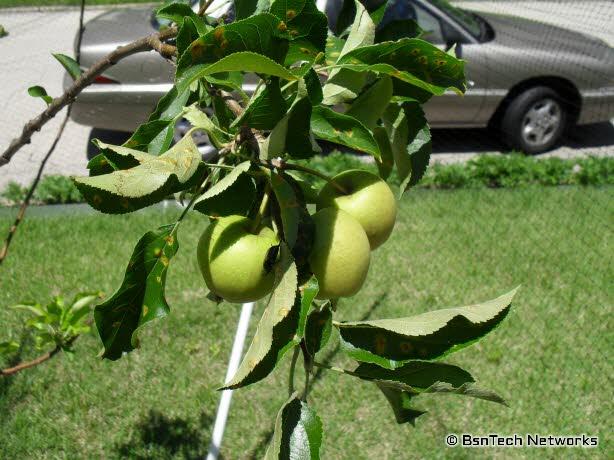
Granny Smith Apples

Now for the garden in the front.  The neighbor asked me today when I was going to get the combine out to harvest the corn!  The Silver Queen corn is at least five feet tall now – but the Sugar Dots corn is still lacking by at least a foot – if not more.  I am wondering now if the Sugar Dots corn I bought online was tainted.  Last year the Sugar Dots corn was very short as well and the cob was quite small.  I ordered the seed from a website I’d never heard of before – so that is my fault.  It is possible that they somehow bred a short corn variety in which is causing it.  The Sugar Dots corn is in the front of the picture below; the Silver Queen behind it.
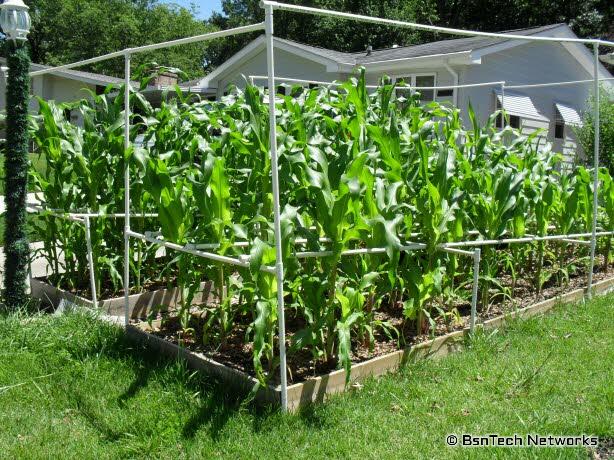
Front Garden

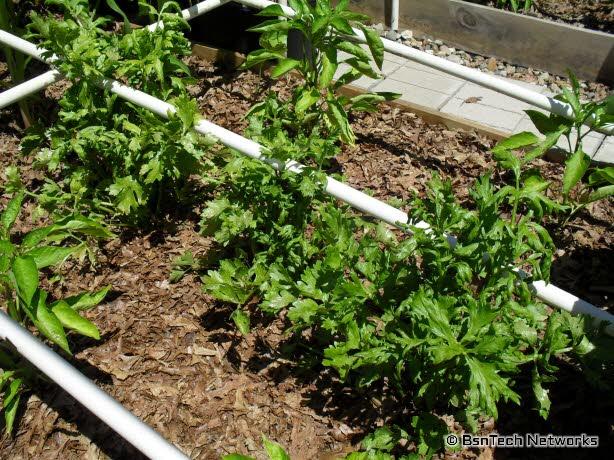
Also in the front garden is the Ventura celery.  It is still coming right along – but it doesn’t seem to be growing anymore.  I bet it is because of the very hot temperatures we’ve had.  I’m not exactly sure when I need to cut out the celery and start to use it (going to try and dehydrate some of this as well).  I know if I start seeing flowers or buds, it is time to cut.  Just hope that won’t be too late.
Ventura Celery

And one of the California Wonder pepper plants.  This has a few small peppers already started.  The pepper plants have been coming along way lately – but about four of the eight are doing well – the other four are still quite small.
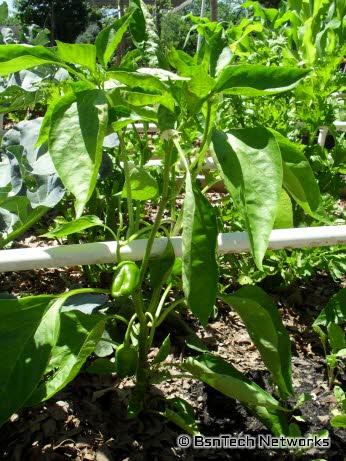
California Wonder Pepper

I’m going to see if I can save some radish seed this year.  Here is a photo of a very tall radish stalk with flowers on it.
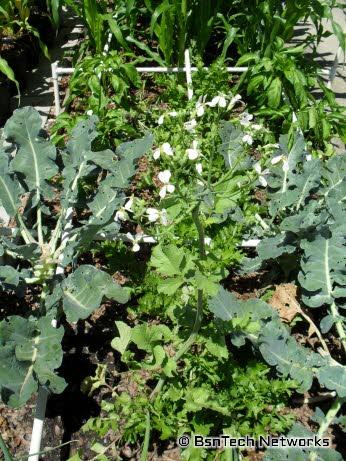
Radish Flower Stalk

You can see the old broccoli plants in the picture above.  I was hoping to maybe get some broccoli seed to try my luck at them – but I’m thinking I need to just cut most of these out – and maybe leave only one with some flowers on it.  They are just eating up the nutrients in the garden and it is much too hot for them to make any side shoots.  Plus, we have more than enough broccoli for the year with 12 pounds!

Here are the Copra onions in the front.  The onion “leaves” aren’t really growing anymore – but I have noticed that the bulbs are getting a little larger.  Still a long ways to go though.
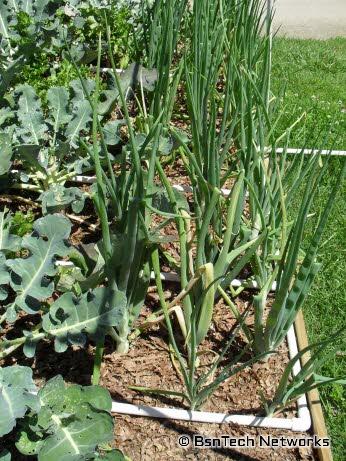
Copra Onions

And lastly, a side picture of the Silver Queen corn.  The Silver Queen corn has many side shoots on them that almost look like a full corn stalk in itself!  I’d say that close to every Silver Queen corn stalk has at least one side stalk – and some have two!
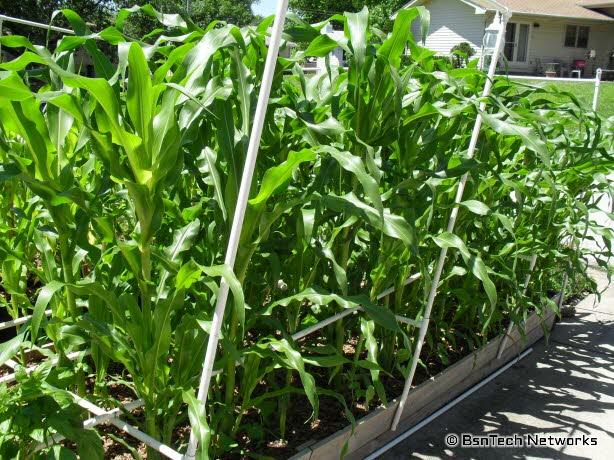
Silver Queen Corn

Lastly before going into the dehydrating, the curb appeal project with the flower bed is growing very well.  Many marigolds have the flower heads on them and a few have opened up already.  The marigold plants are very large – and it has competed most of the ornamental pepper plants out of the sunlight!
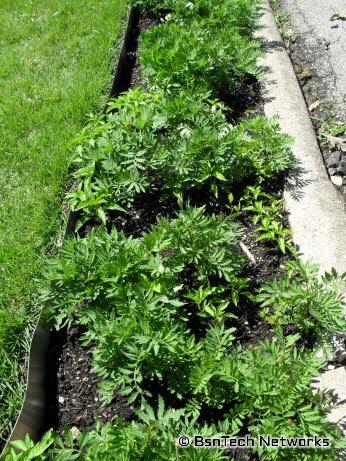
Flower Curb Appeal

Here shows a marigold flower open (reddish and orange color flower) along with another flower that is still open.
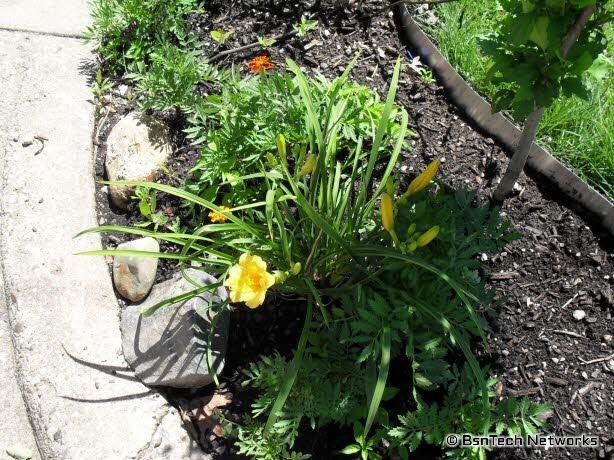
Marigold Flowers

That is all for the garden update!


Dehydrating Herbs

This is the first year that we are dehydrating herbs.  We got a good deal on a Nesco FD-80 American Harvest dehydrator.  The nice thing about this dehydrator over others is that it is square-shaped and not circular!  Because it is square-shaped, it gives a lot more room for putting your items you’d like to dehydrate!  We purchased this at Amazon several months ago for $45 with free shipping.  At this moment, they are currently selling for $58 with free shipping.

The Nesco FD-80 dehydrator came with four trays with the one we received.  I picked a lot of basil leaves today to try my luck at dehydrating basil.  The basil plants are quite large so it was time to thin them out a little bit.  I just took some leaves here and there from the plants – but mostly the largest leaves.  The smaller leaves will continue to grow and get larger, but the larger leaves are at their prime and are ready to be used.

My first bit of luck was picking just enough basil to fit on all four trays.  I could maybe fit a few leaves extra on the trays if I really scrunched them together, but overall I picked just the perfect amount!
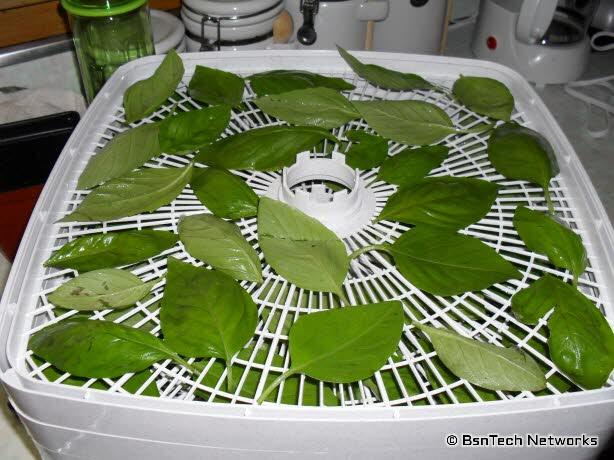
Dehydrating basil

I washed all of the basil leaves first to get any dirt off of them and then placed them on the trays.  They all are spaced well and do not overlap each other.  You don’t want to overlap as much as possible – otherwise those areas won’t dehydrate as well and will require more time.

The Nesco FD-80 dehydrator has a good heater and temperature control right on the top of the unit.
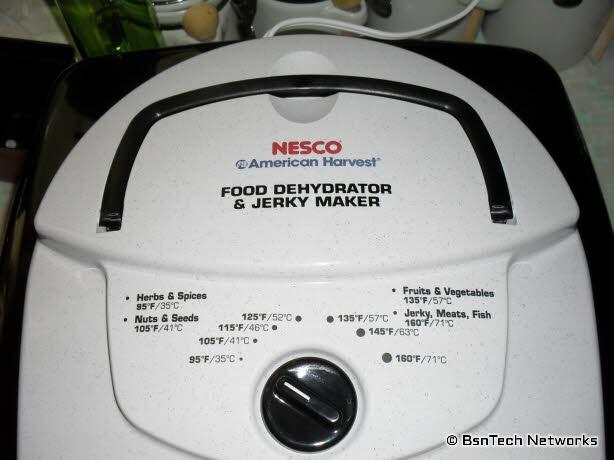
Nesco FD-80 Dehydrator

Very nice!  Right on the top it says to dry herbs and spices at the lowest setting – 95 degrees.  Perfect and easy without having to consult the manual.

The question is – how long should you dry them?  Well, this is very experimental.  You just need to check on them every now and then (about once an hour).  Once they are done, they should crumble easily – which means they are fully dehydrated.  If they don’t crumble easily, wait another hour and check again.

How long did it take this batch of basil?  Well, the book that came with the dehydrator said it should take between 20 to 24 hours.  Nope.  Not even close.  It took about 48 to 50 hours.  I then started taking the basil off of the top tray and crumbling them.
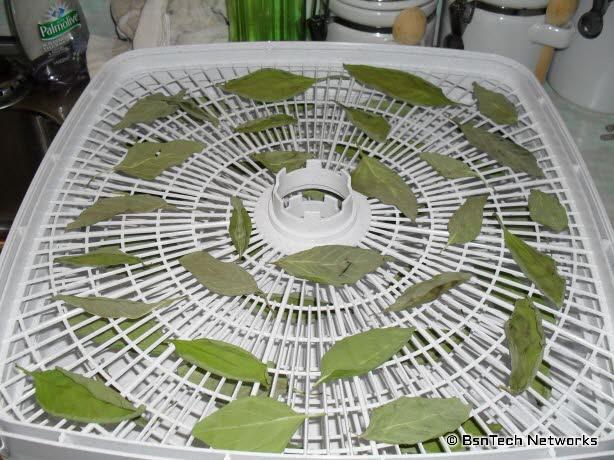
Dehydrated Basil

Wow!  Much smaller than the were when they went on the rack eh?  Yep.  When I got a couple of trays down, I noticed there were some larger leaves that were not fully done.  So even 48 – 50 hours wasn’t enough!  How much basil came out of a full four-tray dehydrator?
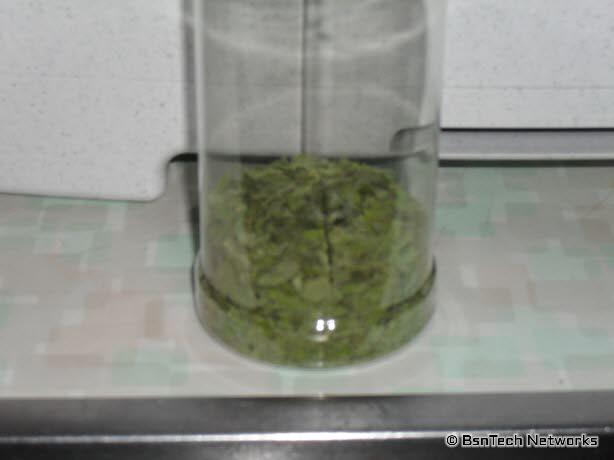
Dehydrated Basil

Not a lot.  Disappointing to say the least.  It managed to only fill a standard herb container up by about 1/5 or less.  So, after all that electric used on the dehydator, I found that it wasn’t worth the drying of basil in a dehydrator.  I’ll probably just put the leaves in a mesh bag or something for a week and see how they do next time.

Why You Should Have a Garden

Why should you have a garden?  Well, let me show you.

Today I picked quite a bit out of the garden.

Let’s start with the broccoli.  I planted eight Green Goliath broccoli plants – and seven survived (the other seemed to be a runt with very thick leaves and never grew after it was transplanted.

I picked the broccoli a little late; I should have picked it yesterday but I got too caught up in other things.  So it was picked this morning.  There was a bit of yellow and some of the flowers opening up on the head, but that is fine.  Out of all seven Green Goliath broccoli plants, there was a total of 12 pounds, 3 ounces of broccoli.  Yes – a huge amount.  That is up by quite a bit compared to last year when I planted the same variety and all eight made it.  Last year I got just over five pounds of broccoli – this year it has more than doubled!

Why the difference?  I am kind of wondering if the compost tea spray really has made a difference.  All of my plants are growing exceptionally well this year with spraying compost tea on the leaves once a week.

Green Goliath Broccoli

Here is the largest head that weighed in at two pounds, 8 3/8 ounces by itself!

Green Goliath Broccoli

The broccoli filled up five one-gallon freezer bags.

Green Goliath Broccoli

Moving on to the next produce – more lettuce!  A combination of Simpson Elite, Buttercrunch, and Red Salad Bowl.  As I’ve said previously, I most likely will not grow Red Salad Bowl again because the production just isn’t there compared to Buttercrunch and Simpson Elite.  However, there is 15 1/2 ounces (just shy of a pound) of lettuce that was plucked today.

Lettuce Harvest

And a few Crimson Giant radishes were picked; four total weighing in at 7 3/8 ounces.  These radishes are huge and quite pungent – just the way I like them!

Crimson Giant Radishes

And lastly, a few peas.  I’m not too happy with the peas this year.  There was over 12 pounds of peas last year and so far this year, I’m well under a pound.  What was picked today is only 2 3/8 ounces worth.  There is one Super Sugar Snap pea below (the very big plump one) and all the others are Dwarf Gray Sugar peas.

Peas

So, the above pictures is why to have a garden.  It is quite satisfying to see what you can grow yourself – and know that you are the one that grew it from start to finish.  You also know how you grew the plants – and whether you used any kind of pesticides (I don’t use any myself).

Moving on to some other pictures.  The tomatoes are coming along very well.  Below is the Red Cherry tomato plant and you can see all of the blooms on it.  There are several little tomatoes already started on the plant.  The plant is already as tall as I am!

Red Cherry Tomato

Below is one of the Best Boy tomato plants.  You can see the tomatoes coming along well.

Best Boy Tomatoes

The Granny Smith apple tree has some apples on them that are still going strong.  Unfortunately, the tree just can’t take the fruit an they are still very small.  In the end, I’m going to have to pull these off shortly before it does damage to the plant.  I have finally managed to fully keep the deer out and away from the apple tree with the netting.

Here is the full side garden showing all of the tomatoes, potatoes, and peas.

Side Garden

Granny Smith Apples

The flower bed in the front yard that was my “curb appeal” project is growing rapidly.  The marigolds are growing very large – which I am happy about since it is helping to fill in all of the space.

Flower Bed and Marigolds

A photo of the front garden.  This is where the broccoli was cut out this morning.  Although the main head of the broccoli was cut out, this year I plan to leave the broccoli in place so that side shoots can develop and we can harvest those.  The onions are still hanging in there and the corn continues to grow.  Still, you can see the difference in the corn on the left and the corn on the right.  The corn on the left is Sugar Dots and the corn on the right is Silver Queen.  I’m not fully sure why the corn growing on the left is slower.  The same variety is in some buckets and they are doing just as good as the corn on the right.  The soil in the buckets is the exact same soil that was used to fill the bed on the left in March.

Front Garden

Moving to the back garden.  I cannot walk through it anymore!  The potatoes on the left have covered the walkway so it is pretty hard to walk through now.

Back Garden

The green beans – which you can barely see some of the white flowers in the bottom of the photo above – are doing much better than I expected.  Why?  Well, look where they are placed!  They were placed just to the right of the walkway and the potatoes are almost completely smothering them out.  This is why I planted more Greencrop green beans in the front garden between each corn stalk.  So far about 40 of the 50 beans in the front have come up.  But, below is a closer photo of one of the Greencrop beans with several flowers on it.  We sitll have a few freezer bags of beans from last year and we’re going to start getting more soon!

Greencrop Green Beans

That is all for this garden update.

Uneven Corn Growth & Other Pictures

What a nice break from the very warm weather we’ve been having!  It is only going to warm up to 76 degrees today and 79 degrees tomorrow.  We had some strong storms come through the area last night – but we didn’t see but a couple drops of rain from it.

I got the pressure sprayer out and sprayed down the foliage on all of the garden plants with some compost tea again.  I failed to do it last week – so maybe if I can remember, I”ll make this a habit to do every Sunday.  I do believe that the compost tea spray on the foliage is helping – although I haven’t been watering anything with it.  I am thinking I might be doing that soon with some of the corn in the front yard.

Below you can see the uneven corn growth.  The corn on the left is the Silver Queen corn; the corn on the right (and in the buckets) is Sugar Dots corn.  The Silver Queen corn has really taken off and is doing well – but the Sugar Dots corn doesn’t seem to be growing as quickly.  Both varieties of corn mature around the same time (around 90 days).  They were both planted at the same time as well.

Front Garden

The broccoli is still growing!  I am going to need to cut some of the heads soon I think.

Green Goliath Broccoli

Green Goliath Broccoli

The Copra onions in the front bed are doing very well too.  I took a picture of the base one of the onions.  Last year when I used sets, the bases didn’t get nearly this large – so hopefully these onions will start bulbing up soon and make some huge bulbs!

Copra Onion Base

The California Wonder peppers are not doing very well.  It does seem about four of them are doing alright, but they just are not growing very quickly.  A couple of them seem very stunted and have yellowing leaves on them.  Below is a photo of one of the stems of a pepper with a few flowers.

California Wonder Pepper

The carrots are still moving right ahead.  The carrots that survived the odd weather are growing well – but the recent carrots I planted about a month ago are still small and just getting their first set of true leaves.  I think the original carrots are going to suffocate the new carrots for sunlight unfortunately.

Carrots

The Basil and Cilantro are also growing very well.  The Cilantro had a problem staying upright and anytime I would water, they would flop over.  The Basil has at least doubled in size in the past week.

Herb Garden

The lillies out front are completely all opened and in full bloom!  These just continue to make more blooms each year.  Just four years ago, there were only two of these.  Now there are dozens!

Lillies

Going to the side garden.  The Red Cherry tomato plant is almost to the top of the second tomato cage that I stacked on top of the first one.  The Roma tomato (next to the Cherry tomato) is working its way into the second tomato caged stacked on it as well.  The five other Best Boy tomatoes are just to the top of the first cage.  This variety doesn’t seem to grow as tall as others (if I remember right) but does put on quite a good crop of tomatoes.

The potatoes (on the right side) are doing good.  The Dwarf Gray Sugar peas behind it all along the fence are flowering fairly well now.  However, due to the cool temperatures we had through April and part of May – and then the extremely hot temperatures, it doesn’t seem the peas are doing as good.  Last year I was out picking a lot of peas by now.  So far I’ve only picked a single Dwarf Gray Sugar pea and three Super Sugar Snap peas.

Side Garden

Then there is the back garden – it is getting overgrown with potatoes and is hard to walk down the path!

Back Garden

The view from the other side.  Here you can see some of the Greencrop green beans on the left side of the boards with lettuce on the opposite side.  We picked another approximate seven ounces of lettuce yesterday evening.

Back Garden

And a picture on the outer-side of the back garden showing some of the onions.  The onions are really struggling to contend with the potatoes that are growing into their turf.

Back Garden

And lastly, here is a nice clump of potato flowers from the back garden.

Potato Flowers