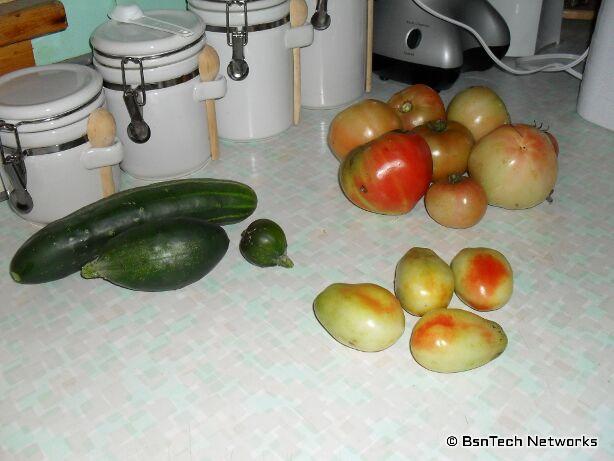
Tilling In Mulched Leaves

The weather has taken an unexpected rise!  This week the temperatures have been in the 70’s.  Unfortunately now with the time change, it gets dark by 5 pm and I get home less than an hour before that.  So that doesn’t leave much time to do anything.

Monday I got the rain barrels taken out of the loop for the water.  I put the regular downspout back into place so that water is not delivered to the rain barrels.  I also took one of those makeshift power sprayers (just attaches to your regular hose but has a very fine tip so it has a stronger stream of water) and cleaned out the more translucent barrel.  It was filled with algae and had a thick floating layer of algae on the bottom of the barrel where there was still a bit of water.  Not all of the algae came off and there is a substantial amount left on the sides of the barrel – but that is how it goes.

This past weekend and the weekend before I got a huge amount of leaves tilled into the front garden and the garden behind the garage.

Since we have a woods-like area behind the house, we have a huge bounty of leaves that we can use as free fertilizer and this greatly adds in some organic matter into the garden.

The neighbor used his blower and made some large piles of leaves in his yard.  I also raked our yard a few times.  Then I take our leaf blower – which doubles up as a mulcher – and mulched up all of the leaves and placed them in some large trash containers that the neighbor let me use.  He has two of these.

Lots of Leaves

I used one of these containers EACH on each part of the front garden.  After I filled the containers like the one above, I got into them and jumped on them to really compact and make more room.  I bet there was over 50 pounds of leaves in the containers by the time I was done.

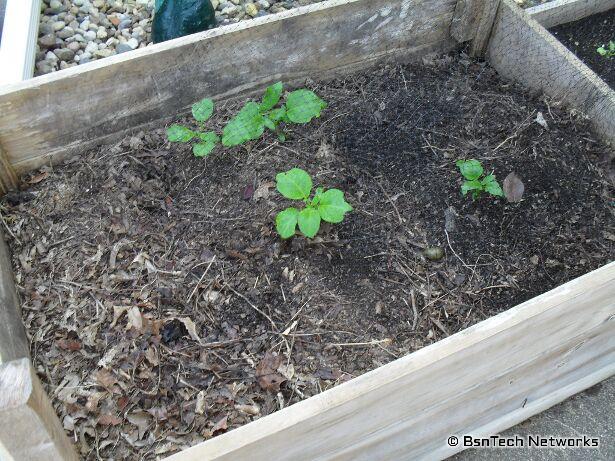
Surprisingly – two of these containers were fully tilled into the front garden on October 31st.  I expected to only fit one of these containers into the front garden – but nope!  After it was all tilled in, it didn’t even raise the level of the garden one bit!  It almost seems that there are places that need more soil added!  Where the heck did all the leaves go?

Tilling In Leaves

This past weekend I then added TWO more of these large containers to the back garden.  The back garden is about five feet wide by 27 feet long.  The front garden has two areas that are four feet by 20 feet.  So I was surprised that I fit two containers of leaves (probably 100 pounds) into the back garden.

Tilling In Leaves

I still need to till leaves into the garden that is next to the house!  Right now I have two 32-gallon containers full of leaves – but that is all!  That probably would be enough to put in that area – but I also need a good amount of leaves to mulch the garden next year (used both 32-gallon containers last year to mulch the front garden).  I also would like to hill up the potatoes next year using leaves instead of hauling in more dirt.  It will also make digging for the potatoes much easier with loose leaves than soil.

So, that is all that is happening around the garden.  Nothing growing – of course!  But I am surprised to see that the lonely carrot and the radish plants are still alive even after several frosts and some hard freezes!

I haven’t had the chance to tally up all of the data for this year’s produce but I will do that sometime before the end of the year.  I did just get all of the peppers cut up this evening from the last big amount.  We have been using them in salads and other dishes over the past two weeks – but the peppers were beginning to get a little soft – so it was time to cut them up and place them in the freezer.  Now we have about six or seven bags of peppers in the freezer.  I guess that takes the place of all the green beans that we had last year – that never produced well this year.

End of the 2010 Gardening Season

The gardening season has now ended for me this year.  We had freezing temperatures – not just a frost – on October 28th into the 29th.  It got down to about 27 to 28 degrees.  We had a very light frost a few nights ago – on October 22nd – but it didn’t damage any plants.

Because of the freezing, the rest of everything needed to be pulled from the garden.

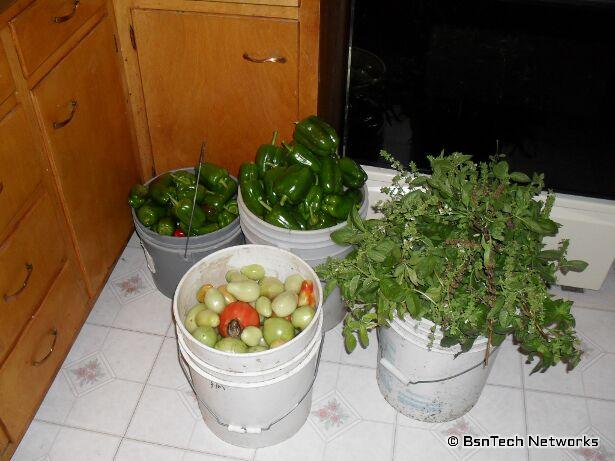
I started with the peppers.  Out of the eight California Wonder pepper plants, I didn’t expect to have very many peppers.  Throughout the season, the peppers seemed to almost be dormant; they did not grow nearly as well as they did last year and the production was down.

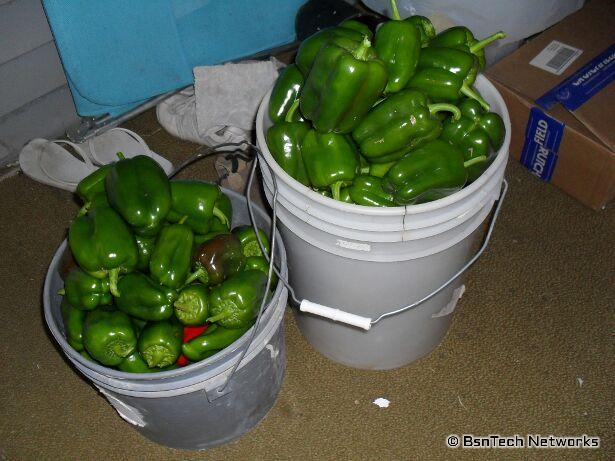
However, I went out with about a three-gallon bucket.  I quickly filled the three gallon bucket with peppers just from the first two plants!  When it was all done, I ended up having over eight gallons of peppers!  Apparently when the weather turned cooler in September from the very hot temperatures this year, the peppers put on dozens of blooms everywhere.  Maybe adding epsom salt around pepper plants also made a difference.

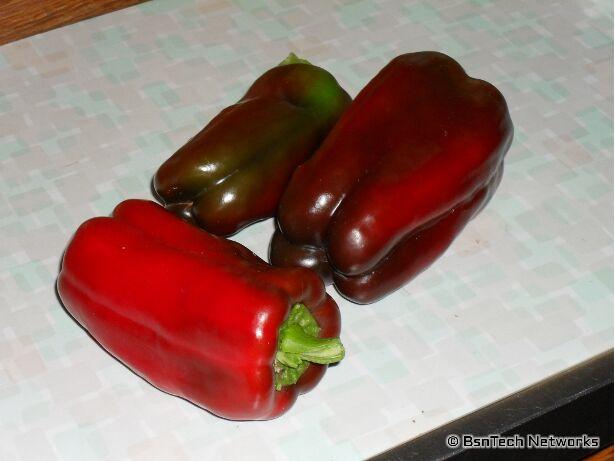
California Wonder Peppers

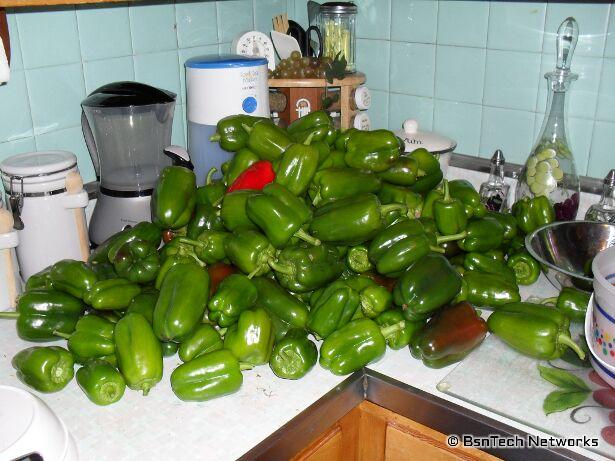
Now, look at them across the counter.

California Wonder Peppers

Wow!  It looks like a supermarket.  So how many peppers are there?  Well, there was a total of 146 of them.  A total of over 26 pounds of peppers!  If we were to go to the local grocery store and buy these (at a current price of $2.99 a pound), that is over $77 worth of peppers!  Unfortunately, we certainly cannot use this many.  I gave a good bucket of these to the neighbor – and am thinking that I may give at least another half or 75% of them away to the Good Samaritan Inn – which is a local day center in our community that provides food for the homeless.

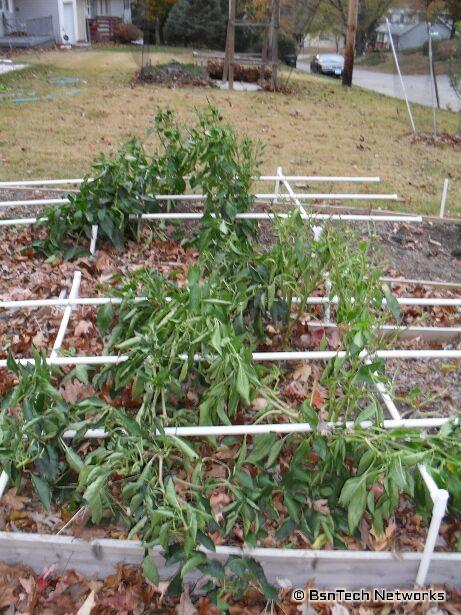
Now, the peppers are all empty:

Pepper Plants

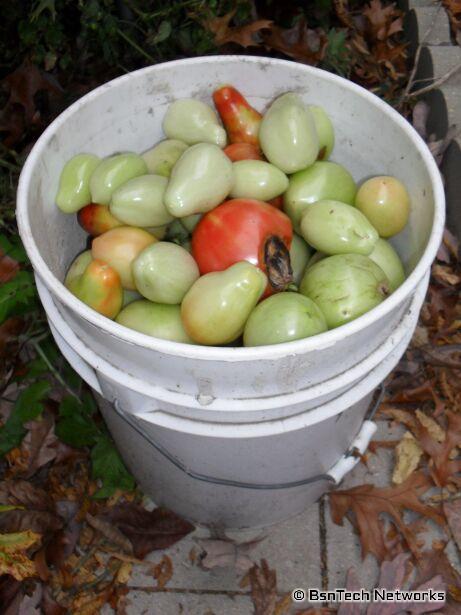
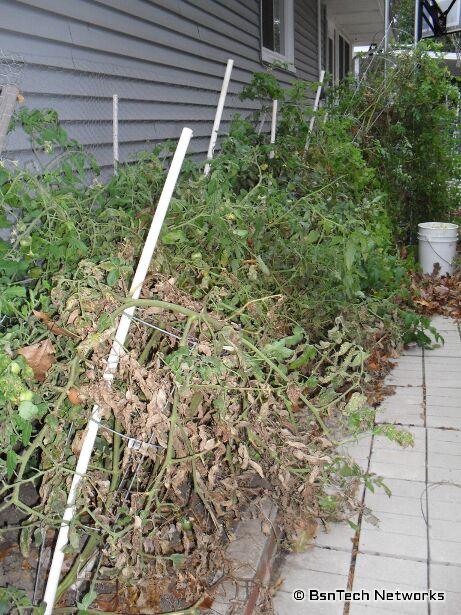
Next, I had to tackle the tomatoes.  I knew that I was going to be quite upset about what I was going to get from the tomatoes.  Sure enough, a full five-gallon bucket of tomatoes were picked.

Green Tomatoes

Something damaged the tomato plants quite extensively.  Last year I didn’t have that problem – although a fungus took them over.  This year, I think there was a lot of stink bug damage and something else that causes black spots on the tomatoes (not just on the bottom or top – so not blossom end rot).  Usually if we picked them just as they were turning pink, they would ripen inside and we could use them.  Otherwise if they ripened on the vine, they went bad.

So out of the year-end green tomatoes that were picked, it amounted to 19 Roma tomatoes and 82 Best Boy tomatoes.  A total of over 22 pounds.

Tomato Plants

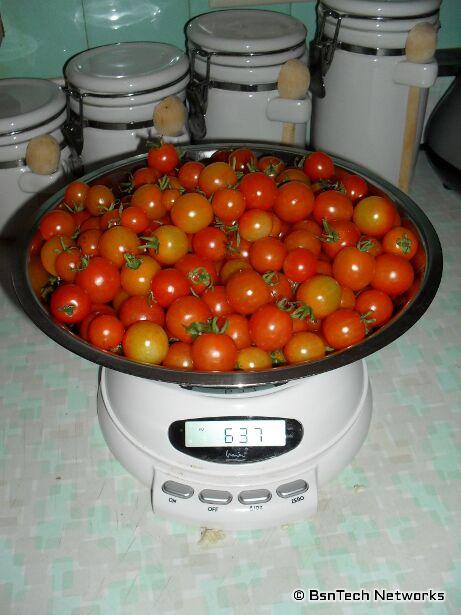
Earlier in the day, the wife spent some time and picked the red cherry tomatoes.  There was over three pounds of these and I shared half with the neighbor since we won’t eat this many.  It seems that once the end of the season gets near, we don’t eat nearly as many fresh veggies from the garden.

Red Cherry Tomatoes

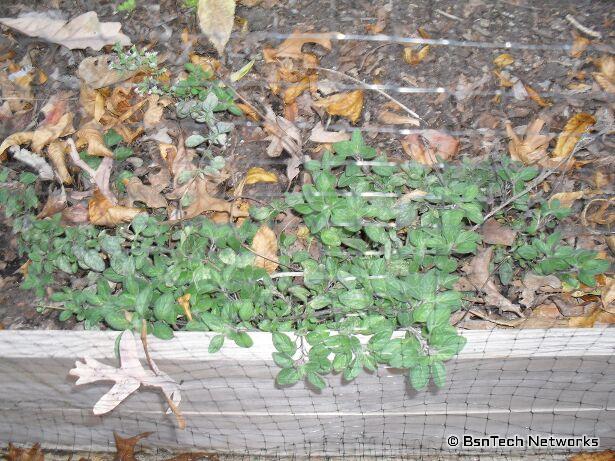
And lastly, the basil had to be picked.  First off, here is a picture of the oregano at the end of the year.  We didn’t get any oregano this year; just was too small.  Apparently it also needs a good year to get itself started.  I did see that there are a few runnings from the main plant that are rooting and starting a new plant, so hopefully we’ll have a good amount of oregano next year.

Oregano Plant

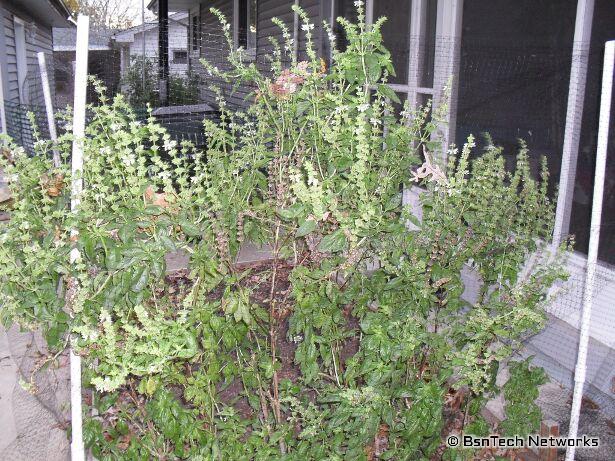
Now for the basil.

Basil

A lot of the leaves were just too small to use.  I am thinking next year I am going to attempt dehydrating full stems of leaves.  Plucking each individual leaf and then setting them on the dehydrating trays takes a good hour or more each time.  I cut down all of the plants and from all of those plants (about 15 total) at the end of the season, I kept about 6 1/8 ounces of basil and dehydrated it (which just completed just 15 minutes ago).

So, here is the full picture of the harvest before the big freeze:

End of Season Garden Harvest


Today was cleanup day.  The plants were looking very bad after they were frozen on the night of the 28th.  All of the fences and netting have been taken down, the rebar and posts taken out of the ground, and the plants all pulled up and thrown on the compost pile.

Over the past week, I have been mulching up leaves in bulk fashion.  The neighbor has two large trash containers so I completely filled both of those.  I even had to get in the containers and stamp down to compact the leaves to fit more in there.  I also filled three large trash containers of mine with leaves as well.  I’ll eventually get as many of these leaves spread over the garden and get them tilled in; hopefully before winter hits.  That will help to add a lot of organic matter and fertilizer into the ground.

Anyways, enjoy the pictures below of the year-end garden cleanup.

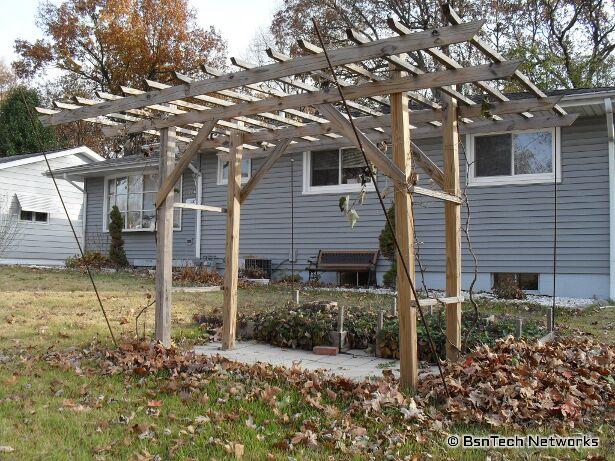
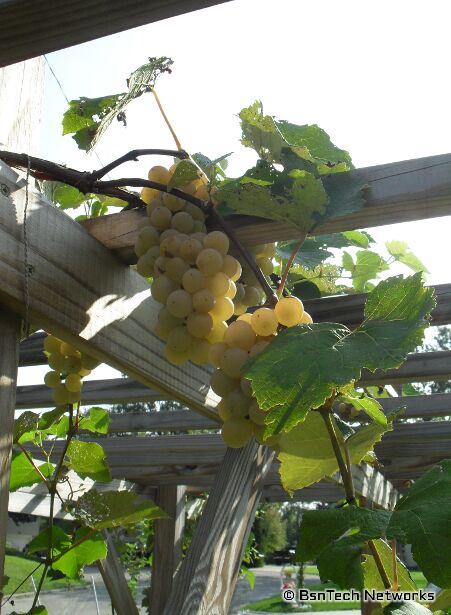
Below is the grape arbor / grape trellis.  The grapes vines have fully went into hibernation.

Grape Arbor / Grape Trellis

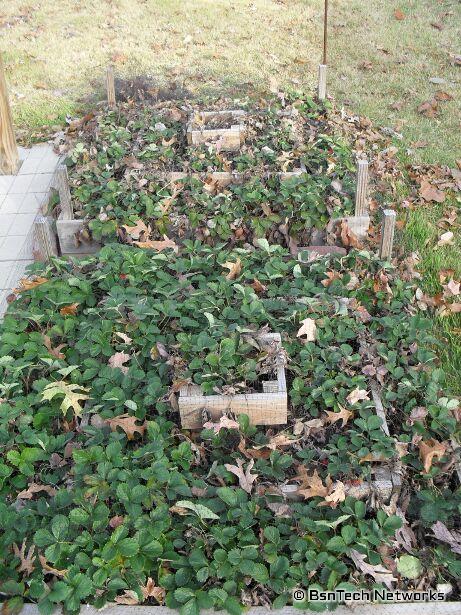
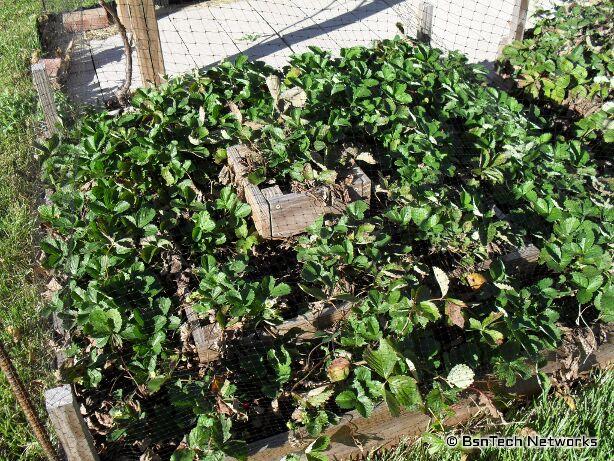
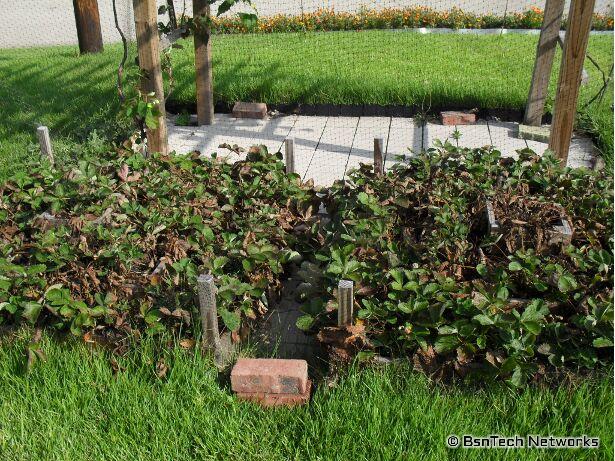
And the strawberry pyramids.  They have been covered to keep the deer from eating them and the stray cats from using them as a litter box.  The far strawberry pyramid doesn’t seem to be doing nearly as well as the other; I need to backfill these with compost as well.

Strawberry Pyramids

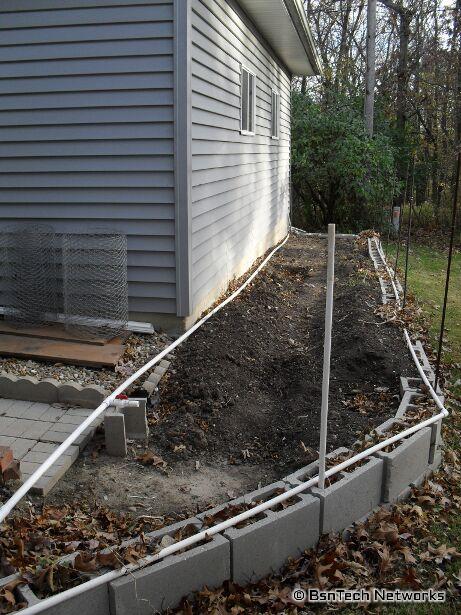
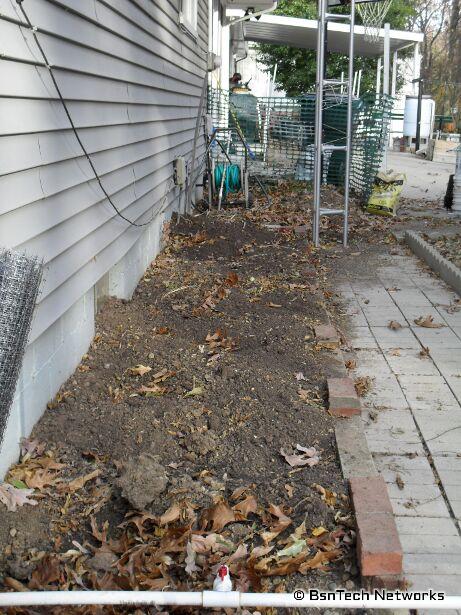
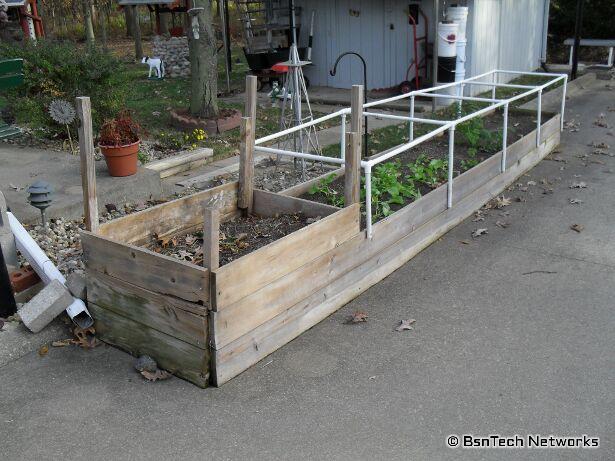
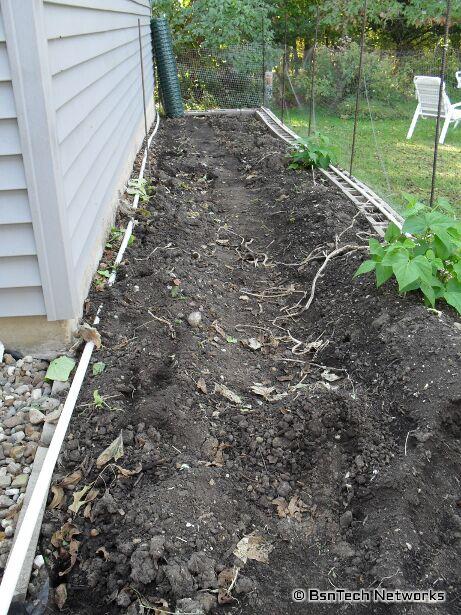
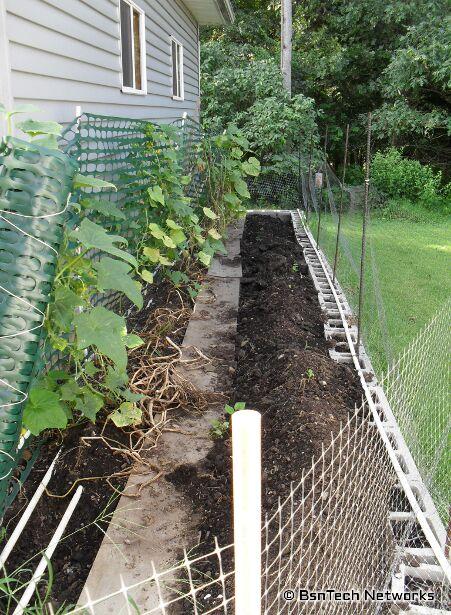
The garden behind the garage with everything removed.

Back Garden

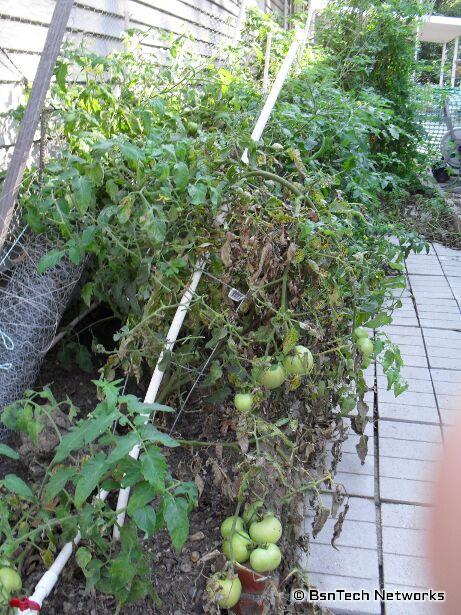
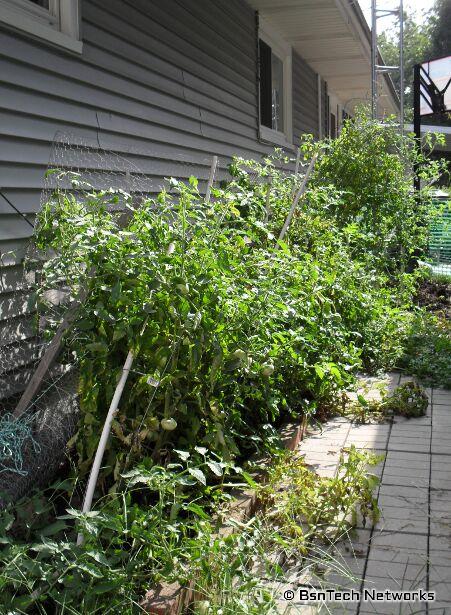
Garden next to the house where the tomatoes were.

Side Garden

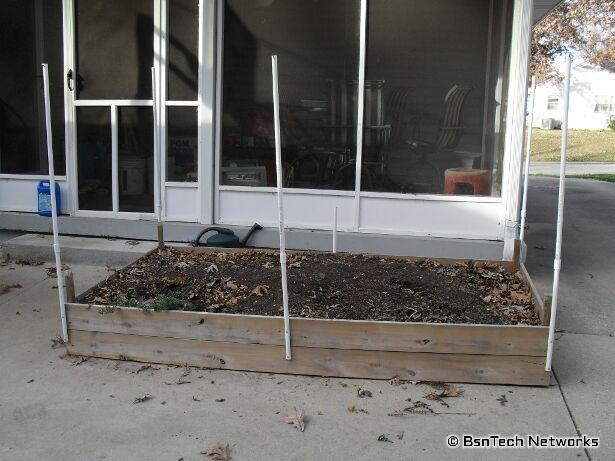
The patio garden where the herbs were grown.

Patio Garden

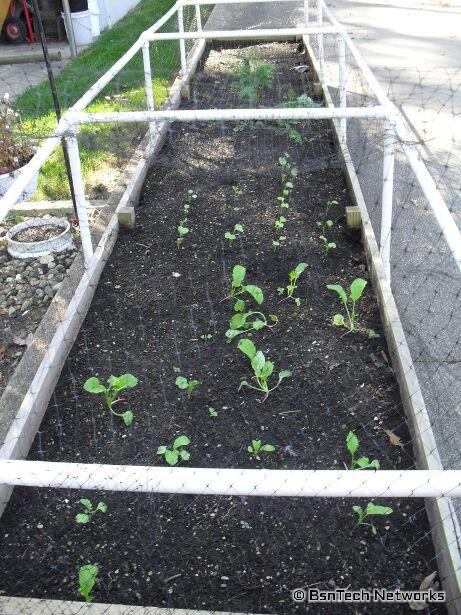
The carrot bed.  One carrot is still hanging in there along with the radishes that were planted over a month ago that never did anything.  I’m sure the deer will take care of these tonight now that they are uncovered from the deer netting.

Carrot Bed

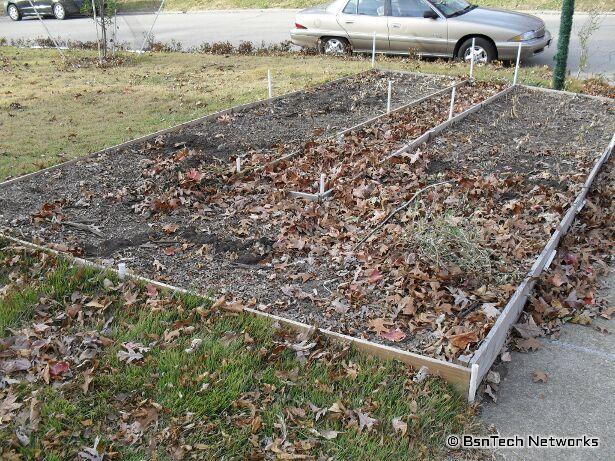
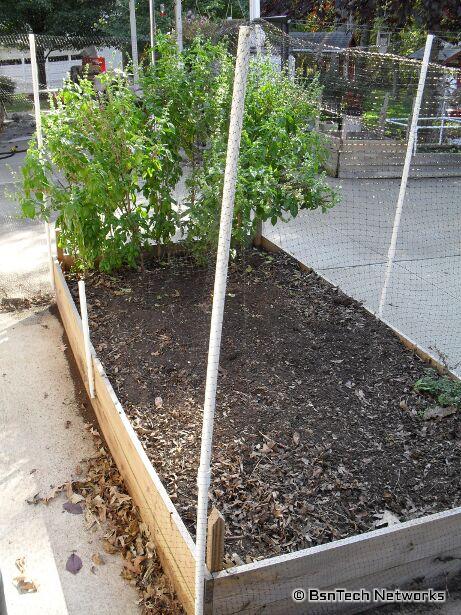
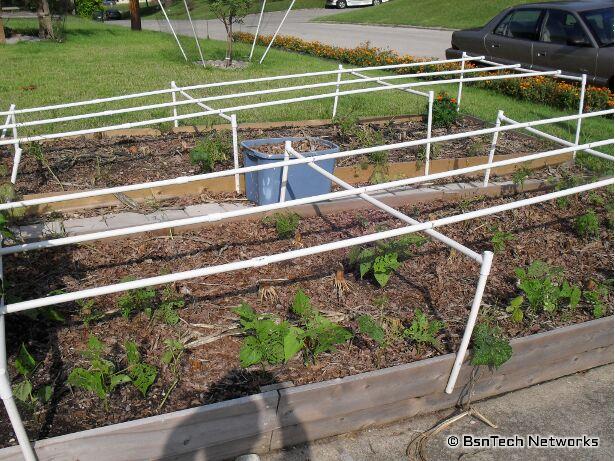
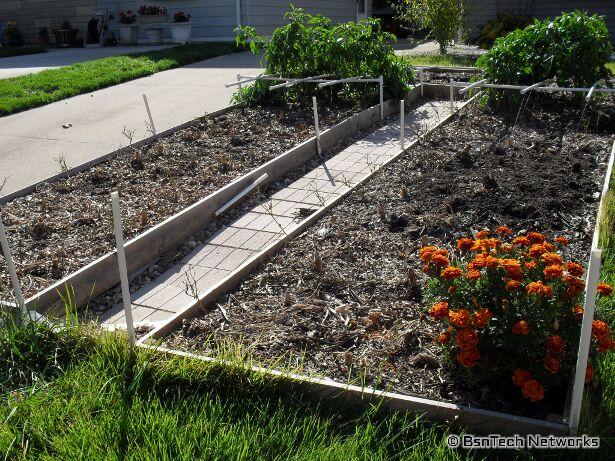
And the front garden with all of the PVC pipe removed for irrigating the garden.  No more peppers and the large marigold plant that took up home has also been pulled.  The one large radish plant still exists in the front – which is where I harvest the radish seed from.  Maybe I’ll get some more seed soon.

Front Garden

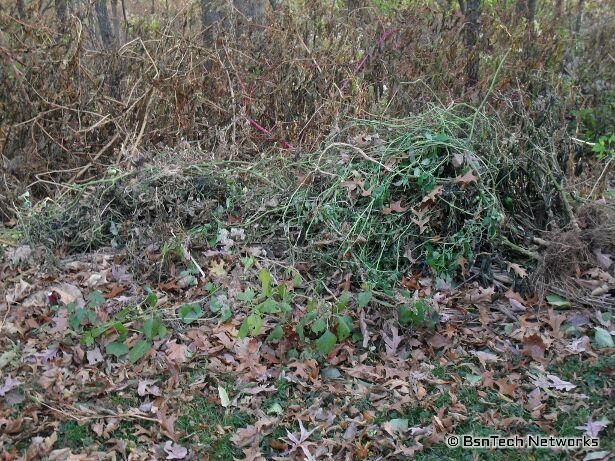
And lastly, the big compost pile with the pepper and tomato plants added.

Compost Pile

I’ll now need to go through my journal – and also make an electronic copy of it here on my blog (like I did last year).  I need to tally up the totals from all of the produce this year and see how it compares to last year.  Then comes the planning for next year’s garden!

Rain Barrel System Update – Three Added

Nothing going on this week around the garden.  I haven’t picked anything from the garden this week.  It has been in the high 60’s, low 70’s this week and it is beginning to slowly get cooler.  Luckily we have not had our first frost yet so the tomatoes and peppers are still on the plants.

However, this post is just about the rain barrel system (again).  A recycling place here in town has the blue 55 gallon barrels for sale for $10.  Over the past few weeks, I have purchased three barrels – which is the maximum capacity for the entire rain collection system.  Our garage is 24 feet square – and the barrels are just under two feet wide.  Therefore, a total of 12 barrels with a maximum capacity of 660 gallons of water can be held.

Nine barrels have been used all summer – so now I’ve added the final three.

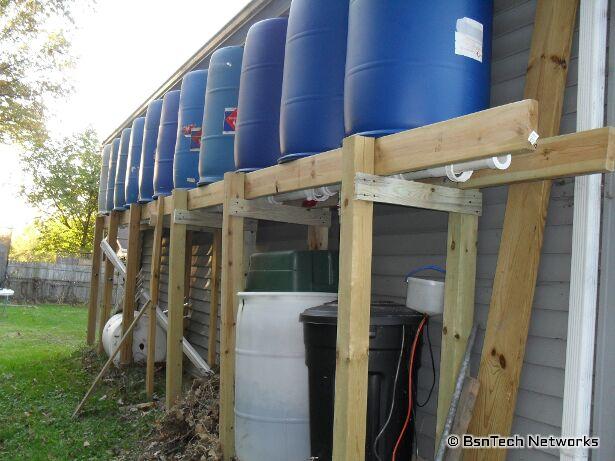
660 Gallon Rain Collection System

Above is a side view of the system.  There is still one at the very end (on the right side) that I have not put up yet.  This is because the downspout prevents me from putting the last barrel in place because of an elbow at the top.  After I take this out, then I can put the last one in.  You can also see some 1×4 pieces of wood that are holding the posts together.  Over the year, I did notice that the posts seemed to be moving apart from one another.  Several people on YouTube also commented and told me I needed to tie the posts together.  So, this should help strengthen things up for now.

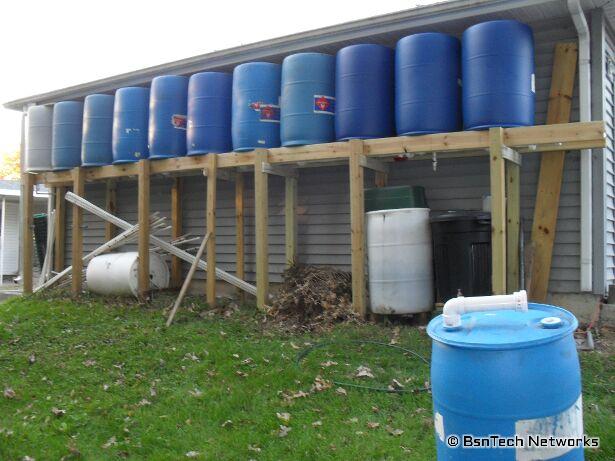
660 Gallon Rain Collection System

In the photo above, you can see a front view of the barrels.  The one on the ground very close in the picture is the last one that will go on the end on the right-side.  You can see the elbow downspout on the right side which is preventing me from putting the last one in place.

Another thing I had to do today was to re-level the horizontal wood supports.  Over time, it seems that the posts near the garage wall settled and went down about 1 – 2 inches.  So I had to take down that 2×6 board that was next to the garage wall.  I then put the 1×4 supports in that tied the posts together – then re-drilled and put the 2×6 board back in place.  Now it is level across the top once again.  Hopefully the settling is all finished because I don’t know how many more holes I can drill!  This is my fault though – because I should have used concrete.  But, it was taking a lot of concrete to fill the holes – so I only filled the first three or four holes when I first started the system last year about this same time.

660 Gallon Rain Collection System

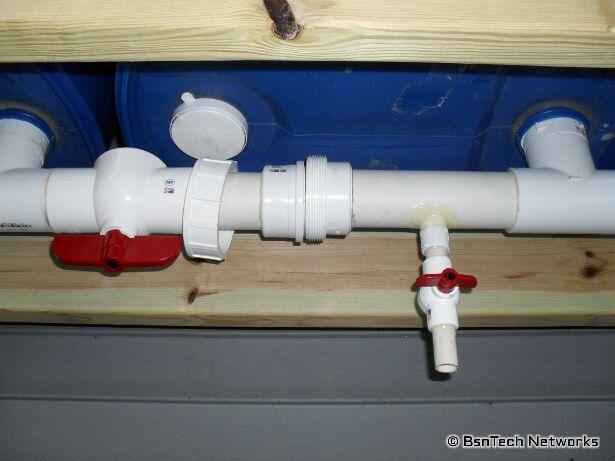
And lastly – I have some new items that I added on!  Yes, I very HUGE 2″ ball valve was added.  Why did I do this?  Well, in case I want to add compost tea directly into the mix, I will now have three barrels to the right of the ball valve (and nine to the left of the ball valve).  This will allow me to open/close the flow of compost tea if I use it for this use.  It is also nice as well because if I have a leak somewhere in the three new barrels, I can just shut off the flow and fix the leak.  Sure, I will still lose three barrels of water, but that is better than all 12!

Then, you will see a small 1/2″ ball valve pointing down.  What’s this you might ask?  Well, notice that it is to the right of the ball valve.  So, that means that I can use this pipe directly to tap into the compost tea.  If I want to fill my watering can or a sprayer with compost tea, I can do so right there!  Right beneath the spigot is another 55 gallon drum that is filled with dead plant materials.  I can also use the ball valve to dump water directly into the barrel with all this dead plant material to make compost tea!

I had to cut a 1″ hole in the 2″ PVC pipe to connect the ball valve.  I am REALLY hoping that this doesn’t leak!  I got lucky and I did the same thing on an elbow.  I drilled a 1″ hold in a 90-degree 2″ elbow and then put a 3/4″ threaded PVC pipe into it – which then leads to the actual pipe to get the water from the system.  I had to use a lot of PVC cement to ensure this was fully leak-proof – and it worked.  So, I’m hoping that I can get lucky a second time around by basically doing the same thing – except this time it is in a straight piece of 2″ PVC pipe.  If it leaks, then I’ll have a mess on my hands with trying to fix it up.

So, the rain barrel system has been fully completed.  When I first started out, I surely thought four barrels was going to be enough.  Then I added two more to make six.  Then I added three more to make nine.  Even with nine, I still had about a week period of time where I ran out of water!  So by adding these last three barrels, this should give me enough water for those extended periods without water – and the three barrels can be dual-purpose – either for water or compost tea!

Nesco / American Harvest FD-80 Dehydrator Review

I posted my review of the Nesco / American Harvest FD-80 Dehydrator on Amazon the other day:

I got a great deal on this dehydrator at the beginning of the year by purchasing one of the used versions that was fulfilled by Amazon (so I still got free shipping).

We use the dehydrator for one purpose mostly – and that is dehydrating fresh basil leaves. The dehydrator came with four trays.

When I filled the four trays with basil leaves and set it on the recommended setting of 95 degrees (lowest setting), it would take the basil between four and five days to full dehydrate. Yes, four or five days!

Later we decided to go ahead and purchase four more trays to max the unit out – so we could pick more basil (about five ounces worth at a time) and fill the eight trays. Now it takes between seven and eight days to full dehydrate the basil!

This seems like an extreme amount of time for dehydrating basil. Even in the book that came with the unit, it indicated basil should be dry within 24 hours. Definitely not the case.

We then tried a few trays of strawberries from the garden. The book said (if I recall correctly) that it should take 11 – 12 hours to dehydrate the strawberries. Nope. It took about two days.

The dehydrator is very reliable and the fact that it has square trays was the sole reason I purchased the unit – for the fact that you can fit more on it. I plan to do some experimenting with the dehydrator here soon with the last batches of basil before the frost hits. I believe that the slow drying times is because of the 95-degree recommended setting for herbs – but I plan to try to do my next batch of basil at the highest temperate setting and see how long it takes then – and if there is any difference in the quality of the basil once done. You can read about this on bsntech.com when completed.

Let’s start with some information about this dehydrator.

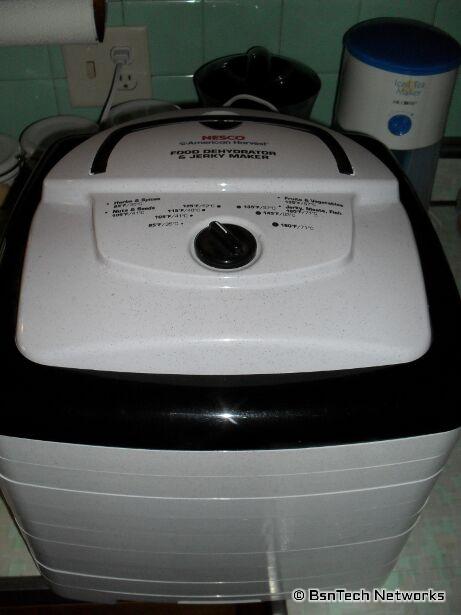
Nesco FD-80 Dehydrator

Above is a top photo of the dehydrator.  The Nesco / American Harvest FD-80 dehydrator has the blower and heater on the top.  Other models may have the blower/heater in the back, one of the sides, or the bottom.  I opted to purchase this version with it on the top – because in case of any water leakage, you don’t want it leaking down into your blower/heater if it is at the bottom.

You can see the temperature setting on there as well with some of the recommended temperatures for various items.  This comes in handy because you don’t need to resort to the manual every time to look things up; it is right on the top and easy to read.

Nesco FD-80 Dehydrator

Another big reason I purchased this dehydrator was because of the square-shaped layout.  Why?  Well, how much surface area does a circle have compared to a square of the same size?  Less.  So that means you get more bang for your buck with the square model and you have more usable square feet available.

Noise –   Well, there is some noise to it – but that is a given.  It isn’t terribly loud but we can hear it throughout the house.  Our kitchen is centrally located in the house between the other rooms (about 1,100 square feet) – so we can hear it running if there isn’t any other noise.  The noise isn’t bad at all and is quite tolerable.  It is about the same noise level as running a ceiling fan on high.

Construction and durability – The entire thing is made of plastic.  it has that nice “cookies-n-cream” look to it with a white plastic with little black dots embedded in it.  The outside perimeter of the trays are built well – but I do question the actual area of the trays where you lay the items to be dehydrated.  I’m always afraid that if I push too hard, that it will snap some of the plastic.  Speaking of the trays – some folks have complained about items falling through the slots in the trays which allow for the air to penetrate through the trays.  While I have had this happen a few times where basil falls through, it is tolerable and not bad.

Expandability – The American Harvest FD-80 came equipped with four drying trays.  They all just stack on top of one another.  It is expandable up to eight trays (which I later purchased to max the unit out).  In the picture above, all eight trays are shown.

Now, let’s get on to my experiment with the temperature settings and various drying times.

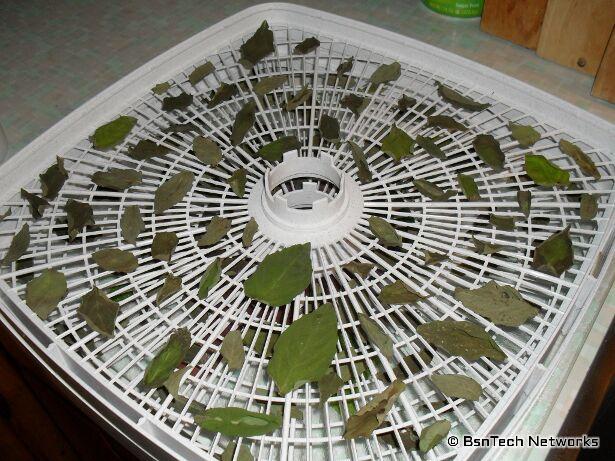
The very first batch of basil that I dried – I washed the leaves.  This can be seen in the below picture with the sheen coming off of the leaves.  I did not do this on all other batches after this.  Washing the leaves added the additional moisture to them and it took a bit longer to dehydrate them.

Drying Basil

Looking back at these leaves, I am astounded to see just how big those leaves were!  In the batches since, the leaves have been smaller.  There is a lot of space between the leaves – as you can see above – but with all batches after this, they were snugged in very close together.  Of course, the more you load your dehydrator and the less space between the items, the longer it will take to dehydrate.

One day later, this is what the batch above looked like.  The basil has shrunk quite a bit because of the moisture escaping the leaves, but the basil still was not fully dehydrated – which is obvious when you look at the bottom left-hand corner leaf that still is very green.

Partially Dehydrated Basil

Our dehydrator is not used nearly as much as what other folks use theirs for. Ours has only been used to dehydrate basil and some cilantro.  However, just as my review of the Nesco FD-80 dehydrator that I wrote on Amazon, ours takes a LONG time to dehydrate herbs.  The booklet that came with the dehydrator says it should only take 24 hours to dehydrate basil and herbs.  Not so.

I e-mailed Nesco Customer Service and got a nice response back from Joy.  Joy indicated that our unit is potentially defective and for me to call into Customer Service to setup an RA (Return Authorization) number.  I would be required to pay shipping to them – but they pay to ship it back.  This is all provided that my unit is still under it’s year warranty – which it is.

Now the question is – is it really defective?  I posed a question to Joy and asked her if the booklet that indicates basil should dry in 24 hours is based upon the highest temperature setting on the Nesco FD-80 dehydrator – which is 160 degrees.  The lowest setting – which they recommend for use on herbs (as seen in the picture above where it says “Herbs & Spices”) – is 95 degrees.

As in my review of the American Harvest FD-80 dehydrator states above, it would take three to four days to fully dehydrate basil at 95 degrees with the included four trays.  Bump the trays up to the maximum of eight (like we did after the first batch of basil) and it takes seven to eight days.

I have some basil dehydrating at this time.  I put it in there and fired the dehydrator up at about 2:30 pm on Sunday.  This time, I decided to experiment – and I have the temperature setting at 115 degrees instead of 95 degrees.  It is now Tuesday.  About 41.5 hours later, some of the basil on the top tray already appears to be dehydrated!

So the question is – again which I asked Nesco Customer Service – does the temperature make a difference?  To me this was a common sense question.  If you have room temperature air blowing on you, how long is it going to take you to sweat?  Now, how long would it take 160-degree heat blowing on you to make you sweat?  I hear your thoughts – exactly.

While I haven’t fully proven this yet, it does appear odd that 41.5 hours later (still well over the 24 hours the book says it takes to dehydrate basil), some is already dehydrated.  Last night when I checked, the leaves were withered up but they were still “limp” and had moisture.  This morning when I picked up a few pieces, they were indeed fully dry and maintained their shape when they were picked up.

Stay tuned with this experiment.  I’ll also compare the basil that I’ve dehydrated at 95 degrees to this that I’ve dehydrated at 115 degrees and see if I can tell any difference.  The next experiment I’ll try is to run the dehydrator at the highest setting of 160 degrees and see how much closer I get to dehydrating basil in the amount of time the book says that came with the Nesco FD-80 dehydrator.


Thursday, October 14th @ 4:30 PM

Well, the basil is fully dehydrated!  This batch started on Sunday at approximately 2:30 pm.  It is now Thursday at 4:30 pm and I’ve removed and crushed all of the basil.

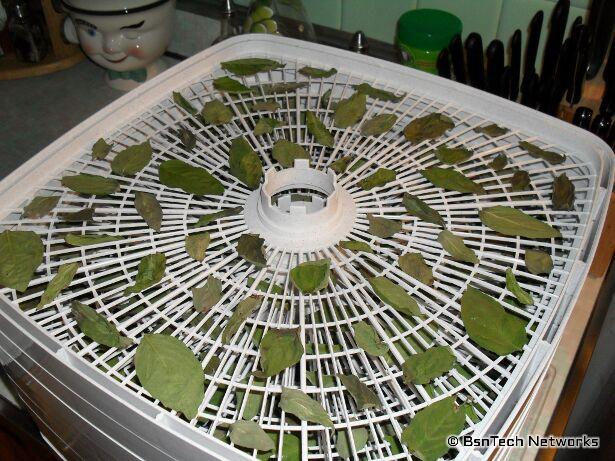
Here are a few more pictures to start off.  These were taken on Tuesday – after about 50 hours of dehydrating time.  The first picture is the top-most tray in the dehydrator:

Top of Dehydrator

And now the bottom:

Bottom of Dehydrator

Can you tell much of a difference between the very top tray and the very bottom tray?  To me, it almost seems that the top tray is drying faster than the bottom tray.  You can see that the curling and browning of the basil on the top-most tray seems to be more present than the bottom tray.  After taking these pictures, I did rotate the trays.  So the bottom tray became the top, the second-from-the-bottom tray became the second-from-the-top, and so on.

Now moving to the results.

At a temperature setting of 115 degrees to dehydrate basil, all eight trays completed in HALF the time it takes if the temperature setting is at 95 degrees – which is the recommended setting from Nesco/American Harvest.  Hard to believe that just 20 degrees differences cuts the time in half!

So, it took a total of 98 hours to dehydrate the basil at 115 degrees.

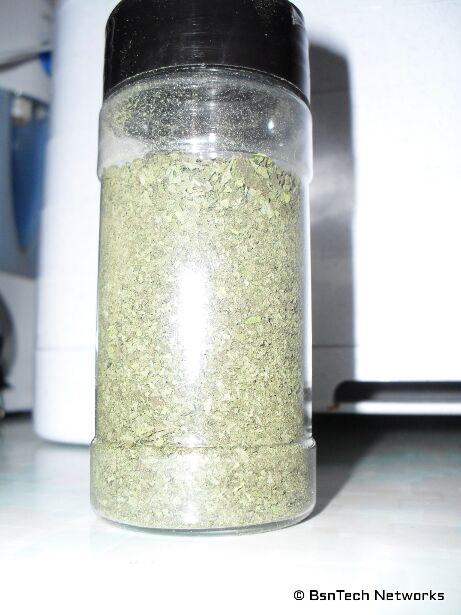
Now, what about quality?  Is there much of a difference between dehydrating basil at 95 degrees or 115 degrees?  For the most part – I couldn’t tell.  Taste was the same and the aroma was the same.  However, I did find that crushing the basil that was dehydrated at 115 degrees was easier – and it crushed into much smaller pieces.

Crushed Basil

Continue to stay tuned to this post.  I will update it with the next batch.  The next batch of basil will be dehydrated at the highest setting – 160 degrees.


Saturday, October 23rd

The next batch of basil has been started at about 11:30 AM.  The temperature is set at 160 degrees; the highest setting.  We’ll see how long it takes to dry this batch at the highest setting.

As an update, I changed the temperature from 160 degrees down to 135 degrees (20 degrees higher than the last trial – which was 115 degrees) after about two hours.  Why?  Well, the basil was getting cooked and started smelling – as my wife said – like candied yams!  Very sweet smell but it was cooking the basil.  This batch probably is ruined.  So, I DO NOT recommend drying basil at 160 degrees.

After another two hours, I changed the temperature up to 145 degrees.  It does appear that some of the basil is almost fully dried already.  Amazing considering it has only been about four hours so far!  So again like my previous hypothesis, the temperature definitely makes a difference in the time required to dry anything.  I may have one more batch of basil that I can take from the garden – as long as the frost holds out.  I will then try an additional test at 135 degrees.  Because I cooked the basil in this period, the taste tests will be way off I fear to make this trial worth considering for dehydrating herbs.


Sunday, October 24th

Dehydrating is already done!  Approximately 22.5 hours on this round!  That is four times faster than when the dehydrator was set at 115 degrees and eight times faster than drying at 95 degrees.  However, I still need to redo one more batch since the setting was put on 160 degrees for a few hours and potentially changed the flavor of the basil.


Thursday, October 28th

The last of the basil has been taken from the garden due to a hard freeze that occurred.  After closely packing 6.25 ounces of basil on eight drying racks, I set the temperature at 125 degrees at 10 pm.  The basil was – for the most part – dehydrated by October 30th at about 4:30 pm.  That means it took 42.5 hours to dehydrate at 125 degrees.  Compare that to 98 hours at 115 degrees.  So by increasing the temperature by 10 degrees, it dropped the time by more than half – by 55.5 hours.

However, the basil could have been dried longer and I bet to get 100% drying of the leaves, it would have taken another day.  The trays would have also needed to be moved around.  The very bottom tray – only about half of the basil was fully dry – which made it pretty hard to crumble up with the undried leaves.  The second to bottom tray and third-from-the-bottom trays (sixth and seventh from the top) were mostly dry but a few leaves didn’t get completed either.

So taking this into consideration, it does show that you need to move the trays to get even drying.  If I were to have moved the trays, I’m sure it would have at least taken another 12 hours to fully dry those leaves.  Therefore, by upping the temperature from 115 degrees to 125 degrees, it didn’t cut the time fully in half, but still did produce quicker results.  The basil was not cooked and had nice green coloration to it at this temperature.

It is 10-10-10 Day – That Means Garden Cleanup

OK – it is 10-10-10 day (October 10, 2010) – but that doesn’t necessarily mean it is garden cleanup day.

But it was around my garden.  The Straight Eight cucumber plants all succumbed to powdery mildew.  Ever notice that when you are around a plant that has powdery mildew all over it – that there is an off-smell?  Wow – to me that is kind of scary – thinking all of those mildew spores are in the air surrounding the plant as the plants are pulled down and put on the compost pile.

After the cucumber plants were all removed, I took the green snow fence down.  I’m going to remember to NOT use this snow fencing for support next year.  The peas simply did not like it because their tendrils could not grasp around the large pieces of plastic.  The cucumbers did fine, however.

Back Garden Cleaned Up

Looks quite a bit different now.  The boards that were put down on the ground as a walk-way have also been removed.  There are still a few Greencrop green bean plants that came up as volunteers that are doing well.  All of the PVC watering pipe has been removed as well – except for the 3/4-inch pipe (on the left side) that is the main pipe leading from the rain barrels.

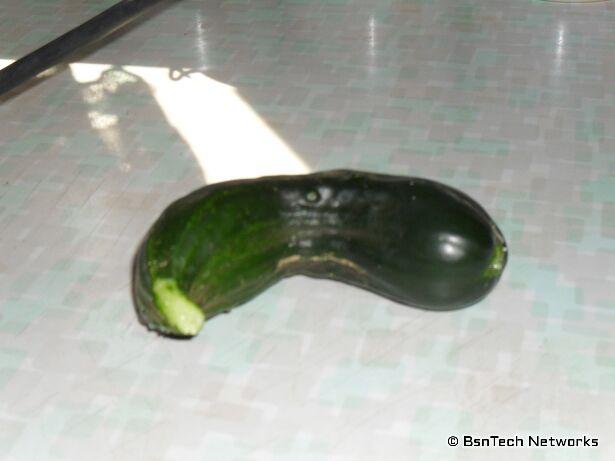
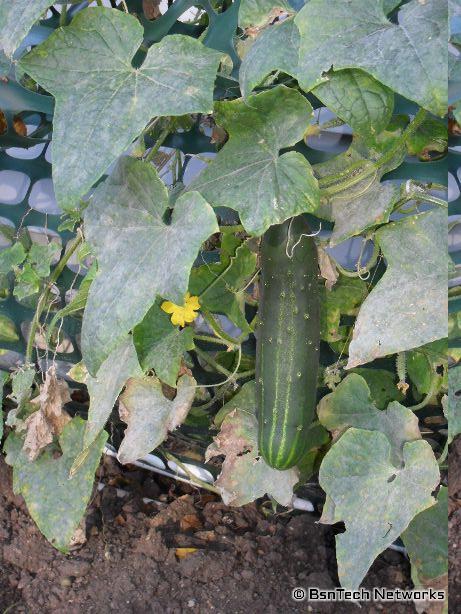
I did manage to get one more cucumber from one of the plants before pulling them down.  It doesn’t look nearly ripened up – so we’ll see how it tastes.

Straight Eight Cucumber

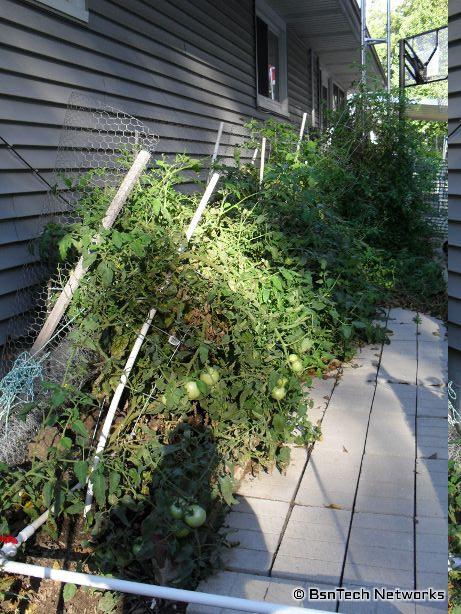
Just a 90-degree turn from where I took the picture of the back garden – is the garden by the house with the tomatoes.  We’ve been spared lately from a heavy frost.  Last week we had two nights where it got around 34 degrees; very close to freezing.  Now the past two days it has been back into the middle 80’s and this week will be in the high 60’s to low 70’s.  The tomatoes are still alive and doing well.  Look at all the green tomatoes!  Unfortunately because of the cool down, none have ripened up in the past week (or more).  We are still getting some cherry tomatoes, however.  I just hope that once all of these green tomatoes are harvested – that they will ripen up in the house so we can use them for something.

Tomatoes

The patio garden still looks the same.  The basil is still growing well.  i’m not too sure what to do with all of this basil actually – I already have three large herb containers filled with it.  Someone mentioned making pesto – which would be fine – but I just question when we would actually use it.

Patio Garden

Some buddies have popped up in the potato bin – more potatoes!  These potatoes have been growing for a few weeks now; I just don’t have the heart to pull them out.  There were quite a few very small potatoes that were in the bin when I harvested it; not nearly large enough to use for anything.  So now they are sprouting.

Kennebec Potato Volunteers

Right next to the bin is my radish experiment.  These plants are doing well from the seed I saved from the radish plant in the front garden.  The first batch had 17 of 24 radishes sprout – and the second batch had 18 of 24 sprout.  So that is about 73% germination of the saved seed.  Not too bad.

There is also the lone carrot still growing very well in the back of the photo.

Saved Radish Seed Sprouts

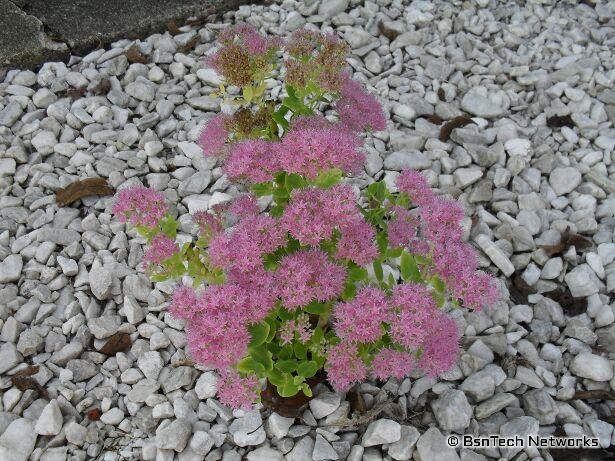
Moving to the front yard and taking a break for a moment from the garden.  The wife cut several small pieces of setum and planted them in the front landscaping.  One of them has pink flowers on the top.  Another setum that was the mother plant had larger flowers, but the flowers are more a very dark red/maroon color.

Setum Flower

Alright – now that we’re in the front yard, here is the full front garden.  Not much left in the garden except the peppers.  All of the green beans have been eaten down to the stalk by the deer.

Front Garden

There is also that HUGE marigold plant at the side of the bottom right of the photo.  Yes, that is only one marigold plant.  I’m not sure how it got into the flower bed – but it made it’s way there.

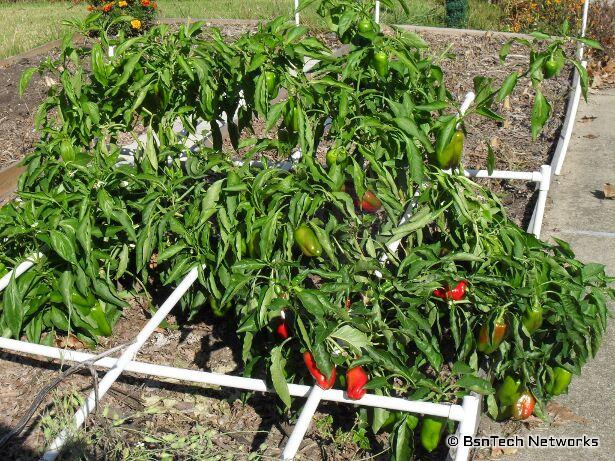
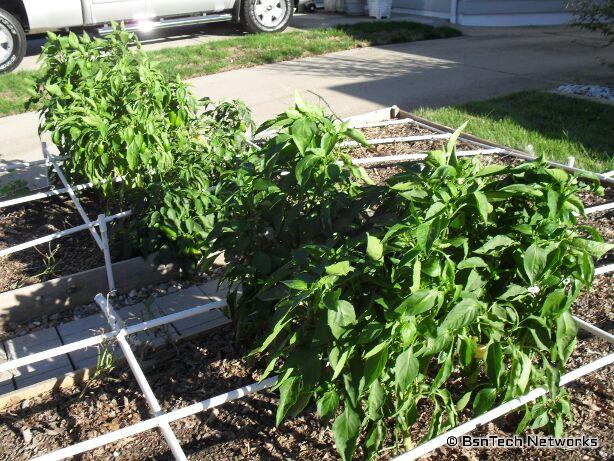
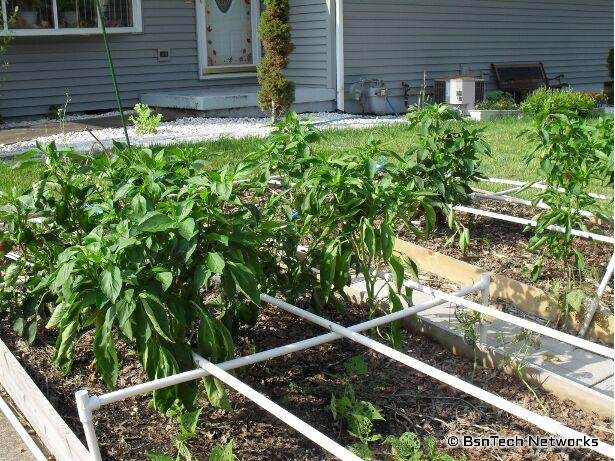
And now for the peppers.  I need to get some of these plucked off of the plants before long – but I am waiting for them to turn fully red.  There was something getting to these peppers earlier in the year where there was a big spot on the peppers that was squishy and a creamish-brown color.  It happened on all of the peppers just before they began turning red.  But now, they do not have that problem – because it is cooler maybe?

But you can see just how many peppers there are on the plants.  I bet there is more on the plants right now than what we’ve harvested all year.  With the weather getting cooler from those 90+ degree days (had over 24 of them this year compared to only four last year), the peppers seem more content and are still putting on flowers.

California Wonder Peppers

And lastly – to revisit how the REAL grape juice wine is coming along.

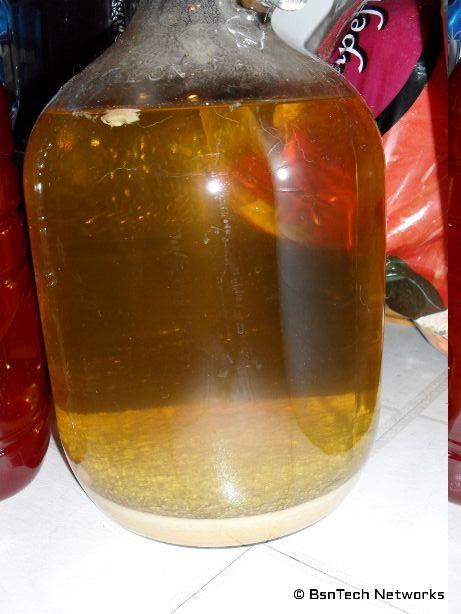
This week I moved the wine into another gallon glass jug so I could get all of the sediment removed from the wine.

Real Grape Juice Wine

Looks much cleaner now with nothing on the bottom!  Of course though, you can see it is maybe 3/4 a gallon of wine after it was all removed.  Unfortunately this leaves the wine open to a lot of oxygen in the top of the bottle – even though I have the airlock on it.

When moving the wine to the second container, I was not impressed with the smell of it.  Smelled pretty bad I thought.  I took a sip of the wine and it tasted just like it smelled.  While it is hard for me to relay the flavor, it seems very watery – and just doesn’t taste very good.  It even has a bit of a vinegar-like flavor to it – which usually means that other bacteria took over and caused that.  The whole issue I believe is that I messed up with making the wine to begin with.  The grapes used were not wine grapes.  Wine grapes have a lot more sugar in them than regular table grapes – which is what was used.  I did not add any sugar to the wine when I began fermentation – for the fact I wanted it to be “pure” real grape juice wine.  Well because of that, there isn’t much of any alcohol content to it (again, I messed up since I didn’t check the specific gravity with a hydrometer to begin with to check the potential alcohol).

So I’m not too sure what to do with the “wine”.  There are a number of factors that are different with this real grape juice wine versus the fruit concentrate I buy at the store.  This also is a white wine and not a red wine – which is what we have made in the past – so there may be issues with the amount of tannin in the wine and there also may be an issue with the pH – or the acidity of the wine.

Real Grape Juice Wine

Well it is getting near the end of the year around the garden – so I’m not too sure how many other posts there will be this year.  Most likely will be one more at the minimum after I’ve pulled everything out of the ground.

Fall Has Arrived at the BsnTech Garden & Wine Update

Fall has arrived at the BsnTech garden!  As was said on the news on Wednesday, approximately 10:07 pm CST was the marking of fall.

Before starting with the garden stuff (since it is mostly the same stuff anyways), let me start with the update for the real wine we made from our own pressed grapes.

No extra sugar was added to the grape juice – and because it was a very small batch (less than a gallon), the yeast have already done their work.  They actually were done in less than a week!  The air lock stopped bubbling at this point.

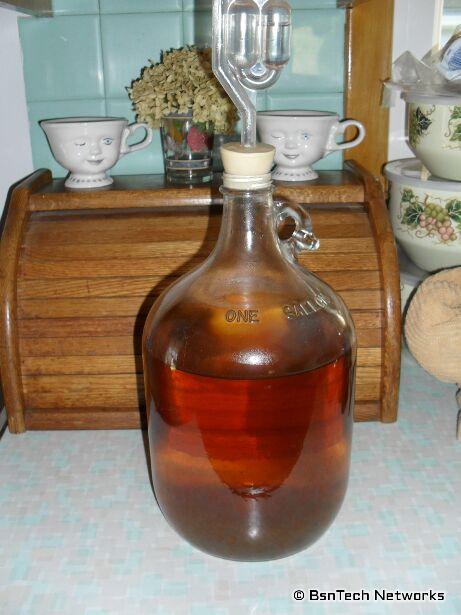
Remember when the wine looked like this starting out – less than two weeks ago?

Wine Juice

I had my reservations and doubts that the wine would clear up myself after seeing such opaque juice.  You couldn’t see through it at all!  You can also see all of the sediment at the bottom as well – and this was on the first day!

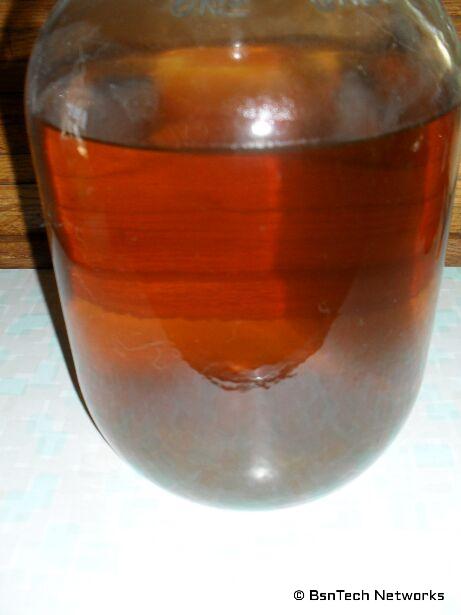
Now – about 12 days later:

Wine Juice

That is absolutely amazing!  It looks like real wine now – in less than two weeks!  You can see right through it.  The sediment at the bottom has also compacted as well – so we may be able to get three 750 mL bottles of wine out of this afterall!


In regards to the garden, more basil was plucked off the plants a few days ago.  It amounted to just over six ounces total.  Unfortunately, the Nesco American Harvest dehydrator cannot hold that much basil!  With all eight trays completely filled, I may have put just over five ounces of basil on.  This is the second time I’ve picked too much that wouldn’t fit on the trays.

The basil seems to take a good week at 95 degrees to fully dehydrate in the Nesco American Harvest dehydrator.  Of course, you also have to realize that the dehydrator is at full capacity with eight trays.  When I first started out with only four trays, this time was cut in half.  But, I would prefer to cut down the basil in larger batches and do it all at once instead of cutting and loading the dehydrator twice.  It is about three days into the dehydrating process and here is one of the trays:

Dehydrating Basil

After about four days, I will flip the trays to get a more even drying.  So the top-most tray (which is pictured above) will go to the bottom, second top-most tray goes to be the second from the bottom, and so on.

After picking six ounces of basil, there is still all of this left:

Basil

I cleaned out this patio garden a bit this evening – but I did so after taking this picture.  All of the dead stuff is the parsley; I didn’t see any point in keeping the parsley – even though it grew very well.  So I just ripped it out and placed it on top – but I finally cleaned that up to make it look more presentable and placed it on the compost pile.

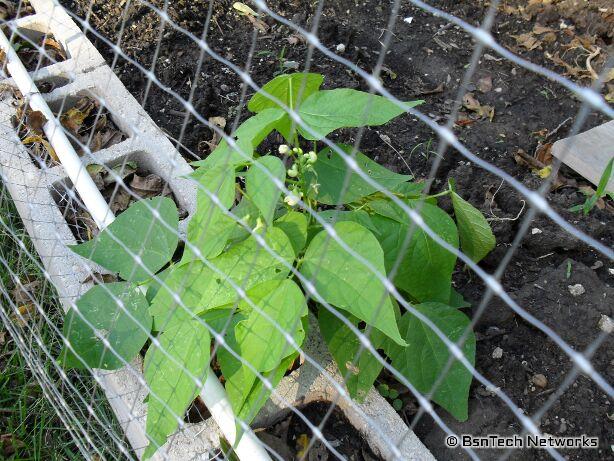
Moving on – green beans!  All of the Greencrop green beans that I planted in the front garden after the corn was done seemed to have a bad death.  Either the deer got to it, the heat killed it, or the bugs obliterated the leaves.  Well, there is a little bit of growth coming back now that the temperatures have been in the low 80’s/high 70’s lately – and there is even a green bean on this plant!

Greencrop Green Beans

Here is one from the back garden.  In the back garden, I buried all of the green bean plants (which may have still had some full beans on them that germinated) after I dug up all of the potatoes.  This one is growing very well and has several flowers on it.

Greencrop Green Beans

Even though they are making a comeback, I don’t believe I’ll grow Greencrop again.  The reason I chose them was simply because out of all bush green bean varieties, these had the longest green beans – which I figured meant a larger yield.  Nope – they just didn’t do well (although the heat didn’t help).  Even when talking to some gardeners at work, they all stay with the Blue Lake variety – which is what I planted last year and had over 50 pounds of green beans.  From the Greencrop variety this year – we may be lucky to have five pounds.  I’ll be returning back to the Blue Lake varieties for next year.

With my previous post, I mentioned how to save radish seeds.  I also mentioned that I was going to test the seeds in the carrot garden to see how the germination went.

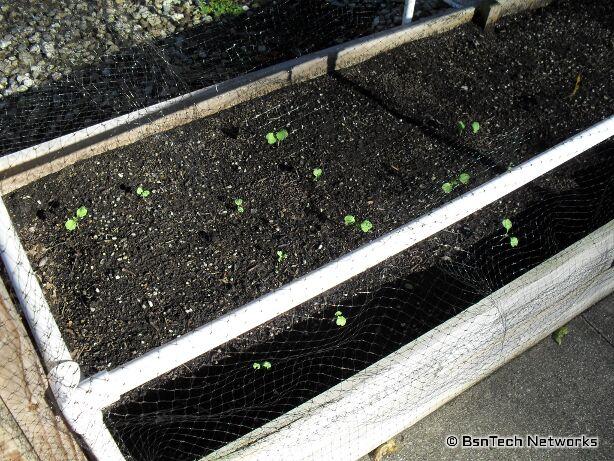
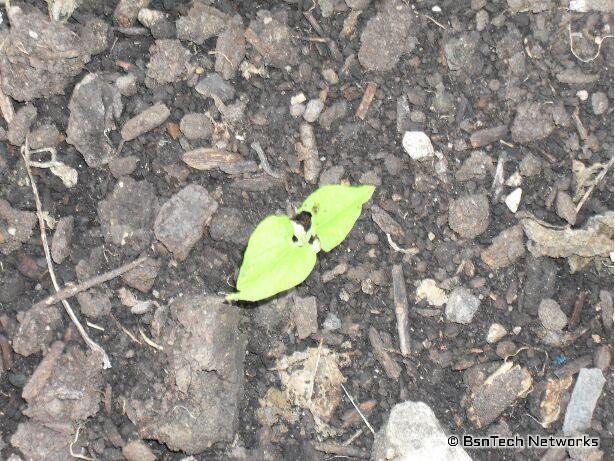
Well, after about five days, the radishes germinated.  Out of 24 that were planted, 13 of them germinated – a 54% rate.  My goal was 50% – so it did surpass my goal (barely), but I would have really liked a higher rate.  Yesterday I planted another 24 radishes from that same saved seed batch – so we’ll see how this second batch does.  Anyways, here are the radishes so far from that batch that was planted last week:

Radishes

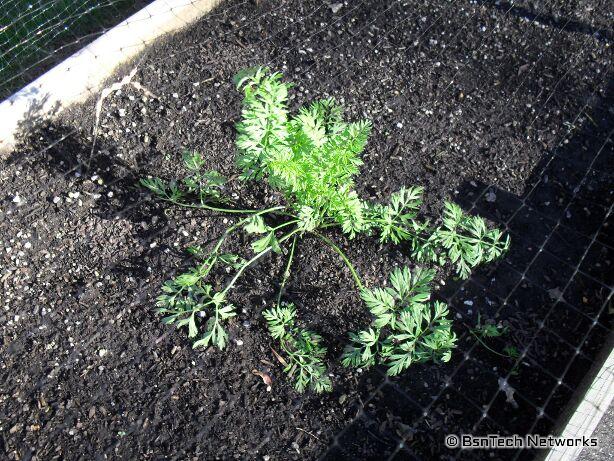
The carrot that seemed to start growing after I pulled the other carrots still is growing strong:

Carrot

Next year I plan to stick with non-hybrid carrots.  Last year I grew Burpee A#1 carrots.  This year I grew the A#1 carrots and Sugarsnax carrots.  When looking online at the FedCo Seeds inventory, you get considerably less hybrid carrot seed for the money compared to what you get with the open-pollinated, non-hybrid seeds.  Next year I am going to plant Danvers carrots (which I’ve also begun testing in my seedling trays).

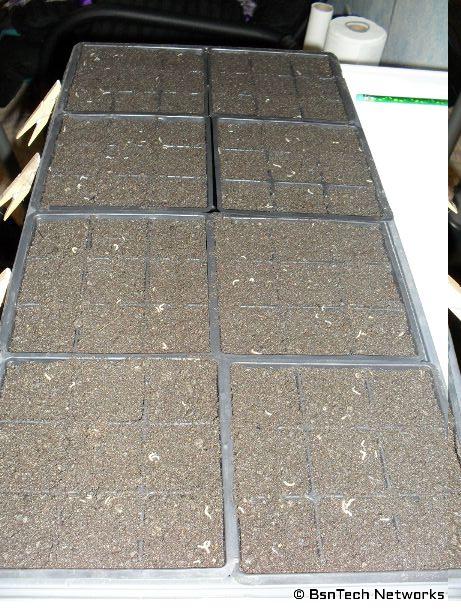
OK – since I mentioned testing in seedling trays – yes – I’m testing some seed viability.  I have four plots of 18 seeds each.  I’m testing the saved Sugar Snap pea seed, the Basil seed, the California Wonder pepper seed (that was saved from last year’s harvest), and some Danvers carrot seed that I’ve had for a few years in an unopened package.

Seedling Trials

Eww – what are all those things on the top of the soil!  I wonder if they are maggots.  They look like little tiny white worms; maybe 1/2-inch in length at the most.  I got all of this soil from the back garden where the potatoes were growing.  I sifted through it to get really nice, fine soil for putting seed starts in.  None of them were there when I did this – but now it seems like the area is crawling with them!

Cucumbers are beginning to taper off.  Well, the Burpee Pickler cucumbers are pretty much completely gone at this point, but the Straight Eight cucumbers are doing well – and just had a nice one I picked today.

Straight Eight Cucumber

The peppers in the front have taken off now that the weather has turned a bit cooler.  They have a lot of blooms on them as well.

California Wonder Peppers

The Tri-Star strawberries are bouncing back – but we definitely won’t have any additional strawberries this year.  At least we got an exceptional amount of strawberries in the spring.  We’re still using all of the strawberry jam we made and it simply cannot be beat!

Tri-Star Strawberries

And to the last live plants in the garden – the tomatoes.  The tomatoes are quite infested with white flies and stink bugs.  I believe that is what is causing the tomatoes to rot and get black spots on them.  We have to pick all of the tomatoes just as there is any hint of pink on them – otherwise it seems like the bugs feast on them!  Sometimes it looks like there is a big chunk taken out of the tomatoes while they are green – so those are goners.

Overall, I bet we’ve lost a good ten pounds of tomatoes because of rot and bug issues.  I am not one for using pesticides in the garden – but next year I may just try to use some Sevin on the plants if they come back.  I haven’t had any kind of problem before with bugs – but this year the tomatoes got them bad!  It is also probably my fault for putting the tomatoes so close together; they were planted every two feet so they are really cramped in.

Tomato Plants

Plenty of green tomatoes left on the vines!  Last year the tomatoes got a bit of fusarium wilt – so there were not any green tomatoes by the end of the year – but this year they are doing well – even though the bugs are getting to them.

Lastly, the produce for the day:

Harvest

Planting Radishes from Saved Seed

Yesterday and Monday I’ve been working to crack open the pods that the radish seeds are contained in.  I let one radish continue to grow earlier this year and the main stem was over three feet tall!  After the top bushy part of the plant turned brown, it was cut down and the seed pods were removed.  The one radish plant still has new growth on it with new flowers and pods being produced – so I’ll have additional seeds in the future (if they finish before the frost hits).

As I’ve been opening the seed pods, I’ve noticed that there are some dark brown – or black – seeds in some of the pods – along with the typical light brown seeds.  I’ve spent about four hours already cracking these pods open and still have just a bit more to do today!  Overall, I may have close to 300 or more seeds so far.  The pods can contain zero seeds or up to about seven seeds in each – depending how big the pod is.

I took 24 of those seeds and planted them in the carrot raised bed last night.  I plan to check on the viability of the seed by taking just a random sample of the seeds.  Hopefully at least half of them will sprout; having more than 50% would be even better!

But the idea of saving radish seeds and harvesting radish seeds is a good one and it is easy to do – but it is just very tedious and takes a lot of time!  You won’t save time by saving your radish seeds – but you will save a few dollars since you won’t need to buy packets – and you also get the satisfaction of going full-circle with your plants; from seed to plant back to seed for the next generation of plants!

It is also said that if you save seed from plants you grow, those plants eventually will put in traits that deal with your climate better – so you may get more vigorous plants or higher yields in the future by using your own seed.

Mid-September Garden Update & Making Real Grape Wine

Wow, it has been over two weeks since my last post!  Why has it been so long?

Well, there isn’t much at all going on around the garden lately.  The only things left standing in the way of veggies are the peppers, cucumbers, and tomatoes.  Basil is still being harvested slowly but it doesn’t appear to be growing anymore.  So, no point on reporting on things that haven’t changed right?

Decided to post today – just because it has been a while – and because over the weekend, we tried our hand at making REAL grape wine.  The wine we’ve made previously is real I suppose – but this time it was actually us getting the grapes, crushing them, and straining them to get the juice.

The wife’s sister dropped by on Friday.  She has two grape vines at her house and they are huge!  They are about eight or nine years old.  She brought two bags of grapes – probably about 17 to 18 pounds of grapes in each bag!  Unfortunately, she picked one of the bags about a week ago and then put them in the freezer.  So by the time they got to our house for “processing”, they looked rotten and stunk pretty bad.  Would have been nice to have those though.

The other bag was good because they were picked just that day.  It took me probably 30 minutes to go through all of the grapes and pull them off the woody pieces that hold the clusters of grapes together.  I also had to pull off a lot of bad grapes that bugs or birds got to.

Unfortunately I didn’t take any pictures of these.  I also had some grapes out on our two vines as well – so I went to pick those and throw into the mix.  I only had about a pound of grapes from my two vines – but the vines were just planted last year!

One thing I am not happy about is the type of grape vines that we have.  I’m not fully sure what kind they are, but both of them are the same.  Originally I had ordered four different grape vines from a place online called Willis Orchards.  The vines were a Flame Bunch Seedless grape vine, a Concord Seedless grape vine, a Crimson Seedless grape vine, and a Niagara grape vine – which had seeds.

When they were planted, only the Flame Bunch and the Concord Seedless seemed to make it through the winter; the Crimson and Niagara did not do anything when Spring broke.

Now – after the grapes ripened up on the Flame Bunch and Concord Seedless vines, I discovered they were NOT Flame Bunch or Concord Seedless grape vines!  The grapes were not green like Niagara – but they definitely did not have any kind of red or purple pigments to them.  The color more closely resembled a “Blanc du Bois” grape vine look.  Needless to say, I’m not happy.  I can’t just rip the grape vines out of the ground now and return them – and I wouldn’t want to because it would set me two more years back on getting new vines.

I originally had called Willis Orchards before they shipped the vines to me and wanted to cancel the order – because I found a cheaper place to order them from.  Well, they proceeded to tell me to not order from them because this company was known for sending the wrong grape vines – and you’d get something that you didn’t order in the first place.  Well, low and behold – I think they were talking about their own company!  So I paid Willis Orchards $40 for four three-year-old grape vines; two of them died and the other two were not even the right kind.  No more ordering from them!

Anyways, let’s get to some pictures.  After getting the grapes broke free, I put them through the food processor.  Wow that made a mess.  I then took that big mess and put it in the six-gallon “Ale Pail”, added some yeast, and let it sit overnight.

After letting it sit overnight, I needed to figure out how to separate the skins/seeds from the actual juice.  I ran up to the local True Value and got a package of five-gallon paint strainers.  They are nylon bags (there were two in the package for $3.50) with holes all over so the liquid could escape – and it has a nice elastic band around the top of the nylon bag.
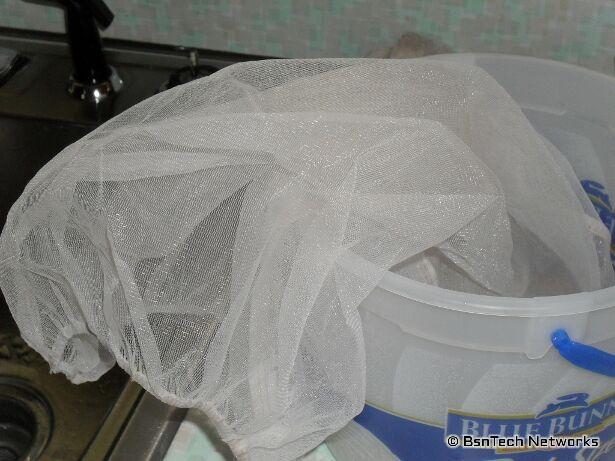
Wine Strainer Nylon Bag

So I put this bag around the “Blue Bunny” ice cream container you can see there – and then poured all of the skins, seeds, and grape juice into the bag.

After almost an hour of trying to compress the bag and get the juice separated, I finally was able to put it in one of our gallon wine jugs.  Unfortunately from all of that work, we managed to get less than one gallon of juice.

I’ve seen many home-made wine presses online where people use hydraulic bottle jacks between two pieces of wood to squeeze apples, grapes, and other fruits – and I think that I’ll build one of these next year.  It is a nice wine press that works well – without the cost of paying $250+ for a real wine press that the pros use.

So anyways, here is the wine juice in the container.  You can see that it isn’t a full gallon of wine – and there still is a lot of particles and debris down at the bottom.
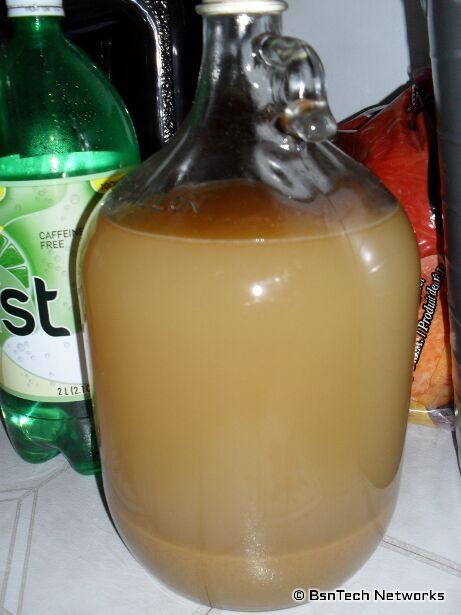
Wine Juice

Here is the big blob of skins and seeds from the grapes that were taken out of the nylon bag.  I bet if I had one of those wine presses, I could have filled the gallon container – and probably even made a bit more.
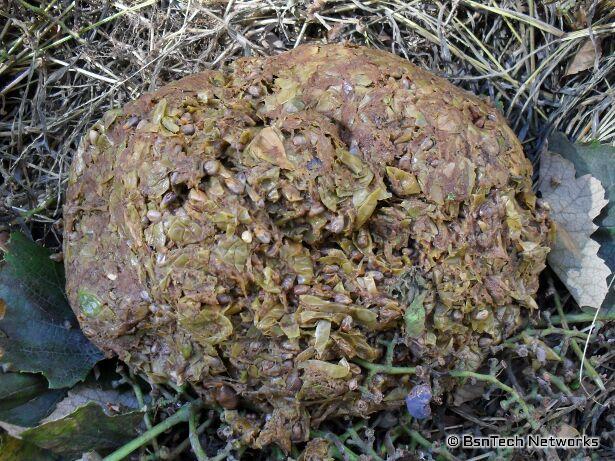
Grape Skins and Seeds

After a few hours, the yeast really started doing some work.  Some of that extra stuff that got through the nylon bag started to collect around the top.  I had to give the bottle a good twirl to get all of this off the side of the bottle.
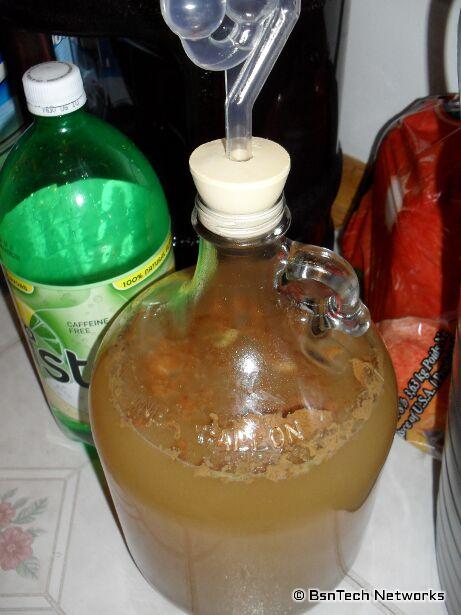
Grape Juice Wine

This is the first time doing it – so we’ll see how it turns out.  I know next time that I will not run the grapes through the food processor – and I know that a fruit press is definitely needed.  I did add 1/2 teaspoon of bentonite, one campden tablet, and 1/2 teaspoon of pectic enzyme to the mix.


Meanwhile, here are some photos from the garden.

The back of the garden has about five of the six cucumber plants left.  They are still providing cucumbers at a good rate (picked three today).  The Burpee Pickler vines do not look nearly as good as the Straight Eight cucumber vines at this point.  But I have found out that the Straight Eight cucumbers have a tendency to get bitter after a period of time – but I haven’t noticed the Burpee Pickler cucumbers doing this.
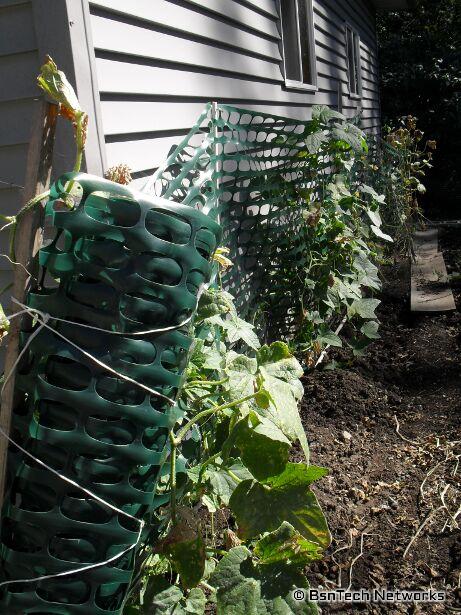
Burpee Pickler and Straight Eight Cucumbers

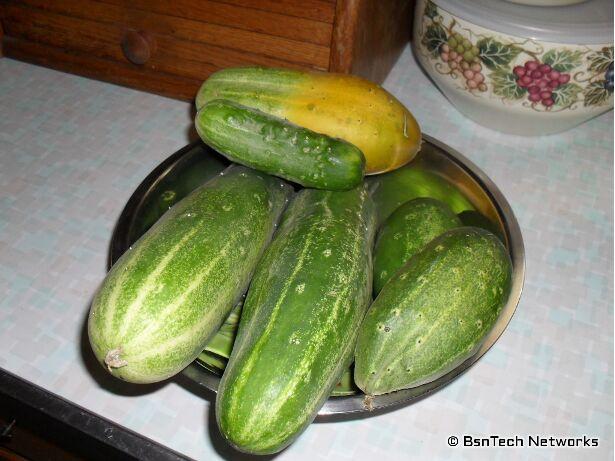
Here are the cucumbers that were picked today.
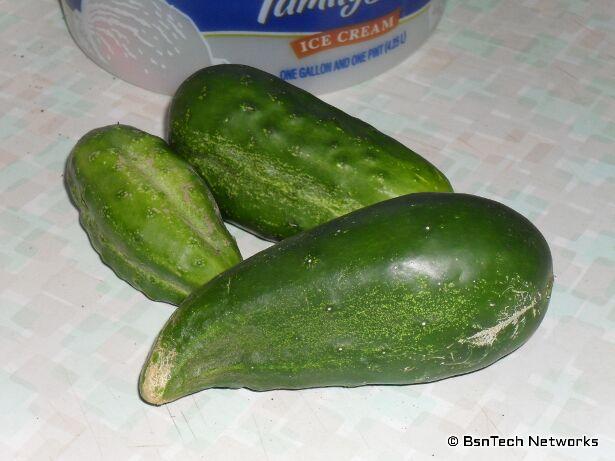
Cucumbers

The tomatoes are still doing well.  Something is getting to the tomatoes though that is causing little black spots in them and then the spots get large and eventually rot the entire tomato.  Or – something is burrowing in them and rotting them out quickly.  I’ve seen a lot of small white flies surrounding this area.  So, we have to pick the tomatoes when they are just beginning to turn red and let them sit indoors.  That allows us to beat out whatever is causing the issues.

You can also see in the picture that the cherry tomato plant (the one in the front) is HUGE and it has even put branches out into the landscaping as well.
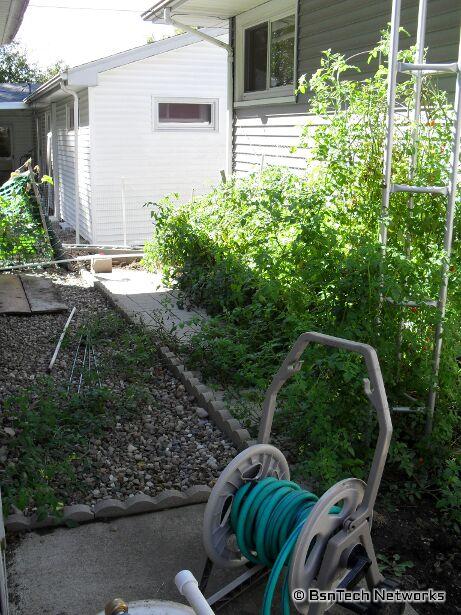
Tomatoes

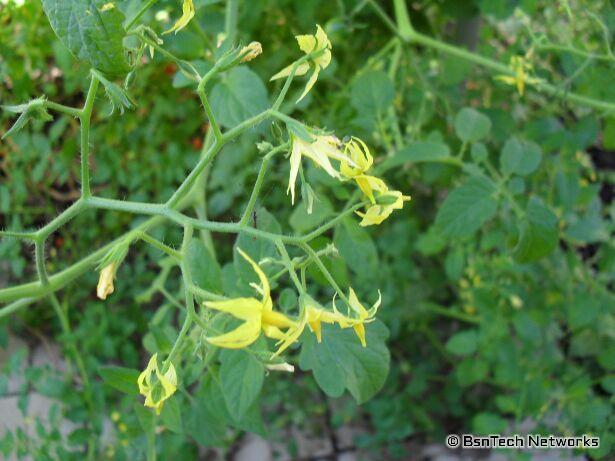
Here are a few pictures of the cherry tomatoes; one of the small tomatoes and another of the flowers that just keep coming!
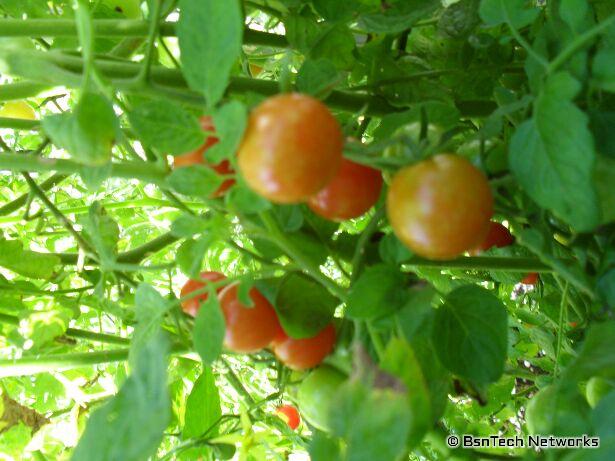
Cherry Tomatoes

Tomato Flowers

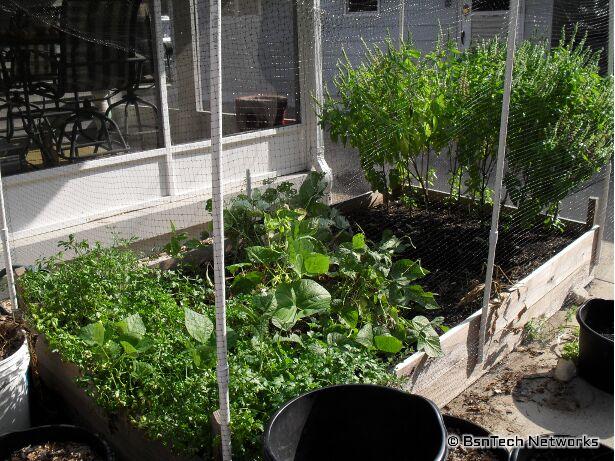
Not much left in the patio garden.  The bins that I was growing some corn and potatoes in were turned over and emptied into this area this week.  In this area, I attempted to grow some Greencrop green beans.  They did well – but then they just all abruptly died at the same time.  The area also is growing the basil (which you see here) and it still is going very well.
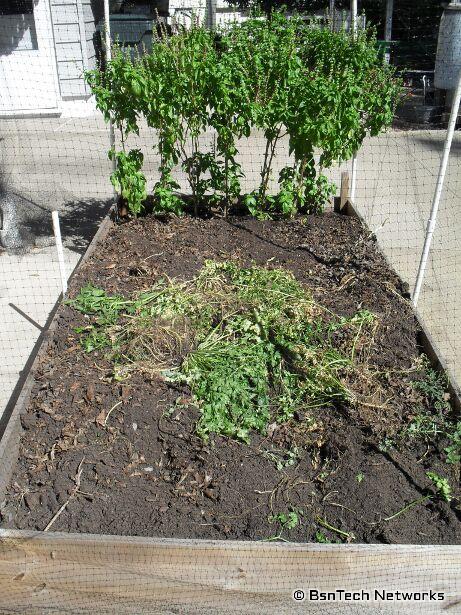
Patio Garden

What is all that stuff thrown on top?  Those were the parsley plants that I pulled up yesterday.  Parsley smells like celery – but it is used as an herb where you cut off the parsley leaves.  I thought they tasted like soap.  I’m not too sure why I planted these actually – but they did last through this deathly-hot weather this year and grew well.

On the other hand, some oregano was planted right next to the parsley and it just didn’t grow well.  I looked at a lot of pictures online of oregano and saw how bushy it got – but the kind I planted didn’t get bushy at all and was a let-down!  There isn’t enough to even dry and use.
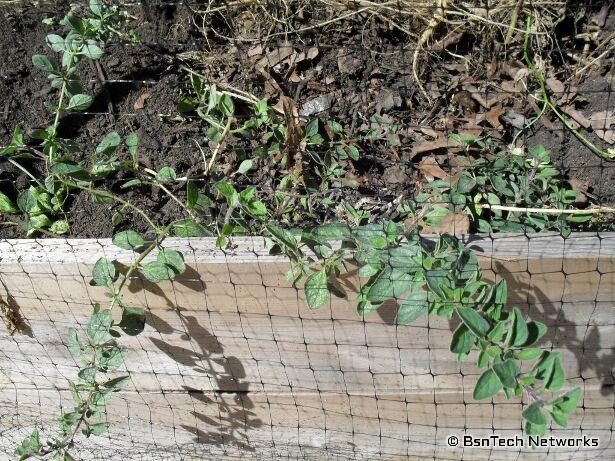
Oregano

I may see if I can find a different variety of oregano – if one exists.  I bought these at the last minute at the local garden store in the typical Burpee packet.  When it comes to herbs, basil is our number one followed by oregano.  We also use a lot of garlic salt as well.  That is something I should try growing in the future – garlic.

Over in the old carrot bed, a few carrots have decided to grow!  One just sprouted sometime in the past couple of weeks and the other one is now about a month old.  I have just let them be – but when it comes time to cleaning the beds out for next year, they will be pulled (if they don’t rot first).
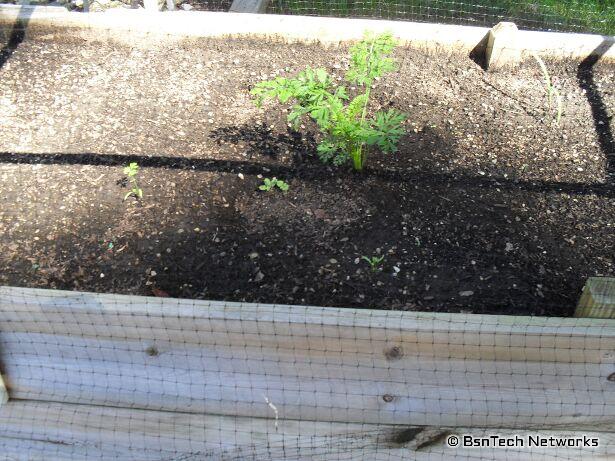
Carrot Bed

To the front garden now.  The eight pepper plants are still here along with a radish plant still putting on some seed.  The rest of the bed is unoccupied.  Well, it is occupied by some dead green bean plants that never made it, but I’m not counting those.
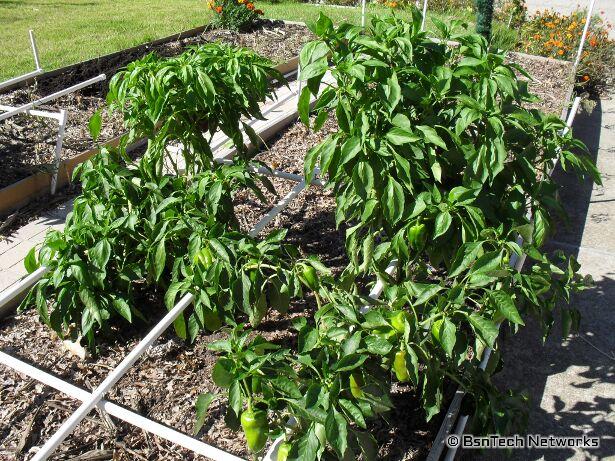
Pepper Plants

After adding some epsom salt around each of the pepper plants and giving them a feeding of compost tea about twice a week, it seems like they are doing very well!  You can see all of the green peppers that are on the plants and there are quite a few blooms as well.

A few peppers were picked today.  There was a branch that was broken on one of the plants so I picked the peppers on it.  They were mostly all small, but I’ll take em!
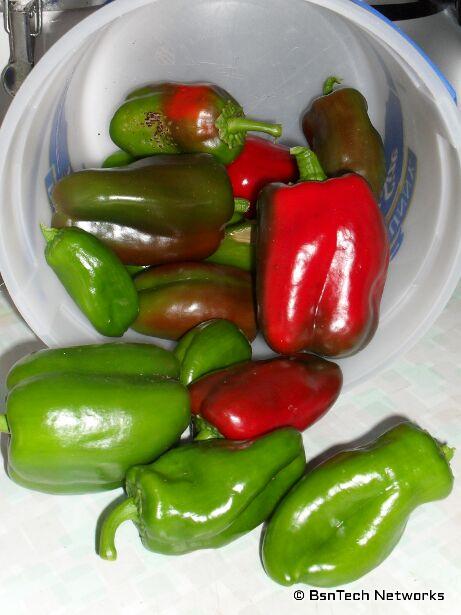
Peppers

Something has also been rotting the peppers out as well.  in the picture above, you can see some black spots on one of the peppers.  There is another pepper in this bunch that has some flesh-colored areas that feel like a rotten area.  Just as with the tomatoes, the peppers also need to be picked before they get ripe.  Otherwise, something causes spots on them and poof – they rot.

This one radish plant just won’t quit!  I pulled about 3/4 of the plant over a month ago and harvested all of the brown seed pods.  Thinking of that – I still need to crack those open and get the seeds out!  But this radish plant is putting on more flowers – and more seed pods!
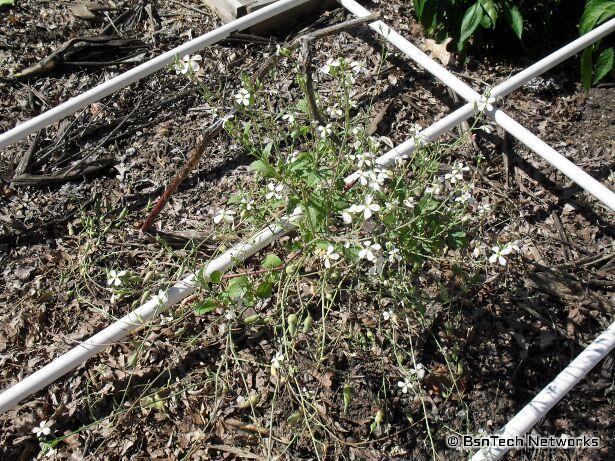
Radish Seeds

Over on the far end of the front garden, a huge marigold plant has really came a long way.  Somehow a seed got into the gardening area back when there was corn in the area.  The marigold plant looked pretty bad and appeared it was going to die.  Well, now this ONE plant is huge and has flowers all over it!
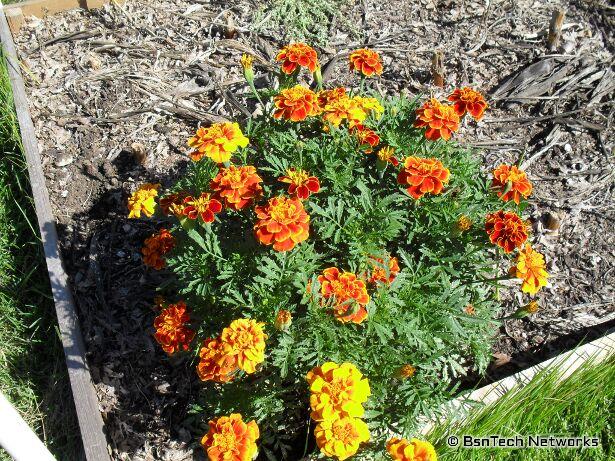
Marigold Flowers

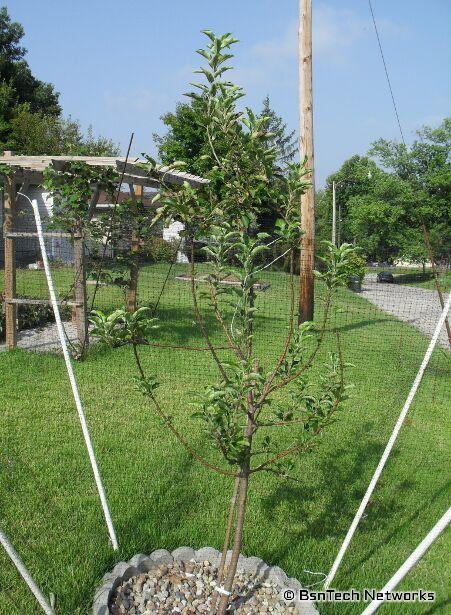
Onto the Granny Smith Apple tree.  The tree seems to be turning around now that it is protected from the deer.  It has put up one long branch so the tree is getting taller now.  It still isn’t strong enough to hold apples, though.
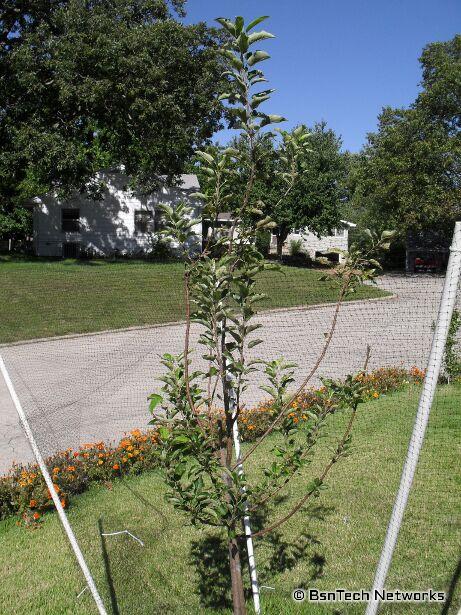
Granny Smith Apple Tree

Unfortunately the other two apple trees that were planted met their demise about a week ago.  These were called “columnar apple trees”.  One of them was a North Pole and another was a Golden Sentinel.  The North Pole was to put on red apples – an the Golden Sentinel was to put on yellow apples.  It would have been neat to see this vertical tree – that has no branches – put on apples in such a small space.  But the deer just kept eating every single leaf that would come out on these “twigs” that were coming out of the ground.

They were just a pain to mow around and I wasn’t satisfied with them – so they were pulled out.

How about the strawberries!  The tri-star strawberries did not like the heat this year at all.  At one point, both of the strawberry pyramids were completely dead-looking; no greenery in sight.  Much of that was my fault.  I was side-tracked and busy with other projects around the house (and I didn’t want to get out in the heat) so I just didn’t keep them watered.  There were times where we didn’t get a decent rain for three or four weeks at a time – so they just died.

Amazingly enough, most of them have come back now.  The one on the top never came back though – so I’ll have to pull a runner (or a baby strawberry plant that is made from a stem from another established strawberry plant) and put it in this area.  The strawberry beds also need to be refilled with some more compost since they have sunk again.  This takes a long time to do because the compost/soil has to be slowly added around each plant – and then each plant pulled up just enough to sit on top of the new compost/soil.  This is done so the roots aren’t disturbed as much.
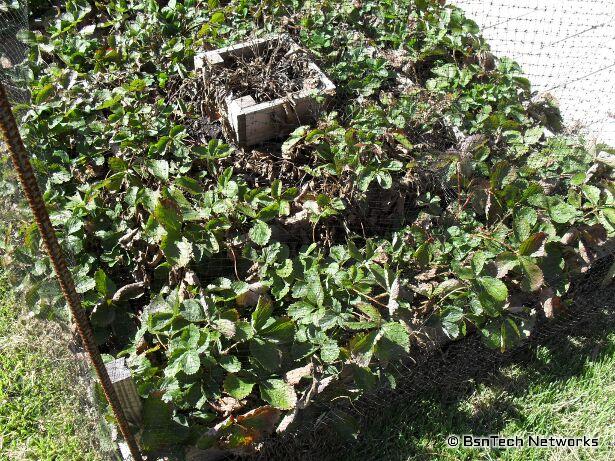
Strawberry Pyramid

There is still a lot of dead leaves in here – but I’m hoping they will just compost down into the soil on their own.  Meanwhile, we still have three quart jars of strawberry jam in the fridge.  We just finished one (took about three weeks) and it is very good!  Nothing like your own strawberry jam!

And for the last picture of the post – the grape vines and arbor.  The vine closest in the picture is the one that was supposed to be the Flame Bunch vine – but like I said earlier, the grapes never turned red like they should have and were more like a “Blanc du Bois” grape color.  This vine overtook a huge area on the arbor and was inter-twining with the deer netting around the arbor.  So when I went to pick the grapes on Friday, the vine got a good pruning and now it is more in-line and ready for growth next year.  In all reality, I should not have pruned the vine until March of next year – because that is the time to prune grape vines in this area.
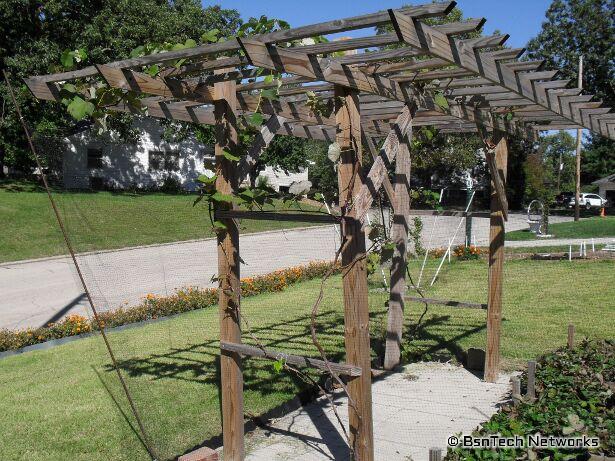
Grape Vines

Finished Bathroom Project/August Garden Update

The end of the bathroom project is finally upon us!  There is only a few little things that need to be done – the mirror installed over the vanity – and a more permanent fix for the toilet rocking side to side.

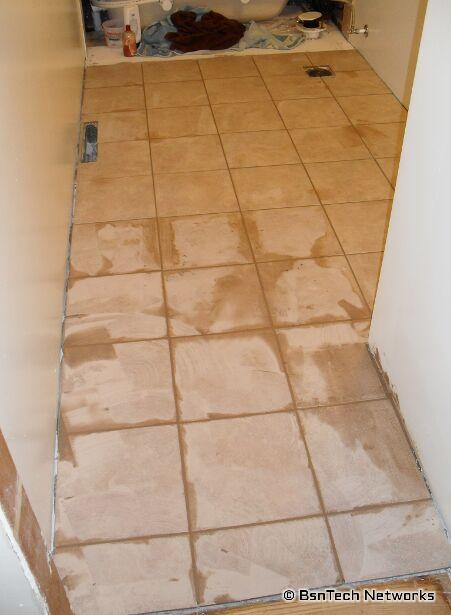
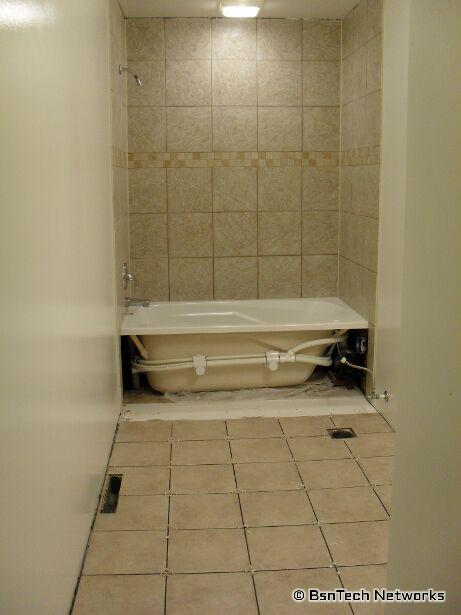
On Thursday, the grouting for the flooring was done.  All of the tiles were put into place on Wednesday – except the last row that was to be right next to the tub support.  That row of tile went in on Friday along with the tub support wall.  The tub support wall needed to be in place before the last row of tile could be cut – so that way the measurements could be made.

Tile Grouting

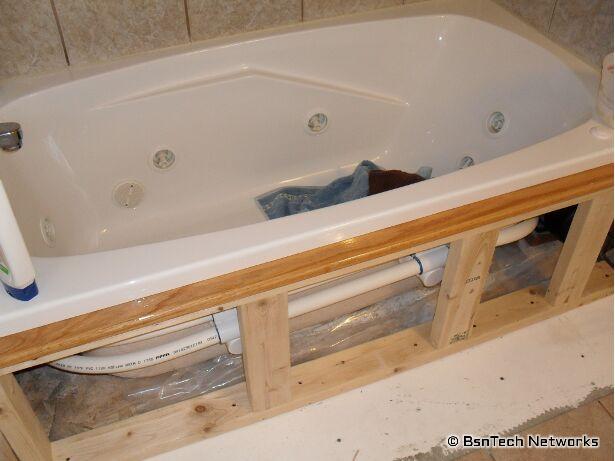
On Friday, a lot was done.  The wall support for the tub was put in with the finished top plate that was varnished six times to hopefully keep water from getting to the wood:

Bathroom Top Plate

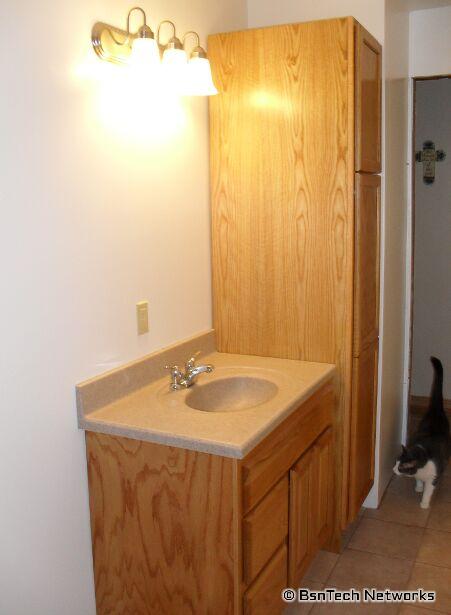
The cabinet and vanity were installed and put in place:

Bathroom Project

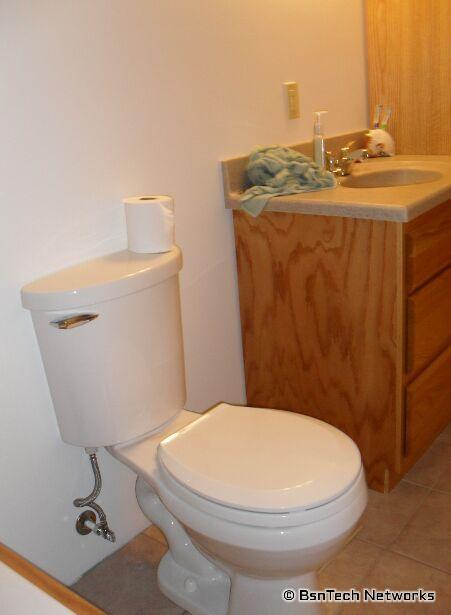
And the toilet was installed:

Bathroom Project

Unfortunately, as said earlier, the toilet rocks from side to side.  This is because the tile isn’t 100% level and on the right side of the toilet, the tile seems to be maybe 1/16-th or 1/8-th of an inch lower than the tile on the left side.  This doesn’t sound like a lot, but it really makes the toilet rock back and forth a lot!  Currently I have three shims that are placed on that side to keep it from rocking – but this isn’t a permanent solution.

Also on Friday, the last row of tile next to the tub was put in (don’t have a picture of that).

Saturday saw the next steps done.  The last row of tile was grouted and the wainscotting was attached to the tub support.

Bathroom Project

It looks almost like a finished bathroom!  Kitty is sure liking the new bathroom and is taking advantage of the rug in there.  Also on Saturday, the door was put up as well.  The trim around the door and baseboard was also cut and two coats of varnish was applied to them.

On Sunday, the last final touches were done – the baseboard and trim were finished up.

The last thing to do is get the mirror put in place.  I was putting the trim around the mirror and was using small brad nails and nailing the trim to the luan board that holds everything together.  Unfortunately, I put one of the brad nails right through the mirror and it cracked it down the whole thing!  So I had to order another mirror – and it may take up to a month to get in.  The size was 20×24 for the mirror and it has to be the same size so I can re-use the pre-cut trim that is already made.

So, the bathroom is almost fully completed!  It looks much better than the old, dated room that it once was with the yellowing flooring and the paint chipping off the walls and ceiling.


Moving onto the August garden update.

The garden doesn’t have much going on.  The majority of the crops are all done for the year.  One thing I’ve learned this year is to NOT use the Greencrop green beans again!  I’ve had quite the problems with this variety of green bean.  We only got about 10% of the green beans this year as we did last year.  They just don’t seem to grow very well and the green beans seem to be very limp.  I purchased this variety from FedCo Seeds because they were advertised as being a good producer and producing long green beans.  While the beans do seem to be long, I think they are comparable to the Bush Blue Lake varieties that we used last year.  The Greencrop beans also seem to be flat – almost like peas!

Here is the area where I planted all new Greencrop green beans in the front garden after the corn was taken out.  They are not doing much of anything and just look horrible.

Greencrop Green Beans

The beans were planted six inches apart from each other in three rows – and the rows are about 20 inches apart.  You can see many holes where they didn’t sprout or come up.  Most of them did – but just died later.

The peppers that are right in front of the green beans are still coming along well.  I’m not too sure of the epsom salt that was added a while ago did anything for the peppers – but the weather has cooled down a bit which has helped out.

California Wonder Peppers

While I was taking pictures, I found three peppers that were just turning red so they were picked.

California Wonder Peppers

In the middle of the front yard, the Granny Smith apple tree is doing alright.  It has put up one long stem that is growing well.

Granny Smith Apple Tree

Over by the strawberry bed, it looks horrible.  The heat has really caused major damage to the strawberries.  I’m hoping that some of them can come back – but I bet we won’t have any more strawberries for the rest of the year – and will have much less next year as the strawberries try to re-establish themselves.

Tri-Star Strawberries

One of the grape plants – the Flame Bunch grapevine – has the grapes still coming along well.  They are just beginning to turn a little bit of color.

Flame Bunch Grape Vine

Next – going to the side garden.  The tomatoes are still doing very well.  There does seem to be something that is getting into the Best Boy tomatoes though.  I’ve noticed that both the cherry tomatoes and the Roma tomatoes do not seem to be affected by this.  It almost looks like something is taking a very small bite out of the tomatoes that just take the top flesh off.  Other times there are large holes in them – which I suspect is insect damage.

Tomatoes

And to the back garden.  This is where the row of potatoes were taken out.  I also had some Greencrop green beans planted right next to the row of potatoes that were removed as well.  The only thing left back here is the Straight Eight cucumber plants, the Burpee Pickler cucumber plants (which are dying off), and a row of potatoes that are in the same row as the cucumbers against the garage.  You can see the dead potato vines lying on the ground.  I need to get back there and dig those up – but I’m afraid I will interfere with the cucumbers.

Back Garden

Notice some growth to the right side of the boards that are put down?  Those are Greencrop green beans!  While I was digging up those potatoes, I buried the green bean plants.  Apparently some of those seeds must have sprouted are are germinating.

Greencrop Green Beans

We got a good selection of cucumbers on Sunday as well.  Two large Straight Eight cucumbers along with a small one – then three small Burpee Pickler cucumbers.  We’ve got more than we can keep up with now.

Cucumbers

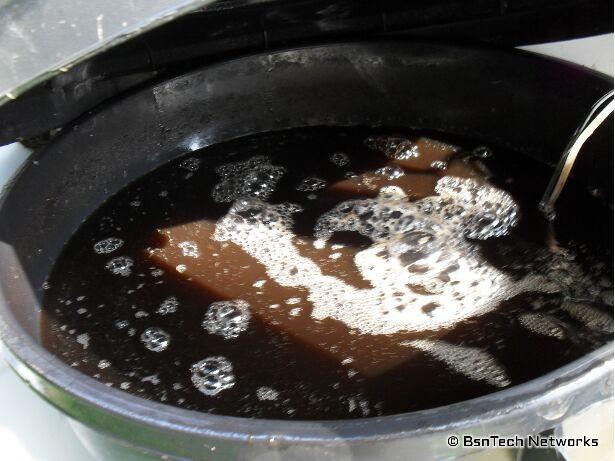
I also poked my head around to the back side of the garage where the rain barrel system and compost tea system is.  I have plenty of compost tea to use – a full 32 gallon container of it!  I haven’t been too good at keeping up the compost tea treatments to the plants recently because of the bathroom project.  But it is getting late in the season anyways.

Compost Tea

The last area to check out is the patio garden.  I pulled a few green beans off of these plants – but again, some of them have already died.  Many of the green beans were limp and were not usable, so they were just thrown back into the area.
Patio Garden

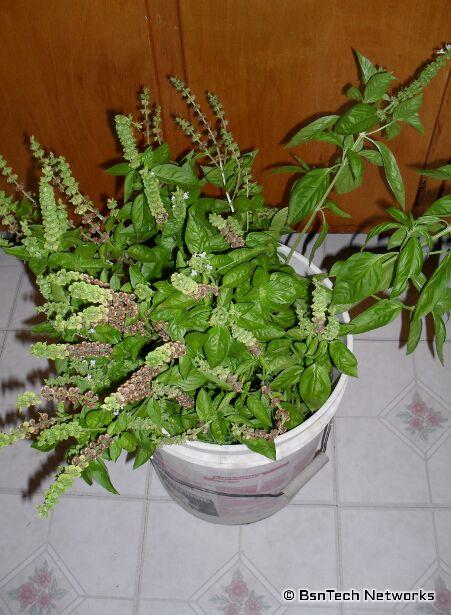
I also cut several sprigs of basil off – one sprig from each plant.  It came to just over four ounces of leaves by the time I was done.
Basil

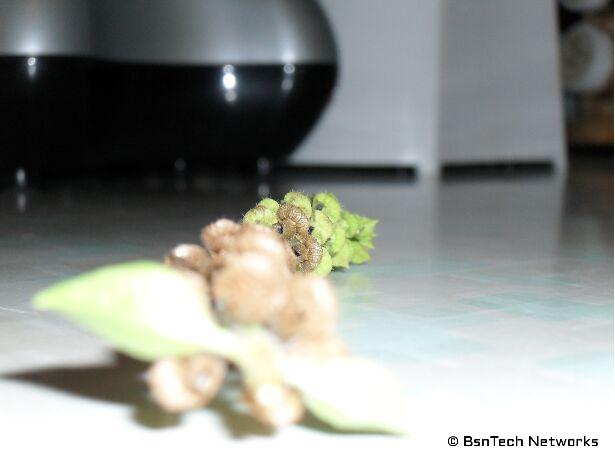
Notice the brown parts on the basil?  That is the flower pods where the seeds form.

Basil Flower Pod

I tried to get a side view of this flower/seed pod so you can barely see a few black spots.  Those are the seeds!  The seeds of basil are very small.  I rubbed each individual flower pod between my fingers back and forth and this freed up the seeds and the seeds then dropped onto the counter.

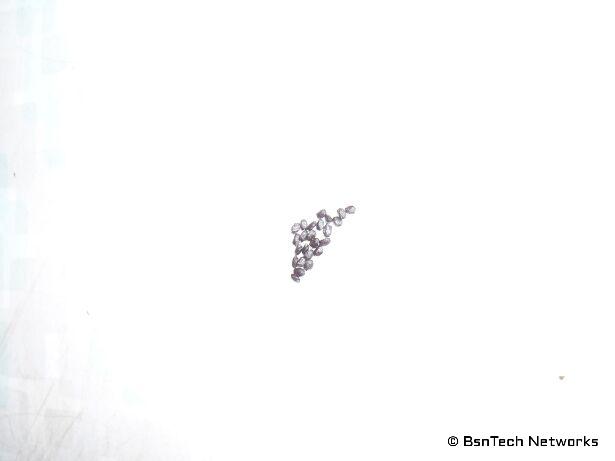
Basil Seeds

Not a very good photo of the seeds, but they are small, oval-shaped and black.  By the time I was done getting all of the seeds, I had probably well over a thousand!  I only need about 40-60 for next year and I’ll give some away to my buddy in Tennessee since he wasn’t able to save any seed this year for his basil plants.

Speaking of seeds, a few weeks ago I cut down the large radish plant that was growing in the front garden that I was saving for seed.  All of the seed pods were brown and ready to be picked.  So I pulled off the seed pods from the plant and placed them in a container.  I still need to go through and crack open each pod to get the seed (wow will that be a job!).

Radish Seed Pods

That is all for the garden update!

Potatoes and more Potatoes!

OK – so I will start off with the gardening activities first – and then go into the update on the bathroom project.

There wasn’t much at all that happened this week in the garden.  Last week (probably Wednesday), I went out to pick a few cucumbers behind the garage.  In doing so, I also turned the water on for the tomatoes since they needed a good watering.  It was another scorcher this week – with everyday at around 95 degrees or higher.

I took the cucumbers inside to weigh them – and before doing so, I told myself that I’d better remember to go turn the water off.  Well, I forgot.  I drained the rain barrels out on the tomatoes!  It was probably 300+ gallons of water that was given to the tomato plants.  What is worse is it was right next to the foundation of the house.  Luckily there wasn’t any kind of water that got into the basement.

Friday night we had some storms blow through the area so it dumped about two inches of rain on us.  So the barrels are full again!  Came just in time really.

Saturday morning I got myself out of bed around 7:30 and went outside.  I needed to start digging up to the potatoes.  I was also worried with all that rain if it would start to rot the potatoes in the ground – because the leaves/vines on the potatoes had been dead for a few weeks now.

I picked one of the rows behind the garage – the longest row of about 25 potato plants.  The other row has about 12 plants that I’ll have to come back later and dig up (can’t right now since the cucumbers are in that row).

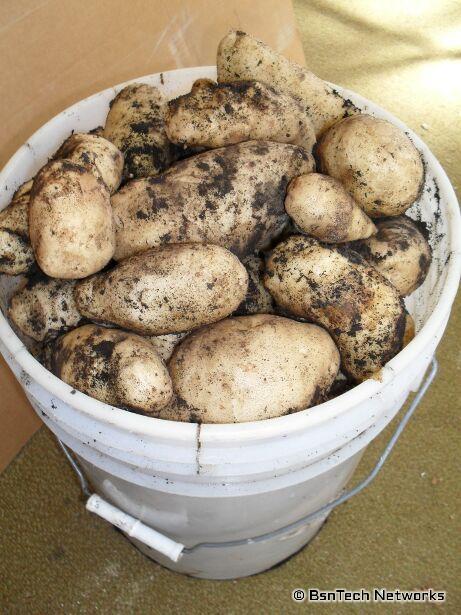
I was absolutely amazed!  I got a full five-gallon bucket full of large, nice-sized Kennebec potatoes.  It was just over 31 pounds of potatoes after they were all picked.  This exceeded my estimates of one pound per plant.  This made up for some of the other potatoes that didn’t produce anything – or those that rotted in the ground.

Kennebec Potatoes

Later in the day I also picked about four red California Wonder peppers from the front garden.  It seems that after adding epsom salt, they seem to be more lush and are growing better.

Sunday night I went out to pick a large cucumber – a Straight Eight cucumber that weighed just under a pound.

The gardening season is quickly coming to an end.  The green beans this year were pitiful and we only got about a tenth of what we did last year.  I am wondering if it is this new Greencrop variety that I planted; next year I think I will go back to the Blue Lake varieties that yielded very well last year.  Some of the cucumber plants are beginning to yellow.  The only plants left in the garden that are still growing are the cucumbers, basil, and peppers.  Parsley is still growing but I am not counting it; it mostly was a waste to plant since we don’t have much use for it.


Moving onto the bathroom update.  What a huge difference a week makes!

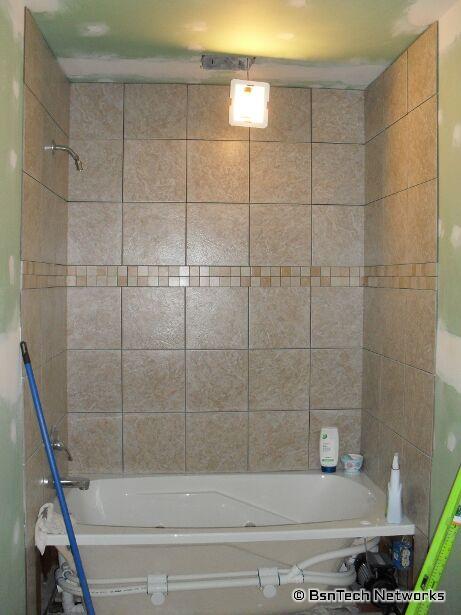
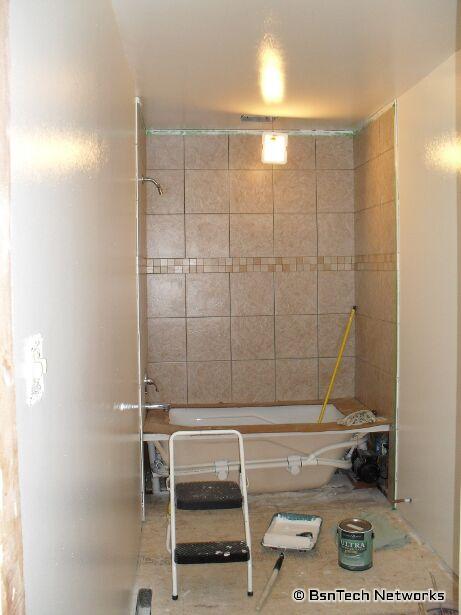
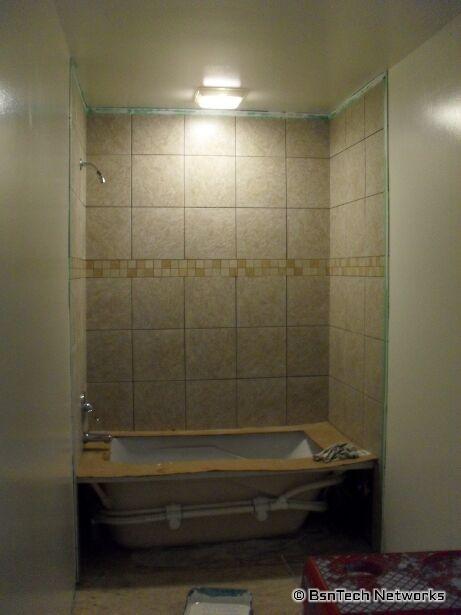
Over the past week, we have been working to put the tile around the bathtub.  Well, after some calculations, it was discovered that there would only be three inches of space left around the top of the tile after the last full piece of tile was put in place.  Instead of having a 12-inch tile cut down to just a 3-inch wide piece all the way around the top, we opted to get some accent tiles and put at the half-way point around the tub.  Our trusty Menards store didn’t have much of anything good in the way of accent tile that matched what we needed.  So we went to Lowe’s and they had a few that we liked.  The tiles we bought were 2×2 inch tiles that were in a mat of a square foot.  So this allowed me to make two cuts in the mesh backing that held the tiles together to make three strips of 4 inch by 12 inch tiles.

The accent tiles turned out exceptionally well.  It did cost us an extra $26 just for this 4 inch strip around the tub, but I think it was a $26 well spent.

We were up late Wednesday and Thursday night until after 11 pm putting all the tile in and completed it that Thursday  night.

Bathtub Tile

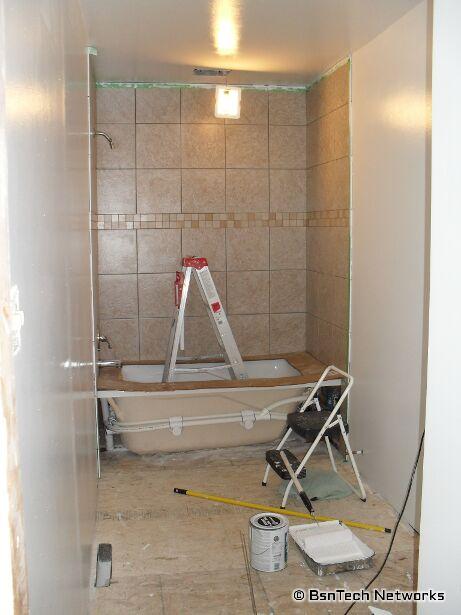
Friday it was time to get the walls all primed up!  Our intentions were to have the walls primed and painted on Friday, but that didn’t quite happen.  One coat of primer was put on the walls – and the walls just absorbed the paint in!  It took exactly one gallon of primer to do the walls and ceiling – but there was a lot of green still showing through.  We used some Zinser primer that had mold and mildew block in it – wanted to get stuff that would last a long time.  So Friday evening I had to get another gallon of primer – and we put two more coats of primer on the wall.  The first coat took a gallon since it absorbed into the wall but each additional coat took less; about 2/3 of a gallon for the second coat and only 1/3 of a gallon for the third coat.  Now the walls were fully white and all of the green from the drywall was gone.

Walls Primed

Saturday we put on the paint.  We used a color called Country White.  It is just a little darker than white.  Again, I opted to get a good paint to ensure we wouldn’t have any painting problems.  The first coat took about a half gallon.  I waited a couple of hours and put the second coat on.  It probably didn’t need a second coat but I had quite a lot of paint left – so I figured it was better to use it than let it go bad.

The paint has a nice shine to it since it is semi-gloss.  It doesn’t look too different in the picture below compared to the picture above where the primer was added.

Walls Painted

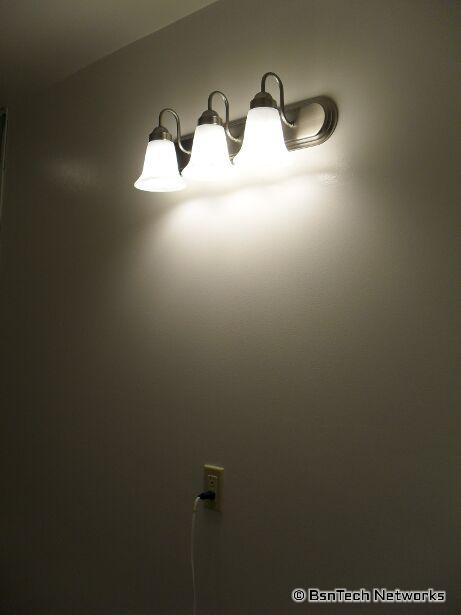
After the walls were painted, it was time to get the new light fixture hung up that will go over the mirror and vanity.  I also got the light over the tub put back together so it wasn’t hanging down and put the face plates on the electrical outlet and switches.

Bathroom Light

Bathroom Light

Bathroom Light

Wow – so that is the tile around the tub, the painting, and lighting done in a week!

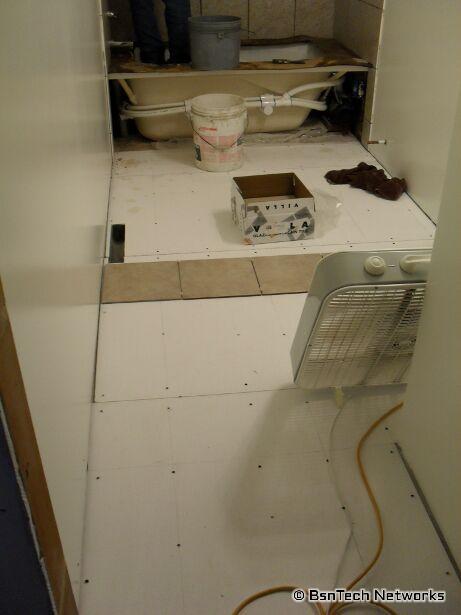
What’s next?  Well, stuff we just did yesterday (Sunday).  We got much farther than I expected.  Dad first started doing the grouting around the tub tile while I was cutting the concrete backer board for the floor and screwing it in.  Tiles were then laid down to see how we needed to cut them.

Concrete Backer Board

The tiles were absolutely perfect.  The tiles were 11.5 inches square and the bathroom width was one inch less than five feet – because of the half-inch drywall on either wall.  When we laid the tile down for a quick check, exactly five tiles wide is what we needed with the 3/16-inch spacers between the tiles.  We got a lucky break.

It was then time to lay the tile.  We first started out by putting all the full tiles in place – then we cut the ones around the air vent, the wall corner, and around the toilet.  It was about 8 pm by the time it was done.

Bathroom Tile

And there it is – the tile on the floor, the tile on the wall, the grout done on the wall, the plumbing all done.

What is left to do?  Well, I still need to make the support for the side of the tub so it hides all of the ugly stuff.  After the wall is put in, I will have one more row of tile to lay on the floor.  Then the flooring can have the grout done.  After that, it will be moving in the vanity, cabinet, and toilet.  The door will then go up and the towel racks – and the bathroom will be complete!